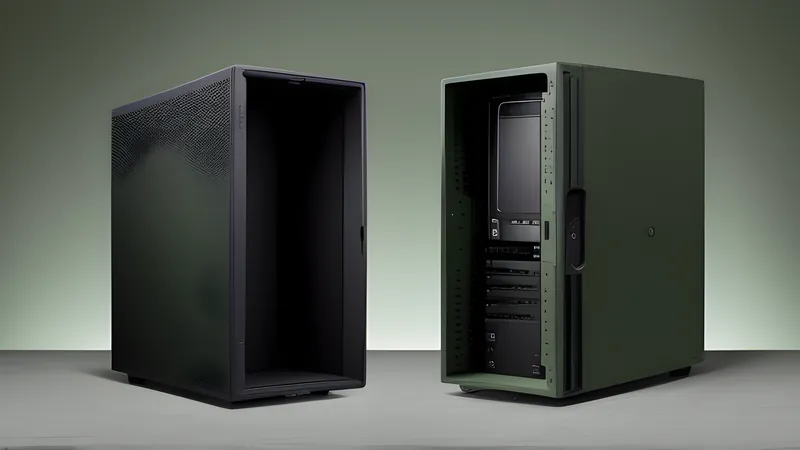
Synology DS423+ vs a DIY N100 Build: Which One You Should Actually Make
An appliance NAS against a Jonsbo N2 build, priced and specced honestly

Contents
Every “should I buy a NAS or build one” thread eventually turns into two camps talking past each other: one side pricing the appliance against bare drives and calling it a rip-off, the other side pricing their own time at zero and calling the DIY route free. Both are wrong in ways that matter. I’ve spent time with Synology’s DS423+ and with a DIY N100 build in a Jonsbo N2 case, and the honest comparison runs on real numbers from both sides.
What the DS423+ actually is
Synology’s DS423+ is a four-bay NAS built around an Intel Celeron J4125, a quad-core part running 2.0GHz base with a 2.7GHz burst, paired with 2GB of DDR4 that’s soldered as a baseline but expandable to 6GB via a single SODIMM slot. It supports up to 72TB of raw capacity across four drives, has two NVMe M.2 slots usable as read/write cache or a small flash storage pool, and ships with two gigabit Ethernet ports that can be link-aggregated for combined throughput on the right switch. Reviewers running ATTO benchmarks against the unit have measured sequential transfers in the region of 110MB/s write and 113MB/s read, dropping to roughly 46-59MB/s on real-world Windows file copies — numbers that make sense once you remember this is a dual-gigabit box with no 2.5GbE or 10GbE upgrade path, since there’s no PCIe slot to add one. What you’re actually buying is DSM: Synology’s package ecosystem, one-click app installs, mobile apps that just work, and a support and firmware update cadence that a DIY box has no equivalent for.
What a DIY N100 build actually costs
The DIY comparison that homelab builders have converged on uses a Jonsbo N2 case — a compact ITX enclosure with five 3.5" bays — paired with an N100 mini-ITX board, 16GB of DDR4, an SFX power supply, and (since most N100 boards only expose two or four native SATA ports) an ASM1166-based M.2-to-SATA expansion card to reach five or six drive connections. Builders documenting this exact combination report the completed system, drives excluded, landing somewhere in the £250-350 range depending on RAM and board choice, with measured idle draw around 15W and peaks near 30W under load — genuinely competitive with an appliance NAS on power despite having a fifth bay the Synology doesn’t. The trade-off is immediate and total: no DSM, no polished mobile app, no vendor support line. You’re the support line, and TrueNAS Scale or Unraid become your operating system rather than an appliance shell around one.
Where the price actually lands
Street pricing for a diskless DS423+ typically sits in the region of £350-450 depending on retailer and promotion timing, against roughly £250-350 for the DIY parts list above before drives. That’s a real gap, but it’s not the whole story: the DIY build gets a fifth bay, double the RAM ceiling before you’ve even added a stick, and a CPU with meaningfully more single-thread performance than the J4125, which matters the moment you want anything beyond file serving — a Jellyfin transcode, a couple of lightweight VMs, anything that asks the CPU to actually think rather than just move bytes between a network port and a drive. The Synology’s price premium is buying DSM’s polish and Synology’s support, not raw hardware capability, and that’s a legitimate thing to pay for if it’s what you actually want.
The Celeron J4125 ceiling, honestly
The J4125 is a fine chip for what a four-bay home NAS is usually asked to do: serving files over SMB and NFS, running Time Machine backups, hosting Synology’s Photos app for a family photo library, and even light Plex or Jellyfin transcoding within its Quick Sync limits. It becomes a genuine bottleneck the moment the workload grows beyond that: multiple simultaneous transcodes, any meaningfully sized container workload, or anything approaching what you’d ask a real compute box to do. This is the fundamental trade the appliance NAS makes — it optimises hard for the file-serving case and treats everything else as a bonus feature bolted onto DSM’s Docker support, where a DIY N100 build with TrueNAS Scale or Unraid is a general-purpose Linux box first and a NAS second, with the storage layer as one workload among several rather than the entire reason the machine exists.
Networking is the DS423+’s real weak point
Dual gigabit with no PCIe expansion slot means the DS423+’s ceiling is roughly 2Gbps aggregated if you configure link aggregation correctly on a switch that supports it — respectable for a home NAS serving a handful of clients, but a real limit against modern SSD-based storage that can move data far faster than that over a single connection. A DIY N100 board, by contrast, increasingly ships with 2.5GbE as standard, and even boards that don’t can usually take a PCIe 2.5GbE or 10GbE card in whatever slot the Jonsbo N2’s compact chassis allows. If your network core is already 2.5GbE or better, this is the single biggest practical argument for the DIY route — the Synology’s networking becomes the actual bottleneck on transfers well before the drives or the CPU do.
Setting up the storage layer
| |
This particular pairing — SnapRAID and mergerfs rather than ZFS — is worth calling out specifically for a DIY N100 build, since it sidesteps the ECC RAM recommendation that comes with running ZFS properly, and most budget N100 boards don’t support ECC at all. Synology’s own hybrid RAID (SHR) on the DS423+ handles this trade-off invisibly behind DSM’s UI, which is exactly the kind of decision an appliance NAS is designed to make for you rather than have you research.
The NVMe slots nobody uses correctly
The DS423+’s two M.2 NVMe slots are frequently misunderstood as a speed upgrade for the whole array, when what they actually do is cache frequently accessed data ahead of the spinning drives — genuinely useful for a busy multi-user share with a small hot working set, close to pointless for a NAS that mostly stores media files read sequentially once and rarely touched again. Sizing the cache to your actual access pattern matters more than maximising its capacity; an oversized cache on a workload that doesn’t re-read the same files repeatedly just burns two NVMe slots for no measurable benefit. A DIY build gets the equivalent result more directly by putting a small NVMe drive in as an L2ARC or special vdev under ZFS, or simply skipping the caching layer entirely and relying on Linux’s own page cache for hot reads, which for most home workloads does a perfectly adequate job without any dedicated cache drive at all.
Troubleshooting notes from both camps
On the Synology side, the most common early frustration is discovering just how locked-down DSM’s package manager is compared to a general Linux box — installing anything outside Synology’s own Package Center means either accepting community-maintained SynoCommunity packages of variable maintenance quality, or dropping into Docker inside DSM itself, which works but adds a layer of indirection a native Linux host wouldn’t need. On the DIY side, the most common issue is the ASM1166 SATA expansion card either not being recognised at boot or dropping a drive under sustained load — check that the card is seated in a slot wired for the full number of PCIe lanes it needs, since some ITX boards helpfully label a slot “x4” that’s electrically wired for far fewer lanes, and the card will silently underperform or drop connections rather than throw a clear error. A DIY build that reports drives going offline under scrub or resilver load is very often this exact issue rather than a failing drive — swap the card into a different slot before you swap the disk.
Drive compatibility and the vendor lock-in question
Synology’s recent DSM releases have tightened drive compatibility checking on several NAS lines, warning about or in some cases limiting features for drives not on Synology’s approved list — a policy that’s generated real controversy in the community and one worth researching for the specific DSM version the DS423+ ships with before assuming any drive you already own will work without caveats. A DIY build has no such gate: any SATA drive that physically fits and reports correctly to Linux works, full stop, which matters if you’ve already got a stack of drives from a previous build or want the freedom to shop purely on price and reliability data rather than a vendor’s compatibility spreadsheet. This is less about either approach being right and more about knowing which one you’re signing up for before the drives arrive.
Expansion paths compared
The DS423+ has no internal expansion beyond its four bays, but Synology sells the DX517, a five-bay expansion unit that connects over an eSATA-style port for exactly this scenario — at a cost that’s worth checking against your total remaining budget, since a fully-loaded expansion unit plus its own five drives is a second NAS-sized purchase bolted onto the first. The DIY route’s expansion story is blunter but arguably more honest: the Jonsbo N2’s five bays are what you get in that chassis, and going further means either a different case entirely or accepting an external USB or Thunderbolt enclosure with its own caveats around reliability under sustained write load. Neither path is free, but the DIY route at least makes the next incremental cost obvious rather than routing it through a proprietary expansion SKU.
Power and noise, measured
Both boxes are quiet by any objective standard next to an old rackmount server, but they’re quiet in different ways. The DS423+ uses a single rear fan tuned by DSM’s own fan curve, and Synology’s firmware is conservative about spinning it up, favouring near-silence at the cost of running slightly warmer under sustained load. A Jonsbo N2 build’s noise profile depends entirely on the parts chosen — an SFX PSU with its own small fan and a case fan pulling air across five drive bays will generally run slightly louder than the Synology at idle, but the difference is measured in decibels most people won’t notice outside a bedroom-adjacent installation. Where the DIY build pulls ahead is thermal headroom under genuinely sustained load: five drives in the more open Jonsbo chassis with a dedicated case fan cool more predictably than four drives in the Synology’s smaller, more tightly packed enclosure.
Backing up the NAS itself
Neither box is a backup on its own, whatever RAID actually is, and both need an actual offsite or off-box backup plan regardless of which one you buy. DSM makes this comparatively easy with Hyper Backup and Synology’s own C2 cloud target built into the same interface you already use for everything else. On the DIY side, the same job falls to whatever backup tooling you configure yourself — restic or Kopia to a cloud target, or a second box at a friend’s house — which is more setup work up front but ends up no less reliable once it’s running, and arguably more portable since it isn’t tied to a single vendor’s cloud offering if you ever want to switch.
The honest recommendation
Buy the DS423+ if what you actually want is an appliance: something that backs up your family’s laptops, serves photos to a phone app, and mostly gets left alone, with Synology’s support line as a backstop when something goes wrong. Build the DIY N100 box if you want the fifth bay, the CPU headroom for actual compute workloads, the 2.5GbE upgrade path, and you’re genuinely willing to be your own support line when something breaks at 11pm. Neither choice is wrong, but pricing them against each other honestly means counting the fifth bay, the RAM ceiling, and the CPU headroom on the DIY side, not just the sticker price — and counting DSM’s polish and Synology’s support line as the real thing you’re paying the premium for on the appliance side.
Related Content