PiKVM v4 vs JetKVM: The IP-KVM Question for a Home Rack
Two very different takes on out-of-band access, and which one earns a permanent spot on the rack

Contents
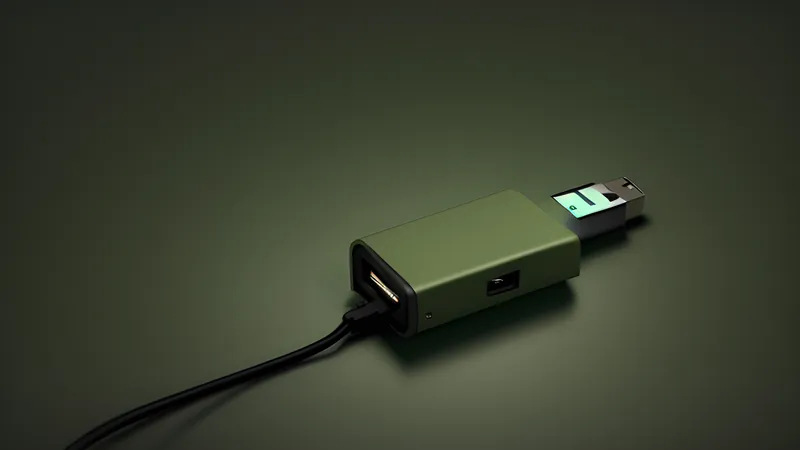
Every homelab eventually has the same bad night: a kernel update that won’t boot, a filesystem that wants a manual fsck, a BIOS setting that got flipped and now the box won’t POST. SSH is useless because the machine hasn’t reached SSH yet. What you actually need is a keyboard and monitor plugged into that machine, and what you actually have is that machine in a cupboard, a rack in the garage, or a colo three hours away. An IP-KVM is the fix: a small device that sits between you and the target machine’s video output and USB port, and makes “walk over with a monitor” into “open a browser tab.” I’ve spent enough time with both of the current favourites — PiKVM V4 and JetKVM — to have a real opinion about which one earns the permanent slot on a home rack.
What an IP-KVM actually does
The trick is unglamorous once you see it: the device captures HDMI (or VGA, on older gear) from the target machine and re-encodes it as a video stream you can watch remotely, while simultaneously presenting itself to the target as a USB keyboard and mouse. Because it operates below the OS — it’s literally emulating human-interface-device hardware over USB — it works during POST, in the BIOS/UEFI menu, during a bootloader hang, and through a kernel panic. That’s the entire point of “out-of-band” access: it doesn’t care whether an operating system is running at all. A well-built one also gives you virtual media (mounting an ISO remotely for a reinstall) and ATX power control, so you can cold-boot a machine that’s completely wedged without leaving your chair. This is the piece that separates a proper IP-KVM from a screen-sharing tool like VNC or a remote-desktop client: those need an OS, a network stack, and running software on the target. A KVM needs none of that, which is precisely when you need it most.
PiKVM V4: the open, modular option
PiKVM is built around a Raspberry Pi Compute Module 4, and it comes in two relevant configurations: the V4 Mini and the more capable V4 Plus. The Mini handles HDMI capture up to 1080p60, full keyboard/mouse emulation, and ATX power control in a compact board. The Plus adds true USB mass-storage emulation for virtual media, onboard storage for ISOs, and support for an internal cellular modem — genuinely useful if your out-of-band path needs to survive your main internet connection going down entirely. Both support capture resolutions up to 1920x1200 depending on model and are built around the CM4 module, which means the whole device is really a small, purpose-built Linux computer with a capture card and a USB gadget-mode controller bolted on, not a fixed-function appliance pretending to be one.
The appeal of PiKVM comes from the whole stack being open source, right down to the firmware, plugging into the Raspberry Pi ecosystem you probably already understand. You can SSH into the PiKVM itself, tweak the Debian-based install running on it, add authentication behind your own reverse proxy, write your own automation against its REST API, and generally treat it as a small server rather than a sealed appliance. It also supports multiple simultaneous auth backends (local htpasswd, LDAP, or an external identity provider), which matters if more than one person needs access to the rack. That flexibility is also the cost: setup is more involved than plugging in an appliance, the software has more moving parts to keep patched, and the Plus model in particular is priced well above the average USB KVM dongle — the price reflects a small embedded Linux server sitting behind that capture chip.
JetKVM: the cheap, closed-form appliance
JetKVM took the opposite bet: a small metal enclosure, a fixed and polished feature set, and a price that undercuts PiKVM by a wide margin — it launched at $69 and funded its Kickstarter to the tune of several million dollars, which tells you how much pent-up demand there was for a cheap, good IP-KVM. It captures 1080p60 over mini-HDMI with H.264 encoding and typical glass-to-glass latency in the 30-60ms range, emulates keyboard and mouse over a USB-C bridge cable, and — notably — ships with a built-in remote-access option via JetKVM’s own cloud relay using WebRTC, so you can reach it from outside your network without configuring port forwarding or a VPN yourself. It also supports Netboot.xyz out of the box, which is a genuinely nice touch if you reinstall OSes often and don’t want to keep juggling USB installer sticks.
The catches are real, though. The onboard Ethernet is 100 Mbps, which is plenty for a KVM video stream but worth knowing if you were hoping to use the same port for anything else — it isn’t a general-purpose network appliance. The software is open source but the hardware and firmware update cadence are controlled by one small team, and the cloud-relay convenience means your remote sessions can, by default, transit a third party’s infrastructure rather than staying entirely inside your own network — you can disable that and self-host the relay, but it isn’t the out-of-the-box behaviour. For a lot of homelabbers that’s an acceptable trade for the price and the sheer convenience of not fighting with port forwarding; for anyone running the OPSEC-paranoid end of self-hosting, disabling the cloud relay is the first thing to do on day one.
Spec-for-spec: where they actually differ
Strip away the marketing and the practical differences come down to a handful of things. Video: both top out at 1080p60, so neither is a downgrade from the other on capture quality — the difference shows up in encoding latency and in PiKVM’s higher maximum resolution ceiling on some panels (up to 1920x1200) versus JetKVM’s fixed 1080p cap. Networking: PiKVM ships gigabit Ethernet on the CM4 board, JetKVM ships 100 Mbps, which only matters if you’re bridging other traffic through the same port. Storage and virtual media: PiKVM Plus does real USB mass-storage emulation with onboard storage for ISOs; JetKVM handles virtual media through its own software layer, which works but is less flexible about mounting arbitrary images. ATX control: both do it, wired to the target’s front-panel header the same way a case’s own power button would be. Price: JetKVM is meaningfully cheaper at every tier, and that gap is the single biggest factor in most people’s decision.
Power, footprint and the security model
Neither device draws meaningfully from your power budget — PiKVM’s CM4 board sips a few watts, and JetKVM’s fixed-function board is smaller still, so running one per machine (rather than sharing a single unit across a switch) is realistic even on a modest UPS. Footprint matters more than power here: PiKVM Plus ships with mounting brackets meant for a PCI slot bracket or rack ear, which is genuinely convenient if you’re bolting it to the back of an existing 1U or 2U chassis rather than leaving it loose on a shelf. JetKVM’s enclosure is designed to sit next to the target rather than inside it, which is fine on a desk but slightly awkward inside a populated rack where cable dressing already fights you for space.
The security model is where the two diverge most, and it’s worth being deliberate about rather than accepting either default. PiKVM supports multiple authentication backends and, because you can SSH into the device itself, you can layer your own reverse proxy, client-certificate auth, or a jump host in front of the web UI exactly the way you would for any other exposed admin panel. JetKVM’s web UI has its own local auth and, separately, an account-based cloud relay for remote access; the local auth is fine for LAN-only use, but if you enable the cloud relay you’re trusting a third party’s infrastructure to broker the connection to a device that can type into your BIOS. That’s a reasonable trade for a lot of people — it’s the whole reason the relay exists — but it should be a conscious choice, not something left on by default because it worked the first time you tried it.
Setting either one up
The physical install is nearly identical for both: HDMI (or mini-HDMI) out of the target machine into the KVM’s capture port, a USB cable from the KVM to a USB port on the target for HID emulation, and Ethernet from the KVM to your management network — never the same VLAN as anything public-facing. A minimal PiKVM network config looks like this once you’re on the local segment:
| |
For JetKVM the equivalent configuration lives in its own web UI rather than a YAML file — set a static IP through your DHCP reservation on mylab.local, put it behind your own reverse proxy if you want a single sign-on point across your whole rack, and disable the cloud relay from the settings page if you’d rather tunnel in over a VPN you already run. Either device benefits from living on its own management VLAN rather than mixed in with general traffic, for the same reason your rack’s IPMI interfaces should never be reachable from the same segment as your laptop’s Wi-Fi.
Which one you should actually buy
If you already run one or two machines that occasionally need out-of-band access and you want the cheapest reliable path to that, JetKVM’s price and simplicity win — it does the core job well and the cloud-relay option removes a step that trips a lot of people up on the PiKVM side (getting remote access working without opening ports). If you’re running a proper home rack, already comfortable maintaining Linux boxes, and want a KVM that behaves like just another server you administer — with ATX control, virtual media, an API you can script against, and a config file you can put under version control — PiKVM V4 Plus is worth the premium.
One thing both share, and worth flagging honestly: neither replaces a real out-of-band access path for the worst-case scenario, where your entire home network is down. An IP-KVM still needs power and a working local network segment to reach. If your homelab lives in a genuinely silent rack in a flat, plan the KVM’s own network drop and power feed as carefully as you’d plan for any other single point of failure — and treat the credentials on it with the same seriousness as anything else in your homelab threat model, because a device that can type into your BIOS is a device that can also type a new root password if someone reaches its web UI.
Troubleshooting notes
A few things that trip people up with either device: video shows a black screen after boot — check that the target’s HDMI output hasn’t been disabled by a discrete GPU taking over display duties, which is common on machines with both an iGPU and a card installed and the BIOS defaulting to the wrong one. HID stops responding mid-session — usually a USB power-management setting on the target going into a low-power state on that port, fixable by disabling USB selective suspend for that specific controller in the target’s power settings. Remote latency spikes — almost always local Wi-Fi somewhere in the path, since both devices assume a wired connection for anything beyond casual use; put the KVM itself on a wired drop even if the client you’re viewing from is on Wi-Fi. ATX power control doing nothing — double-check the header pinout against the motherboard’s manual; front-panel headers aren’t standardised and a reversed connection will simply not register a press rather than damage anything. And on PiKVM specifically, a capture card that reports “no signal” after a firmware update is almost always a case of the target’s GPU needing a fresh EDID handshake — power-cycling the target once resolves it in the overwhelming majority of reports.
None of these are exotic failures, and together they account for the bulk of “my KVM stopped working” complaints for either product. For a single machine that misbehaves twice a year, either device earns its keep the first time it saves you a drive to the garage at midnight. For a rack full of machines that you actually administer like infrastructure, the PiKVM’s openness, gigabit networking, and ATX scripting make it the one I’d trust for the long haul — but I wouldn’t talk anyone out of starting with the cheaper JetKVM first to see whether they even need the extra capability.
Related Content