Pao de Queijo: Brazilian Cheese Bread
Tapioca-starch puffs with a gruyère twist alongside the traditional queijo minas, scalded into that unmistakable chew
Contents
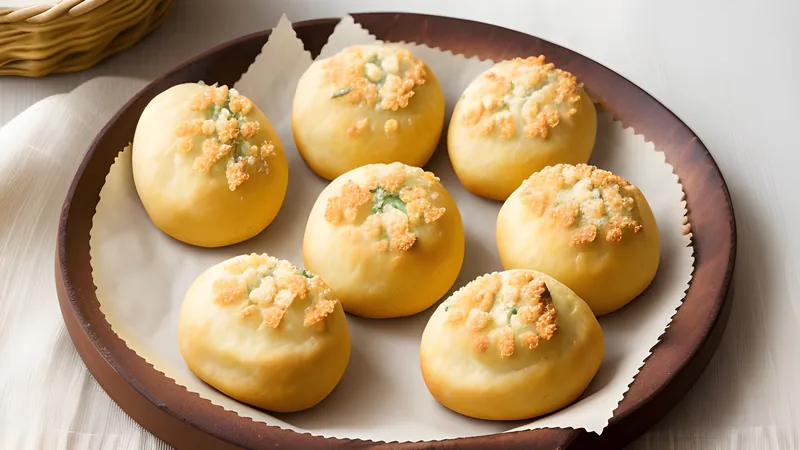
↓ Jump to recipePao de queijo is Brazil’s cheese bread, and it behaves like nothing else in a bread basket: no yeast, no gluten, no rise in the conventional sense, just tapioca starch scalded with hot milk and worked into a stretchy, cheese-heavy dough that puffs into hollow, chewy little domes. The traditional cheese is queijo minas curado, a firm, salty, slightly tangy cow’s-milk cheese from Minas Gerais, and I keep that as the backbone here. But I fold in gruyère alongside it, because gruyère melts with a nuttier depth and a longer stretch than most cheeses I can buy easily outside Brazil, and the combination gives you both the sharp tang of the original and a rounder, more savoury pull.
Pao de Queijo: Brazilian Cheese Bread
Ingredients
- 250ml whole milk
- 100ml vegetable oil
- 1 tsp fine salt
- 500g sour tapioca starch (polvilho azedo), or 400g sour tapioca starch plus 100g sweet tapioca starch
- 2 large eggs, room temperature
- 150g queijo minas curado or aged parmesan, finely grated
- 100g gruyère, finely grated
Method
- Combine the milk, oil and salt in a saucepan and bring to a rolling boil over medium-high heat.
- Tip the tapioca starch into a large mixing bowl or stand mixer bowl.
- Pour the boiling milk mixture over the starch in one go and stir hard with a wooden spoon until it forms a shaggy, lumpy, half-scalded mass. It will look wrong; keep going.
- Leave to cool for 10-15 minutes, until just warm enough to handle.
- Add the eggs one at a time, beating hard (by hand, or with a paddle attachment on medium speed) until each is fully absorbed before adding the next.
- Beat in the grated queijo minas (or parmesan) and gruyère until you have a smooth, sticky, stretchy dough that holds together when pinched.
- Rest the dough at room temperature for 20 minutes, or chill up to 24 hours.
- Preheat the oven to 200C fan (220C conventional, Gas 7) and line two baking trays with parchment.
- With oiled hands, roll the dough into balls about 35g each, roughly golf-ball size, and space them 4cm apart on the trays.
- Bake for 20-25 minutes, swapping the trays halfway, until puffed, cracked and deep golden, with the cheese visibly bubbled at the cracks.
- Eat within 10 minutes of coming out of the oven, while the crust is crackling and the inside is molten and stretchy.
Minas Gerais, and a bread with no flour in it
Pao de queijo comes from Minas Gerais, the mountainous, dairy-and-mining state in Brazil’s interior, where it has been made on farms since at least the 18th century and possibly earlier, depending on which regional history you read. The starting point was tapioca starch, extracted from cassava root and dried in the sun, a staple across enslaved and Indigenous communities long before it became a national snack. Farm cooks scalded the starch with whatever fat and dairy were on hand, originally with little or no cheese at all, and it was only later, as dairy farming took hold across the region, that queijo minas worked its way into the dough and gave the bread its name and its signature savoury pull.
Today it is sold everywhere in Brazil, from bakery counters and roadside stalls to airport kiosks and school canteens, usually still warm, always small enough to eat in two or three bites. It is breakfast food, afternoon-coffee food, and the thing you are handed at almost any Brazilian gathering within minutes of arriving. What makes it a genuinely useful bread to know, beyond the charm, is that it is naturally gluten-free, built into the dough’s chemistry from the very first scald.
The commercial side of the bread is just as telling as the farmhouse version. Casa do Pão de Queijo, founded in Rio de Janeiro in the 1980s, built a national chain on stuffed and flavoured takes on the recipe, and frozen pao de queijo dough is now one of Brazil’s most successful export foods, sold in Brazilian and Portuguese grocers from Lisbon to Orlando to anyone craving a taste of home. Locally it is weighed and sold by the kilo at padaria counters as often as it’s counted by the piece, and the standard way to eat it is with a strong cafezinho or a cold guaraná, dunked or eaten alongside rather than as a meal on its own.
Two tapioca starches matter here and they are not interchangeable in flavour. Polvilho azedo, sour tapioca starch, has been naturally fermented for weeks before drying, which gives it a faint tang and, more importantly, a greater capacity to trap steam and puff during baking. Polvilho doce, sweet tapioca starch, is the same root starch without the fermentation step, milder and less puffy on its own. Traditional recipes lean heavily on the sour version; if you can only find the sweet one, the bread will still work, just slightly denser and less dramatically domed, and a squeeze of lemon juice in the milk mixture goes some way to compensating. Outside Brazil, polvilho azedo turns up in Brazilian and Portuguese grocers and increasingly online; look for a coarse, off-white powder, and don’t mistake its faintly sour smell straight out of the bag for spoilage — that smell is the fermentation doing its job.
Why the scald matters, and what it’s actually doing
The scalding step is the entire mechanism of this bread, so understanding what it’s doing pays off at the mixing bowl. Tapioca starch is pure starch, no protein, no gluten network to speak of. When you pour boiling milk and oil directly onto it, the outer layer of starch granules gelatinises instantly, swelling and partially cooking while the inside of the mass stays raw and grainy. That uneven, half-cooked texture is correct at this stage; it is what gives the dough its unusual, taffy-like stretch once you work in the eggs and cheese, because you are combining fully gelatinised starch (which holds structure) with raw starch (which still has expansion left to give in the oven).
The eggs do two jobs. They add moisture and fat that keep the crumb from drying into something chalky, and their proteins set around 60-70°C in the oven, giving the dome its structural walls just as trapped steam is trying to blow it apart. If you skip the resting step after adding the eggs, or beat them in while the starch mixture is still too hot, the eggs can partially scramble on contact, which knots the dough and stops it developing the smooth, elastic pull you are after. Aim for warm, well short of hot, before you add them.
The cheese is doing more than flavour. As it melts in the oven, it thins the dough locally around each pocket of steam, which is why the surface of a good pao de queijo cracks and blisters rather than staying smooth; those cracks are where cheese fat has broken through the starch shell. A cheese with real salt and tang, like queijo minas or a well-aged parmesan, sharpens the whole thing against the blandness of the starch. Gruyère alone would be too mild and too fatty; it needs the sharper cheese alongside it to keep the bread from tasting flabby.
The dough, step by step
Bring milk, oil and salt to a full boil, then pour it over the tapioca starch and stir hard until it comes together into a rough, lumpy mass; it will not look like proper dough yet, and that is fine. Let it cool until it’s warm rather than hot, no more than 15 minutes, then beat in the eggs one at a time, working each fully into the mixture before adding the next. Beat in the two grated cheeses last. What you want by the end is a dough that is glossy, sticky and genuinely stretchy when you pull a small piece between your fingers, closer to a thick batter that holds its shape than to a bread dough you’d knead. If it feels too wet to roll, chill it for 30 minutes; if it feels dry and crumbly, work in another tablespoon of milk.
Roll into balls a little smaller than a golf ball, about 35g, using oiled hands since the dough sticks readily. Space them well apart on the tray, as they roughly double. Bake at 200C fan until they are deep gold, cracked across the surface, and visibly puffed hollow rather than dense; a properly baked one sounds faintly hollow when you tap the base. Undercooked pao de queijo collapses as it cools and tastes gummy in the centre, so err on the side of a few extra minutes and a properly dark crust rather than pulling them early for the sake of a paler colour.
What goes wrong, and why
A few failures come up often enough to be worth naming. Rolls that spread flat instead of puffing usually mean the dough was too wet, or the oven wasn’t hot enough to set a crust before the trapped steam could escape sideways instead of pushing up; check your oven’s actual temperature with a separate thermometer, since a cool oven is the single most common cause of flat, greasy bread. A greasy, oil-slicked surface on the finished rolls points to too much cheese fat rendering out during baking, often because the cheese was grated too finely or used too generously relative to the starch, or because the balls were rolled larger than they should be, which lowers the surface-to-volume ratio and lets more fat pool at the crust. Dense, gummy centres almost always mean underbaking rather than a dough problem: break one open to check doneness rather than trusting colour alone, since the outside can look perfectly bronzed while the middle is still raw starch.
Tips, substitutions, storage
The raw balls freeze exceptionally well, and this is genuinely the best way to keep them on hand: freeze on a tray until solid, then bag them, and bake straight from frozen, adding 4-5 minutes to the timer. Baked ones lose their crackle within a couple of hours and are best eaten fresh, though a 30-second blast in a hot oven revives yesterday’s batch better than a microwave ever will. If queijo minas is genuinely unavailable, a mix of aged parmesan and a little feta gets closer to its salty tang than parmesan alone. Do not substitute regular wheat flour or cornflour (cornstarch) for the tapioca starch; the chew comes specifically from tapioca’s starch structure and nothing else behaves the same way under scalding.
Variations
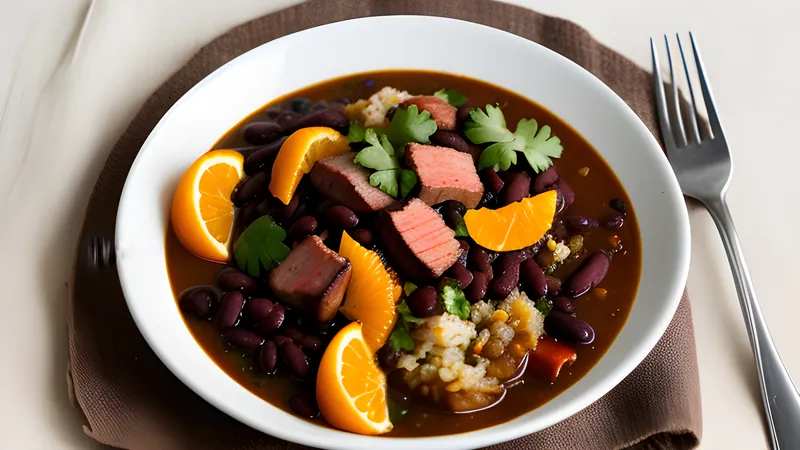
A version with a spoonful of requeijão (Brazilian cream cheese) worked into the dough gives a softer, richer crumb, closer to what you’d find at some Minas farm stalls. For a smoky edge, swap a third of the gruyère for smoked provolone. And if you want the classic single-cheese version rather than my gruyère addition, simply use 250g queijo minas or parmesan on its own; it is the original for good reason, and worth making once before you start improvising. Pull a tray of these warm from the oven alongside a plate of brigadeiros for pudding and a pot of feijoada for the main event, and you have a properly Brazilian spread on the table.
Related Content