Key Lime Pie with Brown-Butter Graham Crust
The classic lime-and-condensed-milk custard, set over a nutty brown-butter crumb crust
Contents
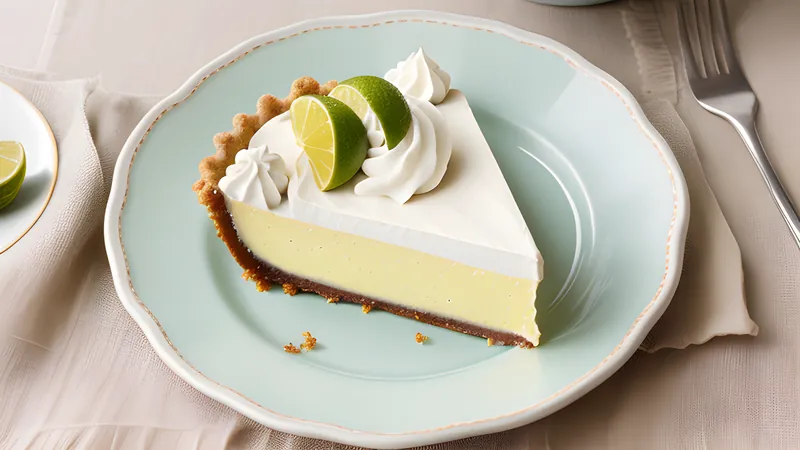
↓ Jump to recipeKey lime pie is one of the shortest ingredient lists in American baking — egg yolks, condensed milk, lime juice, a crumb crust — which is exactly why every component has to earn its place. This version keeps the custard classic and unapologetically tart, but takes the crust seriously for once: the butter is browned before it meets the crumbs, so the crust underneath that bright, sharp filling tastes toasted and faintly caramelised rather than just buttery. It is a small change, one pan and five extra minutes, and it turns a good crust into the part of the slice people mention first.
Key Lime Pie with Brown-Butter Graham Crust
Ingredients
- 200g digestive biscuits or graham crackers, crushed to fine crumbs (about 1.5 cups)
- 90g unsalted butter
- 2 tbsp light brown sugar
- 0.25 tsp fine salt
- 5 large egg yolks
- 2 x 397g tins sweetened condensed milk (about 780g total)
- 180ml key lime juice, or regular lime juice (see note)
- 1 tbsp finely grated lime zest, plus 1 tsp more to finish
- 300ml double cream, well chilled
- 2 tbsp icing sugar
Method
- Heat the oven to 160°C fan (180°C conventional / Gas 4).
- Melt the butter in a light-coloured saucepan over medium heat. Swirl as it foams, then continue cooking until the foam subsides, the butter turns a deep amber and smells nutty and toasted, about 5 to 6 minutes. Immediately pour into a bowl, scraping in the browned solids, to stop it cooking further.
- Cool the brown butter for 10 minutes until just warm rather than hot.
- Stir the biscuit crumbs, brown sugar and salt together, then pour over the brown butter and mix until the crumbs are evenly coated and hold together in clumps when pressed.
- Press the mixture firmly into the base and up the sides of a 23cm pie dish or loose-based tart tin. Chill in the freezer for 15 minutes while the oven finishes heating, then bake for 10 minutes until set and fragrant. Cool on a rack for 10 minutes; leave the oven on.
- Whisk the egg yolks and lime zest together for 2 minutes until pale and slightly thickened.
- Whisk in the condensed milk until smooth, then whisk in the lime juice in a steady stream. The mixture will thicken visibly as the acid reacts with the milk.
- Pour the filling into the warm crust and bake for 15 minutes, until the edges are set and the centre still gives a gentle, even jiggle when the dish is nudged.
- Cool the pie to room temperature on a rack, then chill, uncovered, for at least 4 hours or overnight.
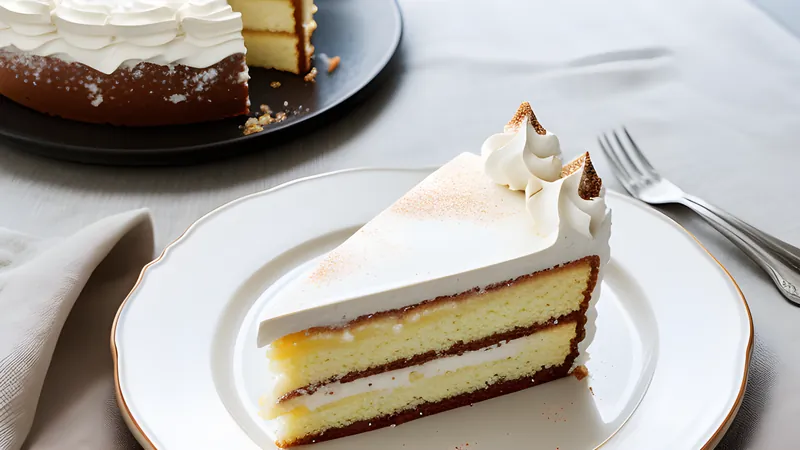
- Whip the cream and icing sugar to soft peaks. Dollop or pipe over the chilled pie and finish with the remaining lime zest just before serving.
A pie born of no refrigeration
Key lime pie’s history is really a story about a fruit and a tin of milk arriving in the same place at the same time. Key limes — small, thin-skinned, intensely aromatic, and considerably more tart and floral than the common Persian lime sold in most supermarkets — grow well in the Florida Keys but travel badly, bruising and spoiling fast in the tropical heat, which meant they were eaten locally rather than shipped out. Sweetened condensed milk arrived in Florida kitchens in the second half of the nineteenth century as one of the few dairy products that kept without refrigeration in a place where ice was, for decades, a shipped-in luxury. Cooks in Key West found that whisking key lime juice into condensed milk and egg yolks produced a filling that set to a soft, sliceable custard with no oven at all, since the acid in the lime juice was enough to thicken the eggs and milk on its own — a genuine curiosity of dairy chemistry that predates modern refrigeration by decades and is part of why the dish reads as so distinctly of its place.
The pie’s exact origins are contested in the pleasant, low-stakes way that regional food history usually is — competing claims point to Key West cooks, to sponge fishermen’s wives, and to a Key West socialite’s cook in the early 1900s — but the fundamentals of the recipe have stayed remarkably stable for more than a century: yolks, condensed milk, key lime juice, a graham or biscuit crust, and nothing else asking for attention. Modern versions, this one included, bake the pie briefly rather than relying purely on citrus to set it, which produces a more reliably sliceable, silkier custard without changing the fundamental flavour.
Why brown the butter for the crust
A standard graham cracker crust is built from crumbs, sugar, melted butter, and little else, and it does its job perfectly well as an inert, buttery base for whatever filling sits on top. Browning the butter first changes that relationship. As butter cooks past the melting point and past the point where its water content has boiled off, the milk solids suspended in the fat — casein and whey proteins, plus a little residual lactose — begin to toast, undergoing the same Maillard browning that turns bread crust golden and seared meat savoury. The butter turns from pale yellow to a deep amber, and the flavour shifts from simply “buttery” to something closer to hazelnuts, caramel and toffee. Poured hot over crumbs and sugar, that toasted flavour saturates the whole crust rather than sitting as a coating on top, so every bite of crust carries a faint nuttiness that plain melted butter cannot supply.
The technical risk with browning butter is timing: the window between “beautifully amber and nutty” and “burnt and bitter” is short, especially once the foam that forms early in cooking starts to subside and the milk solids at the bottom of the pan are directly exposed to the heat. Use a light-coloured pan, not a dark or non-stick one, so you can actually see the colour change happening at the bottom rather than guessing from smell alone, and pour the butter into a separate bowl the moment it hits colour — leaving it in the hot pan lets residual heat carry it past done and into burnt within seconds.
Getting the custard right
The filling’s set depends entirely on the order you combine things and the ratio of acid to dairy. Whisking the yolks and zest first, before anything else goes in, aerates them slightly and lets the zest’s oils start infusing immediately; whisking in the condensed milk next, rather than the lime juice, means the base is fully smooth before the acid arrives to thicken it. Add the lime juice last, and add it steadily rather than all at once — you will see and feel the mixture thicken as you whisk, a visible sign the acid is already denaturing some of the milk proteins even before the pie goes anywhere near the oven. That is normal and expected; it is also exactly why the short bake still matters, since a purely unbaked key lime filling can weep or fail to hold a clean slice once refrigerated, where a brief 15-minute bake sets it firmly enough to cut cleanly while staying soft and custardy rather than firm like a baked cheesecake.
Do not overbake looking for a fully set, motionless centre — a proper key lime pie should still hold a slight, even wobble in the middle when it comes out of the oven, the same doneness cue you would look for in a good cheesecake. It firms up considerably as it cools and then chills, and an overbaked filling turns rubbery and loses the silky texture that makes the pie worth making in the first place.
Note on limes
True key limes are small, yellow-green when ripe, and genuinely hard to find outside Florida and specialist grocers; bottled key lime juice is a reasonable, widely available substitute and is what many Florida bakeries themselves use. If working with regular Persian limes instead, the juice is milder and less floral, so taste the filling before baking and, if it tastes flat, add an extra teaspoon of zest rather than more juice, since more juice would throw off the custard’s set. You will need roughly 12 to 15 regular limes, or about 20 to 25 key limes, to yield 180ml of juice.
Meringue, cream, or nothing at all
Older Florida recipes just as often top key lime pie with a baked meringue rather than whipped cream, using the leftover egg whites from the yolk-heavy filling — a genuinely practical pairing, since a five-yolk filling leaves five whites with nowhere else to go. A meringue topping means beating the whites with sugar to stiff, glossy peaks, piling it over the baked and cooled filling, and returning the pie to a hot oven (220°C fan / 240°C conventional) for 3 to 4 minutes just to set and lightly brown the peaks, watching it constantly since meringue catches colour fast. Whipped cream, the version used here, is the more common modern choice and the simpler one for a home kitchen, since it needs no second trip to the oven and no separate sugar syrup or careful whisking over heat, but either topping is traditional and the filling underneath does not change either way. Some of the oldest Key West versions skip a topping altogether and serve the pie with nothing more than a wedge of fresh lime, trusting the filling to carry the whole plate on its own; it is worth trying at least once, particularly with a good, well-toasted crust, to taste the custard with nothing softening its edge.
Tips, substitutions and storage
The pie keeps well, covered, in the fridge for up to 4 days — the crust does soften gradually over that time, though it never turns properly soggy the way an unbrowned crust can. The finished pie with its cream topping does not freeze well; the baked, unfrosted pie, however, freezes for up to a month wrapped tightly; thaw overnight in the fridge and top with cream just before serving. If you do not have a stand mixer or want to skip whipping cream entirely, a dusting of extra lime zest and a scatter of crushed crust crumbs makes a fine finish on its own.
Make the pie a day ahead if you can — the filling actually improves overnight as the lime flavour settles and rounds out, and a fully chilled pie slices far more cleanly than one only just set. Dip your knife in hot water and wipe it dry between slices for the cleanest cuts through both the soft filling and the crumb crust. If the crust cracks slightly when pressing it into the tin, patch it with a spare spoonful of the crumb mixture rather than starting again — small cracks patch invisibly once baked, and the filling will not leak through a properly compacted crust in any case.
Variations
A gingersnap crust, made the same brown-butter way, adds a warm spice note that pairs particularly well if you are serving the pie after something rich. For a coconut key lime pie, toast 40g of desiccated coconut in a dry pan until golden and fold it through the crust crumbs before pressing them in. If citrus custards are your thing, the same egg-yolk-and-dairy thickening logic, pushed in a very different direction with rosewater and cardamom, shows up in saffron and cardamom rice pudding (firni), and the same toasted-dairy trick used on this crust turns up again, doubled down, in butter mochi with brown butter and coconut — worth a look if the smell of that browning butter converts you the way it converted this crust.
Related Content