Jaffa Cakes from Scratch
Sponge, a proper orange jelly and dark chocolate, made at home
Contents
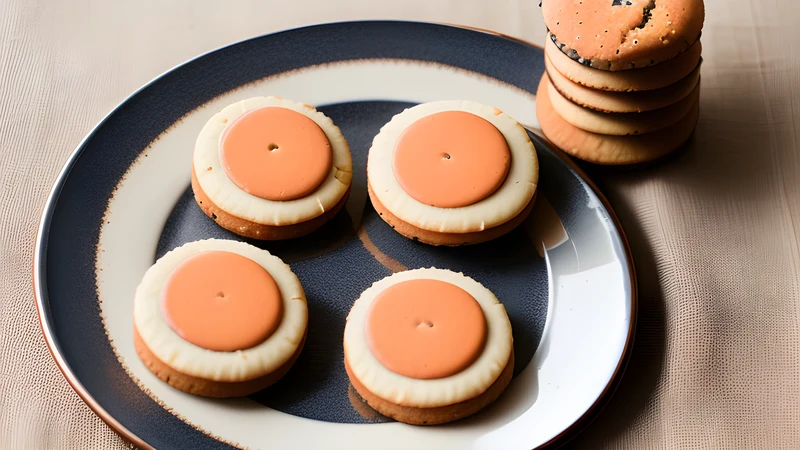
↓ Jump to recipeEveryone in Britain has a Jaffa cake opinion, and most of them are about whether it is a cake or a biscuit. Making them from scratch settles the argument in the most satisfying way, because you build the thing in three parts and see exactly what it is: a small, light sponge, a disc of sharp orange jelly, and a thin cap of dark chocolate. Homemade, they are a revelation, mostly because the jelly can taste of real oranges instead of orange-flavoured sweetness. My twist is to set that jelly with a couple of spoons of fine-cut marmalade alongside the fresh juice, which brings a grown-up bitterness and little threads of peel, so the fruit layer has some bite to stand up to the chocolate.
Jaffa Cakes from Scratch
Ingredients
- 150ml fresh orange juice (about 2 oranges)
- Finely grated zest of 1 orange
- 2 tbsp fine-cut marmalade
- 40g caster sugar (for the jelly)
- 4 gelatine leaves (about 7g)
- 2 large eggs, at room temperature
- 60g caster sugar (for the sponge)
- 60g plain flour
- Pinch of fine sea salt
- 1/2 tsp vanilla extract
- 10g unsalted butter, melted, for greasing
- 150g dark chocolate (about 55%), chopped
Method
- Make the jelly first. Soak the gelatine leaves in cold water for 5 minutes. Warm the orange juice, zest, marmalade and 40g sugar until steaming and the sugar dissolves, then squeeze out the gelatine and stir it in until melted.
- Pour into a shallow tray or dish to a depth of about 5mm and chill for at least 3 hours until firmly set.
- Preheat the oven to 180C fan and grease a 12-hole shallow bun or patty tin well with melted butter.
- Whisk the eggs and 60g caster sugar for 5 to 6 minutes until pale, tripled and holding a ribbon, then fold in the sifted flour, salt and vanilla.
- Divide the batter between the holes, filling each about halfway, and bake for 8 to 10 minutes until golden and springy. Cool for 5 minutes, then turn out onto a rack.
- Stamp discs from the set jelly with a small cutter, roughly 1cm smaller than the sponges, and sit one disc on the flat side of each sponge.
- Melt the dark chocolate gently over hot water until smooth, cool slightly, then spoon over each cake to cover the jelly and the top of the sponge.
- Once the chocolate is almost set, drag a fork across the top to make the classic hatched pattern, then leave to set completely.
Cake or biscuit, and why it matters
The Jaffa cake was introduced by McVitie and Price in 1927, named after the Jaffa orange, a sweet, largely seedless variety long associated with the port of Jaffa in what is now Israel. The cake-versus-biscuit question is not idle pedantry; it went to a VAT tribunal in 1991. In Britain, chocolate-covered biscuits are taxed as a luxury while cakes are zero-rated, so McVitie’s had a powerful financial reason to argue their product was a cake. Their cleverest piece of evidence was simple staling behaviour: cakes go hard when they go stale, biscuits go soft, and a Jaffa cake goes hard. The tribunal agreed, the Jaffa cake was ruled a cake, and it has been untaxed and beloved ever since. Making them at home, you will see the argument is unanswerable, because the base is unmistakably a genoise-style sponge.
That sponge is the same airy, whisked type you would build for a light celebration cake, leavened by beaten eggs rather than butter and raising agents. The orange-and-dark-chocolate pairing at the heart of the thing is one of the great classic combinations, the same partnership that carries a clementine and almond cake and gives a good chocolate orange its whole reason to exist.
The jelly: make it first, and make it real
The jelly needs a long chill to set firm, so start here. Warm fresh orange juice with zest, sugar and marmalade until it steams, then dissolve soaked gelatine leaves into it off the heat. Fresh juice is worth the two oranges; from concentrate or carton it tastes flat and one-note, and the whole point of home-made is that this layer tastes of actual fruit. The marmalade is the twist and does real work: it adds the faint, welcome bitterness of orange peel and a little pectin, and its threads of shred give the set jelly a better texture than a smooth wobble.
Gelatine leaves are more reliable than powder for a clear, clean set, and four leaves in this quantity of liquid gives a jelly firm enough to stamp into discs that hold their shape on the sponge. Soak the leaves in plenty of cold water until floppy, about five minutes, then lift them out and squeeze firmly before stirring into the warm juice; the squeezing stops you carrying extra water in and slackening the set. Never boil the mixture once the gelatine is in, because prolonged high heat weakens gelatine’s setting power. Pour it into a shallow tray to a depth of about five millimetres so your discs are the right thickness, and chill for a good three hours, or overnight.
Stamp the discs a centimetre or so smaller than the baked sponges, so there is a clean rim of sponge around the jelly for the chocolate to grip. A little round cutter or the wide end of a piping nozzle works. If the jelly tears as you lift the discs, it is not set firm enough; give it longer in the fridge, and dip the cutter in warm water for a cleaner cut.
The sponge: shallow, quick and springy
The base is a small whisked sponge baked in a shallow bun or patty tin. Whisk eggs and sugar for a full five to six minutes until they triple and hold a ribbon, then fold in the flour gently to keep the air in, exactly as you would for any genoise. Grease the tin well with melted butter, because there is no butter in the batter to help release, and fill each hole only about halfway so the sponges rise into low, flat discs rather than domed buns. If they dome a little, press them gently flat while warm.
Bake them hot and fast, eight to ten minutes at 180C fan, until golden and springy to the touch. Overbaking gives you a dry, tough disc; you want them just set and tender. Cool for a few minutes in the tin so they firm up enough to handle, then turn out and cool fully before assembling, or the residual heat will melt your jelly and seize your chocolate.
The chocolate, and that fork pattern
The lid is simply dark chocolate, melted gently and spooned over. Use a chocolate around 55%; the bitterness balances the sweet sponge and sharp jelly, while milk chocolate tips the whole thing into cloying. Melt it slowly over barely simmering water, or in short bursts in the microwave, stirring often and pulling it off while a few unmelted pieces remain to melt in the residual heat, which keeps it smooth and glossy. Let it cool and thicken slightly before spooning it over each jelly-topped sponge, so it sits in a neat cap rather than running off the sides.
The signature crosshatch is the finishing move: once the chocolate is almost set but still soft, drag a fork lightly across the top in one direction, then the other, to leave those shallow ridges. It is decorative, though it also gives the chocolate a satisfying snap-and-scrape as you bite. If you want a real professional shine, temper the chocolate properly, but for a home batch a gentle melt and a cool room does the job. The same restraint with dark chocolate rewards you on a Sachertorte with apricot and dark chocolate glaze, where the fruit-and-chocolate logic is exactly the same.
Assembly, storage and variations
Assemble in order: sponge flat-side up, jelly disc centred on top, then chocolate spooned over to cover the jelly and meet the sponge all the way round, sealing the fruit in. That seal keeps the jelly from weeping and helps the cakes keep. Leave them somewhere cool to set completely before stacking, and do not refrigerate to speed it up if you can avoid it, because condensation dulls the chocolate to a grey bloom.
They keep in an airtight tin at room temperature for up to four days, and true to the tribunal, they go firm rather than soft as they age. I would not freeze them, as the jelly weeps on thawing and turns the sponge damp. The components, though, are happy made ahead: the jelly keeps in its tray in the fridge for three days, and the sponges keep a day in a tin, so you can spread the work across an evening and assemble the next day.
For variations, blood orange juice in the jelly gives a gorgeous deep colour and a slightly berried flavour; lemon and lime work too, though you lose the classic Jaffa identity. A tablespoon of Cointreau or Grand Marnier stirred into the warm jelly before it sets makes an adults-only version, and a pinch of ground cardamom in the sponge is a lovely, subtle addition. If you want to go further into the chocolate-and-cherry world, the same three-part logic underpins a Black Forest gateau, reconsidered. But the plain orange original, with real juice and a little marmalade bitterness under dark chocolate, is hard to beat, and once you have made a batch the shop version never quite tastes the same again.
Related Content