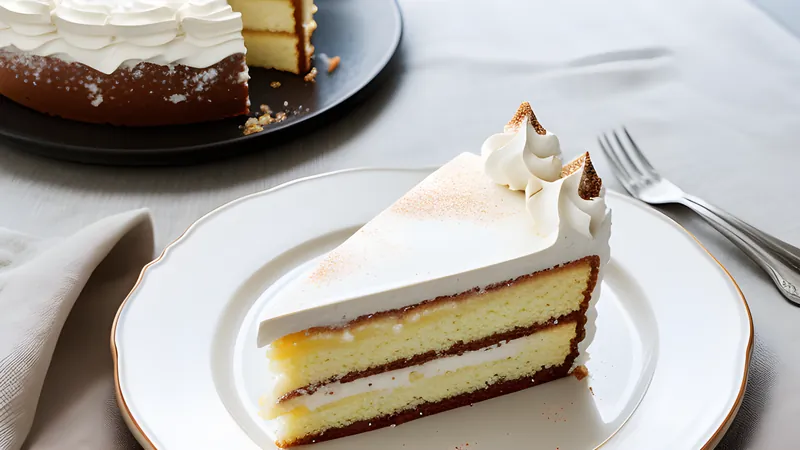
Honey Cake (Medovik) with Sour Cream Layers
Thin honeyed sponge and tangy cream, rested until it turns to velvet
Contents
↓ Jump to recipeThere is a story Russians tell about medovik, and like most cake origin stories it is almost certainly too good to be true. The wife of Tsar Alexander I supposedly could not stand honey, and any cook who served it was shown the door. A new young pastry chef, ignorant of the rule, baked her a honey cake anyway. She loved it. When the horrified kitchen confessed what was in it, she asked for the recipe instead of a resignation. Whether or not a nervous apprentice ever really got away with it, the cake stuck, and by the Soviet era medovik had become the birthday cake of the ordinary household, the one that turned up on kitchen tables from Kaliningrad to Vladivostok.
I love it for a reason that has nothing to do with tsars. Medovik is the rare showstopper you can build with cupboard staples and a bit of patience. No fancy chocolate, no tempering, no water bath. You cook honey, sugar and butter into a caramel, turn it into a dough on the stovetop, roll it thin, and bake eight quick discs. Then you smother them in tangy cream and walk away for a night while the cake does the hard part itself.
Honey Cake (Medovik) with Sour Cream Layers
Ingredients
- 100g runny honey, plus 1 tbsp for the cream
- 150g caster sugar
- 100g unsalted butter, cubed
- 3 large eggs, beaten
- 1 tsp bicarbonate of soda
- 400g plain flour, plus more for rolling
- 1/4 tsp fine salt
- 600ml sour cream (full-fat, at least 20%)
- 300ml double cream, cold
- 80g icing sugar, sifted
- 1 tsp vanilla extract
Method
- Set a heatproof bowl over a pan of gently simmering water. Add the 100g honey, caster sugar and butter, and stir until melted and smooth.
- Whisk in the beaten eggs a little at a time so they thicken rather than scramble. Cook, stirring, for 4-5 minutes until the mixture is amber, glossy and coats the spoon.
- Take the bowl off the heat and whisk in the bicarbonate of soda. The batter will foam up pale and almost double; keep whisking for 30 seconds.
- Sift in the flour and salt in three additions, folding to a soft, tacky dough. Tip onto a floured surface, knead briefly, then divide into 8 equal pieces. Chill 20 minutes.
- Heat the oven to 180C fan. Roll each piece on baking paper to a rough 22cm round, about 2mm thick. Prick all over with a fork. Bake each layer 4-6 minutes until deep gold, then trim to a neat 20cm circle using a plate as a guide. Keep the trimmings.
- Whip the double cream with icing sugar and vanilla to soft peaks. Fold in the sour cream and 1 tbsp honey until thick and spreadable.
- Stack the layers on a plate, spreading a generous 4-5 tbsp of cream between each and over the top and sides. Blitz the trimmings to crumbs and press over the whole cake.
- Chill at least 8 hours, ideally overnight, so the layers drink in the cream and turn tender. Slice with a hot, dry knife.
Why the layers go soft (and why that is the whole point)
A freshly baked medovik layer is crisp, almost like a thin biscuit. If you cut the cake straight after assembly you will be disappointed: it shatters and drags, and the honey flavour sits flat. The magic is entirely in the rest. Over eight to twenty-four hours in the fridge, moisture migrates from the sour cream into the dry, porous sponge. The crisp discs soften to the texture of damp velvet, the seams between layer and cream blur, and the whole thing becomes sliceable in clean, defined stripes.
This is why sour cream is the traditional partner and worth defending. Its acidity cuts the sweetness of all that caramelised honey, and its water content is exactly what the layers need to drink. I lighten it with whipped double cream so the filling holds its shape while you stack, but the sour cream is doing the softening. Use full-fat, at least 20%; low-fat sour cream is thin and weepy and will slump.
If you have ever made a proper English trifle you already understand this principle of deliberate sogginess. My trifle with sherry custard and raspberry leans on the same trick, sponge given time to soak until spoonable, and medovik is its architectural cousin.
Cooking the dough on the stove
The step that unnerves people is making the dough over a bain-marie. Do not skip the water bath in favour of direct heat, at least not the first time. Honey and sugar scorch fast, and once caramel catches it turns acrid and there is no rescuing it. Gentle, steady warmth from below lets you cook the mixture to a deep amber without gambling.
Two moments matter. First, the eggs: whisk them in gradually so they emulsify into the warm honey rather than setting into ribbons of sweet omelette. Second, the bicarbonate of soda. When you whisk it into the hot acidic honey mixture it reacts on contact, foaming up pale and voluminous like a science-fair volcano. That aeration is what keeps the baked layers light instead of hard as toffee, and it also mellows the honey’s edge. Whisk it in properly and let it froth.
From there the flour goes in and you have a soft, tacky, workable dough in under a minute. It firms as it cools, so a short chill makes it roll like a dream.
Rolling thin, baking fast
Eight layers sounds like a lot of faff and I will not pretend it is nothing, though each disc bakes in four to six minutes, so it moves quickly once you get a rhythm. Roll directly on baking paper to about 2mm; if you can almost see the grain of the paper through the dough, you are there. Prick all over with a fork so the layers stay flat rather than blistering into domes.
Bake until deep gold. Underbaked layers stay bendy and pale and taste of raw flour; pushed to a proper toasty colour, the honey turns nutty and faintly bitter in the best way, like the crust on a good loaf. While each disc is warm and still pliable, trim it to a neat circle with a plate and a small knife. Warm layers cut cleanly; cold ones snap. Save every scrap of trimming.
The crumb coat that finishes it
Those trimmings are not waste, they are the decoration. Blitz the baked offcuts to a fine, sandy crumb and press them over the finished, cream-covered cake, top and sides. It gives medovik its signature look, a soft suede exterior the colour of toffee, and it means the cake needs no piping, no ganache, no fuss. A traditional finish that also happens to be the laziest.
If you want to gild it, a handful of toasted flaked almonds or crushed walnuts pressed round the base is welcome. I sometimes grate a little dark chocolate over the top for contrast, in the same spirit as the cocoa dusting on a red velvet with cream cheese frosting, where a dark note keeps a sweet cake honest.
Tips, swaps and make-ahead
The honey matters. A strong, dark honey (chestnut, buckwheat, a robust wildflower) gives real depth; a pale supermarket blend disappears under the sugar. This is the one place to use the good jar.
Weigh your dough pieces. Eight even layers make a level cake. Eyeball it and you get a leaning tower that slides. A digital scale and thirty seconds of dividing saves you grief.
If a layer tears while transferring, patch it in the stack; the cream and the overnight rest hide all sins. Nobody sees the middle.
Make-ahead is built in. Medovik must rest overnight, so it is genuinely better made a day before you need it, which makes it a superb dinner-party dessert. It keeps, covered in the fridge, for four days and arguably improves on days two and three.
A lighter tang: replace 200ml of the sour cream with thick Greek yoghurt for a brighter, cleaner finish. A boozier one: brush each layer with a whisper of brandy as you stack.
Dulce medovik: swap 100g of the sour cream filling for dulce de leche folded through the cream for a caramel-forward version that leans toward banoffee territory, if that is your weakness, as it is mine in my banoffee pie with salted caramel.
Serving
Cut medovik in slim wedges; it is rich and eight layers deep, so a little goes far. A hot, dry knife wiped between cuts gives you those clean caramel-and-cream stripes that make people ask how on earth you did it. Serve it plain, with strong black tea or coffee, exactly as it would appear on a Russian kitchen table. No sauce, no scoop of anything. The cake has earned the right to stand alone.
It is a patient cake, and it rewards patience in kind. Bake the layers on a quiet afternoon, build it before you go to bed, and forget about it. By the next evening you will have something that looks like it took a professional and tasted like it, when really all it took was a night in the fridge doing nothing at all.
Related Content