Butter Mochi with Brown Butter and Coconut
A chewy Hawaiian mochiko cake, deepened with browned butter
Contents
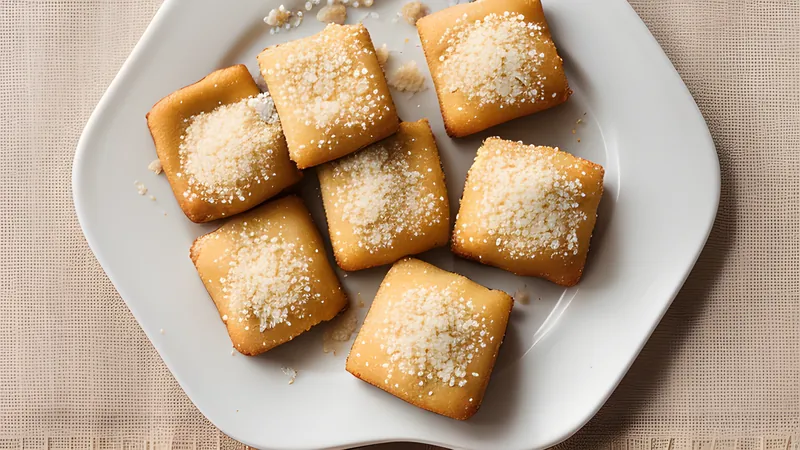
↓ Jump to recipeButter mochi is a Hawaiian bake with a texture unlike almost anything else in a home baker’s repertoire: dense, chewy and faintly gooey in the middle, with a deep golden, slightly crackled top that turns almost caramelised at the edges. My twist is to brown the butter before it goes anywhere near the batter, trading the flat richness of melted butter for something toastier and more complex, and to lean harder into coconut with both coconut milk in the batter and toasted coconut flakes baked into the top.
Butter Mochi with Brown Butter and Coconut
Ingredients
- 115g unsalted butter
- 300g mochiko (glutinous rice flour)
- 300g caster sugar
- 2 tsp baking powder
- 1/2 tsp fine salt
- 400ml tinned full-fat coconut milk
- 350ml tinned evaporated milk
- 3 large eggs
- 1 tsp vanilla extract
- 40g coconut flakes, for the top
Method
- Heat the oven to 160C fan (180C conventional, gas mark 4) and grease a 23x33cm baking tin, lining the base with baking paper.
- Melt the butter in a light-coloured pan over a medium heat, swirling often, until it foams, then turns golden and finally deep amber with brown flecks and a nutty smell, 5 to 7 minutes. Pour immediately into a heatproof bowl to stop it cooking further and leave to cool for 10 minutes.
- Whisk the mochiko, sugar, baking powder and salt together in a large bowl.
- In a separate bowl or jug, whisk the coconut milk, evaporated milk, eggs and vanilla until smooth.
- Whisk the browned butter, including all the browned solids at the bottom of the bowl, into the wet mixture.
- Pour the wet mixture into the dry ingredients and whisk until completely smooth with no lumps of flour.
- Pour the batter into the prepared tin and scatter the coconut flakes evenly over the top.
- Bake for 60 to 65 minutes, until deep golden brown on top, set at the edges, and only a slight wobble remains in the centre.
- Cool completely in the tin, at least 2 hours, before cutting into squares with a knife run under hot water and wiped between cuts.
A Hawaiian bake with Japanese roots
Mochiko, the fine glutinous rice flour that gives this cake its name and its chew, arrived in Hawaii with Japanese plantation labourers in the late nineteenth and early twentieth centuries, brought over to work the sugar and pineapple fields. Japanese immigrants made up a huge share of that workforce, and they brought their food culture with them, including mochi — pounded glutinous rice cakes eaten at New Year and other celebrations. Over generations in Hawaii, that tradition mixed with American baking habits, particularly the butter cakes and box-mix desserts that spread across the islands in the mid-twentieth century, and butter mochi is very much a product of that fusion: a Japanese starch baked American-cake style, using tinned evaporated and coconut milk that were pantry staples across the Pacific.
It has become one of Hawaii’s defining potluck desserts, turning up at family gatherings, school bake sales and church functions cut into neat squares, usually from a big rectangular tin so it can feed a crowd. Unlike steamed or pounded mochi, which needs to be eaten fresh or it turns hard, baked butter mochi keeps its chew for days at room temperature, which is part of why it became such a practical, well-loved thing to bring to a shared table.
The defining quality is texture rather than flavour complexity in the traditional version — a bouncy, sticky-chewy crumb that holds together in a way no wheat cake ever will, because mochiko contains essentially no gluten-forming proteins. What holds the cake together instead is the starch itself: glutinous rice flour is almost entirely amylopectin, a branched starch molecule that, once cooked, sets into a springy, cohesive gel rather than the crumbly structure wheat flour gives you. That is the whole reason butter mochi has the pull-apart, taffy-like bite that makes people ask what on earth it is made from.
Honolulu’s Diamond Head Market & Grill, a plate-lunch counter that also runs a bakery window, is widely credited with turning butter mochi bars into a must-try item for visitors rather than just a potluck regular, and its cellophane-wrapped squares are still what a lot of people picture when they hear the name. Butter mochi also sits in a family of related island-Pacific rice bakes worth knowing about even if this recipe stays firmly in its own lane: Filipino bibingka is a similarly rice-based, coconut-milk-enriched cake but leans on regular rice flour and banana leaf rather than mochiko, giving it a softer, less chewy crumb, while Okinawan-style mochi tends to stay closer to the steamed, unbaked original that Japanese immigrants first brought over. Butter mochi’s baked, oven-set format is very much its own Hawaiian branch of that wider rice-cake family tree.
Why browning the butter is worth the extra five minutes
Standard butter mochi recipes call for melted butter, stirred straight into the wet ingredients while it is still liquid and essentially flavourless beyond basic fat richness. Browning it first changes that completely. As butter melts and its water content cooks off, the milk solids suspended in the fat — casein and whey proteins, plus a little residual lactose — begin to toast against the base of the pan once the water is gone, undergoing the same Maillard and caramelisation reactions that brown a steak or a loaf crust. What you end up with is a butter that tastes of hazelnuts and caramel rather than plain fat, and every one of those new flavour compounds carries through into the finished cake.
The technique itself needs a light-coloured pan, because you are watching for colour and a dark pan hides it until it is too late. Butter foams first as the water boils off, then the foam subsides and the butter turns a light gold, and finally, over the space of perhaps a minute, it moves through amber to a deep brown flecked with toasted solids at the base — that final minute is where all the flavour lives, and it is also where burning happens fastest if you look away. Pull it the moment it smells distinctly nutty and toasted rather than simply “buttery”, and tip it into a cool bowl immediately; the residual heat of the pan will keep cooking it towards acrid otherwise. Scrape every one of those browned solids into the batter rather than straining them out — they are concentrated flavour, not a mistake to be filtered away.
A stainless steel or other pale-bottomed pan is worth using specifically for this job even if you normally reach for cast iron or a dark non-stick — being able to see the true colour of the butter and the solids at the base is the only reliable doneness cue, since smell alone can lag a few seconds behind what’s actually happening in the pan. Unsalted butter is worth sticking to as well; browning concentrates whatever salt is already in the butter as the water cooks away, and salted butter browned this hard can tip the finished cake too salty against the sugar in the batter.
Coconut milk does two jobs alongside the browned butter. It adds fat and a background sweetness that plays naturally with the nuttiness of the brown butter, and its own proteins and sugars support a little extra browning on top of the cake as it bakes, which is why this version develops a slightly deeper, more crackled crust than the plain evaporated-milk-only original.
The recipe
Heat the oven to 160C fan (180C conventional, gas mark 4) and grease a 23x33cm baking tin, lining the base with baking paper. Melt 115g unsalted butter in a light-coloured pan over a medium heat until it turns deep amber with brown flecks and smells nutty, 5 to 7 minutes, then pour it into a bowl to cool for 10 minutes.
Whisk 300g mochiko, 300g caster sugar, 2 teaspoons baking powder and 1/2 teaspoon salt together in a large bowl. In a jug, whisk 400ml coconut milk, 350ml evaporated milk, 3 eggs and 1 teaspoon vanilla until smooth, then whisk in the browned butter and all its solids. Pour the wet mixture into the dry ingredients and whisk until completely smooth.
Pour into the tin, scatter 40g coconut flakes over the top, and bake for 60 to 65 minutes, until deep golden and set at the edges with only a slight wobble in the centre. Cool completely in the tin, at least 2 hours, before cutting into squares with a hot, clean knife between cuts.
Reading doneness on a cake that never sets like a normal cake
This is the part that unnerves first-time bakers most: butter mochi never sets the way a sponge or a pound cake does, and a skewer inserted into the centre will always come out with some sticky batter clinging to it, even when the cake is perfectly done. Do not chase a clean skewer here, because you will simply overbake it. Instead, look for a deep golden-brown top with some darker, almost caramelised patches at the edges and around the coconut flakes, and give the tin a gentle shake — the very centre should have only a slight, contained wobble, not a liquid slosh. The cake firms up considerably as it cools, so a texture that looks slightly underdone at 60 minutes is usually exactly right once it has had its full two hours to set.
Cutting matters more than usual too. Warm butter mochi is essentially a sticky taffy and will tear rather than cut cleanly, dragging strings of half-set cake across your knife. Letting it cool fully firms the starch structure enough to cut, and running the knife under hot water and wiping it between each cut keeps the squares neat rather than smeared.
Tips, storage and variations
Butter mochi keeps at room temperature, covered, for up to three days, and this is one of the rare cakes that genuinely improves slightly on day two as the coconut flavour settles through the crumb. It does not refrigerate well — the cold firms the starch too far and gives it an unpleasantly dense, almost rubbery bite — so keep it at room temperature and eat it within the week. It also freezes surprisingly well, wrapped tightly in individual squares, and thaws at room temperature in about an hour without losing its chew.
Sourcing mochiko correctly matters more than most flour swaps: it is glutinous (“sweet”) rice flour milled from short-grain sticky rice, sold in the UK and Ireland under Japanese and Thai brands in East Asian grocers, and it behaves nothing like regular rice flour or ground rice, which are milled from ordinary long- or short-grain rice and contain none of the amylopectin that gives this cake its chew. Using plain rice flour by mistake produces a cake that sets crumbly and grainy rather than gooey, so check the packet says “glutinous” or “sweet rice flour” before you buy.
For variations, stir a tablespoon of black or white sesame seeds into the batter for a nutty crunch that echoes the browned butter, or swap a third of the mochiko for cocoa powder and reduce the sugar slightly for a chocolate version. Ube (purple yam) is a popular Hawaiian variation, folded through as a paste for both colour and a mild, vanilla-like sweetness. If you enjoy this coconut-forward register of dessert, my mango sticky rice with toasted coconut cream leans on the same toasted-coconut instinct in a very different, no-bake direction, and a coconut pandan chiffon cake makes good company on the same dessert table if you want two very different coconut textures side by side.
Related Content