Rough Puff Pastry: A Cheat's Lamination That Actually Works
All the flake, none of the all-day folding
Contents
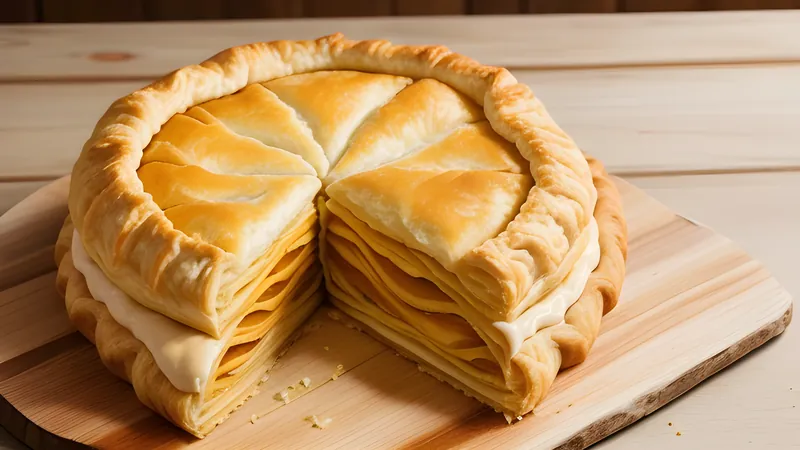
↓ Jump to recipeThere is a particular kind of kitchen smugness that comes from pulling a tray of homemade puff pastry out of the oven, watching it rise into golden, shattering leaves, and knowing you never once made a proper butter block. Classic puff pastry is a beautiful thing, but it is also an all-day commitment involving a slab of beaten butter, a carefully wrapped dough envelope and a lot of nervous resting between turns. Rough puff is the honest weeknight cousin: less ceremony, almost as much flake, and absolutely good enough for a galette, a sausage roll or the lid of a pie.
Rough Puff Pastry: A Cheat's Lamination That Actually Works
Ingredients
- 250g plain flour, plus extra for dusting
- 0.5 tsp fine salt
- 250g cold unsalted butter, cut into 1cm cubes
- 120ml ice-cold water
- 1 tsp lemon juice or cider vinegar
Method
- Whisk the flour and salt together in a wide bowl and add the cold cubed butter, tossing to coat each piece without rubbing it in.
- Mix the lemon juice into the ice-cold water, then add to the bowl and bring together with a knife until a shaggy, lumpy dough forms with visible butter.
- Tip onto a floured surface and pat into a rough rectangle, then roll out to roughly 40cm by 15cm.
- Fold the dough in thirds like a letter, give it a quarter turn, and roll out again to the same size.
- Repeat the roll and fold three more times, chilling for 20 minutes if the butter starts to soften or smear.
- Wrap the finished block and rest in the fridge for at least 30 minutes before using.
- Roll, cut and bake as your recipe directs, always starting in a hot oven of at least 200C fan.
Where rough puff comes from
Laminated pastry as we know it is a French invention, or at least a French perfection. The full method, pâte feuilletée, is usually credited in French culinary lore to the seventeenth-century pastry cook Claude Gelée, later famous as the landscape painter Claude Lorrain, though like most kitchen origin stories that attribution is more romantic than documented. What is certain is that by the time Marie-Antoine Carême was codifying French pastry in the early nineteenth century, the technique of trapping a butter block inside dough and folding it into hundreds of layers was already the professional standard.
Rough puff, feuilletage rapide or demi-feuilletage in French, is the practical shortcut that professional and home kitchens have used for generations when full lamination is not worth the effort. Instead of the disciplined butter block and single detrempe, you scatter the butter through the flour in lumps and let the rolling do the layering for you. The result is not quite as tall or as even as the classic, but it is honest work: this is the pastry that goes under a jam tart, over a pie, or around a sausage, where a wildly uneven rise matters far less than good flavour and genuine flake.
Why Rough Puff Works
Proper lamination relies on building hundreds of paper-thin alternating layers of butter and dough. When that hits a hot oven, the water in the butter turns to steam, the layers are forced apart, and the pastry puffs. Rough puff cheats the geometry. Instead of one neat sheet of butter folded over and over, you start with the butter in rough cubes scattered through the flour. As you roll and fold, those lumps streak and smear into ragged sheets. The layers are messier and less even, so the rise is a little wilder and a little lower, but it is unmistakably puff pastry rather than shortcrust.
The clever twist here is not an ingredient, it is restraint. The single most common mistake is overworking the dough into something smooth and uniform. You actually want to see marbled streaks of butter through the block right up until it goes in the oven. Those visible seams are your future flakes. If your dough looks tidy, you have gone too far.
The Method, Step by Step
Keep everything cold. Cut your butter into 1cm cubes and chill them hard, ideally for fifteen minutes in the freezer before you start. Whisk the flour and salt in a wide bowl, then add the butter and toss so every cube is dusted in flour. Do not rub it in. The point is to keep the cubes whole and distinct.
Mix the lemon juice or vinegar into ice-cold water. That splash of acid relaxes the gluten slightly, which makes the dough easier to roll without springing back and shrinking. Add the liquid and bring it together with a table knife until you have a rough, lumpy mass. It will look alarming and underhydrated. Trust it.
Tip the shaggy dough onto a floured surface and pat it into a rectangle. Now roll it out long and thin, roughly 40cm by 15cm, then fold it in thirds like a business letter. Give it a quarter turn so the open edge faces you, and roll out again. Repeat this roll-and-fold sequence four or five times in total. By the third turn the dough will have transformed from a crumbly heap into a cohesive, marbled block. If at any point the butter starts to soften, melt or push through the surface, wrap the dough and chill it for twenty minutes before carrying on. Warm butter is the enemy of layers.
Once you have done your turns, wrap the block and rest it in the fridge for at least half an hour, or up to two days. This relaxes the gluten and re-firms the butter so the pastry rolls cleanly and bakes tall.
The science of the flake
It helps to picture what is actually happening between the layers. Butter is roughly 80 per cent fat and 15 to 18 per cent water, and that water content is the engine of the whole thing. When the pastry hits a hot oven, two events race each other. The fat begins to melt, and the water in the butter flashes to steam. If the water turns to steam while the fat is still holding the layers apart, that steam has nowhere to go but up, prising the sheets of dough away from each other and inflating them like tiny balloons that then set crisp. But if the fat melts and merges into the dough before the water boils, the steam just escapes through a greasy, uniform mass and nothing lifts. This is the entire reason for keeping everything cold: you want the butter still solid and distinct when the pastry goes in, so the melting and the steaming happen in the right order.
It is also why British butter, with its slightly higher water content than some continental “dry” pastry butters, gives a slightly more explosive but less controlled rise. For rough puff, where a little wildness is expected anyway, ordinary supermarket unsalted butter is perfectly good. What matters far more than the brand is that it goes into the flour cold and comes out of the oven having stayed cold until the last possible moment.
Baking and Getting the Best Rise
Rough puff needs a hot, confident oven. Anything below 200C fan and the butter melts and leaks out before the steam can lift the layers, leaving you with greasy, sunken pastry. Roll the chilled dough to about 3 to 4mm, cut your shapes with a sharp knife or a floured cutter, and resist the urge to twist as you cut, since a clean downward press keeps the cut edges open and free to rise. A bashed or sealed edge will lift unevenly.
An egg wash gives that glossy, deep-bronze finish, but keep it off the cut sides for the same reason. Chill the cut pastry for ten minutes before baking to firm everything back up, and it will reward you with proper height. For an even deeper shine, use a whole egg beaten with a pinch of salt, which loosens it and helps it brush on thinly; a yolk-only wash gives the darkest colour but can catch and burn on a long bake, so watch it if your filling needs more than about twenty-five minutes in the oven.
A last point on the flour. Plain flour is right for rough puff because you want just enough gluten to hold the layers together, not the elastic, springy dough that strong bread flour would give. Bread flour makes the pastry fight back as you roll and shrink in the oven. If your kitchen is warm and the dough keeps softening, work in short bursts and return it to the fridge between turns rather than pressing on; ten minutes of patience beats a smeared, greasy block every time.
How to Use It
This recipe makes enough for a generous galette, a batch of sausage rolls, or a pie lid with a little to spare. It freezes beautifully, either as a block or as cut shapes laid flat on a tray, so it is worth doubling the quantity and squirrelling some away. Roll offcuts into a spiral with cinnamon sugar for instant palmiers rather than re-rolling them into something tough.
For savoury bakes, this pastry is the perfect base for a roasted tomato and goat cheese tart, where its flake plays against the soft cheese and jammy tomatoes. If you want to graduate from rough puff to full lamination, the proper butter-block method in the Danish pastry dough recipe is the natural next step, and it uses many of the same cold-butter, gluten-relaxing principles taken further.
Troubleshooting
The most common disappointments all trace back to temperature. If the pastry leaks a lake of butter and bakes flat and greasy, the butter melted before the layers could set; the fix is colder butter and a hotter oven. If it rises unevenly, tilting to one side, your rolling was uneven or you sealed the cut edges by dragging a blunt knife or twisting a cutter. If the pastry is tough rather than tender, you either overworked the dough into smoothness or re-rolled the scraps too many times, developing the gluten. And if it shrinks dramatically in the oven, it went in under-rested; the gluten needed longer to relax, so give it the full half hour in the fridge, or up to two days.
The strong opinion I will leave you with is this: do not buy the block stuff out of habit once you have made this. Shop-bought puff is fine, but it almost always uses vegetable shortening rather than real butter, and the difference in flavour is enormous. Twenty-five minutes of unhurried rolling, most of it spent waiting for the fridge to do its job, buys you pastry that tastes of actual butter. That is a trade worth making.
Related Content