Pita Bread: Puffy, Charred, and Better Than Anything in a Packet
Homemade pockets that balloon in the heat
Contents
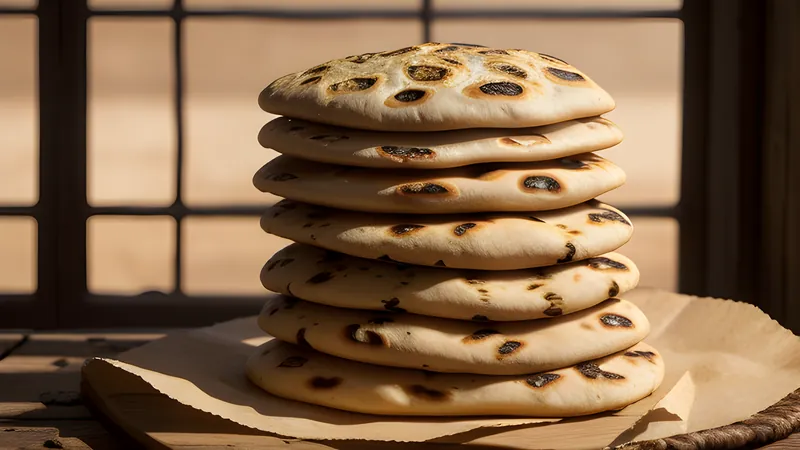
↓ Jump to recipeShop-bought pita is one of life’s small disappointments: dry, papery, faintly cardboardy, with a pocket that tears the moment you try to fill it. For years I assumed that was just what pita was, until I made it at home and watched the first one balloon up in the oven like a small miracle. Homemade pita is a completely different animal — soft, chewy, fragrant, freckled with char, and warm enough to make the butter melt. It is also absurdly cheap and quick to make, and it is one of those breads that turns dinner into an occasion without any real effort.
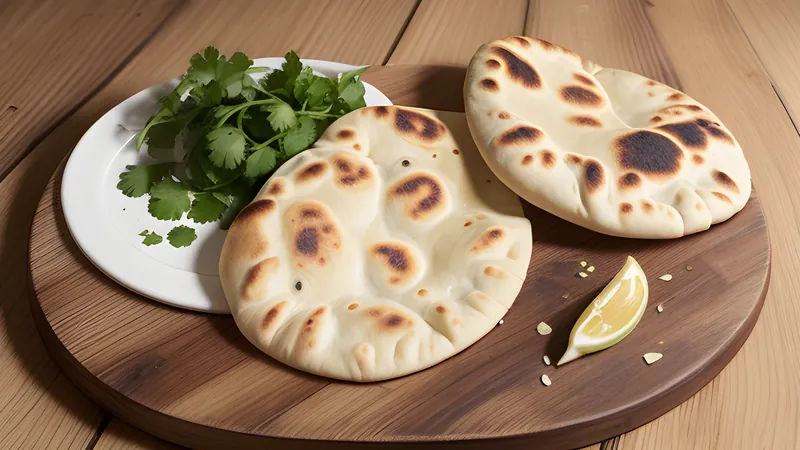
There is no single clever ingredient here; the twist is technique and, above all, heat. The whole drama of pita — that puff, the hollow pocket, the leopard-spotted char — comes from baking a simple dough at a ferociously high temperature on a surface that is already screaming hot. Get that right and the bread does the spectacular part for you. The charring, which I push a little further than tradition strictly demands, is the difference between pleasant and unforgettable: that smoky, blistered edge is what makes a homemade pita taste like it came off a bakery’s stone floor.
Pita Bread: Puffy, Charred, and Better Than Anything in a Packet
Ingredients
- 400g strong white bread flour, plus extra for dusting
- 7g instant dried yeast
- 1 tsp caster sugar
- 1 tsp fine salt
- 250ml water, lukewarm
- 2 tbsp olive oil, plus extra for the bowl
- 1 tbsp wholemeal flour (optional, for flavour)
Method
- Whisk the yeast and sugar into the lukewarm water and leave for 5 minutes until frothy.
- Combine the flours and salt in a large bowl. Pour in the yeast water and the olive oil and mix to a rough dough.
- Knead for 8-10 minutes until smooth and elastic, or 5 minutes in a stand mixer. Shape into a ball, oil lightly, cover and leave to rise until doubled, about 1 hour.
- Knock back and divide into 8 equal pieces. Roll each into a tight ball, cover, and rest for 15 minutes so the gluten relaxes.
- Put a heavy baking tray or pizza stone on the top shelf and heat the oven to its maximum, 250C or higher, for at least 20 minutes.
- On a lightly floured surface, roll one ball at a time into a circle about 4-5mm thick, keeping the thickness even all over.
- Working quickly, lay one or two pita onto the screaming-hot tray and bake for 3-4 minutes until they balloon up dramatically and the tops are just blistered.
- For extra char, finish each puffed pita for 20-30 seconds under a hot grill or over a gas flame.
- Wrap the baked pita in a clean tea towel as they come out, to keep them soft and pliable.
How the pocket forms
The pocket is the whole party trick, and it is pure physics. A pita is rolled into a thin, even round and then hit with intense, sudden heat. The instant it lands on the hot surface, the water in the dough flashes to steam. With nowhere to go, that steam gathers in the centre and pushes up violently, forcing the top and bottom layers apart and inflating the bread into a balloon.
As it cools, the steam escapes and the bread deflates, but the two separated layers stay parted — and that gap is your pocket. Everything in the method is in service of this moment. The dough must be rolled evenly so the steam does not find a thin escape route; the oven must be as hot as you can get it; and the baking surface must be properly preheated so the bottom blasts the dough the second it touches down. A lukewarm tray gives you a flat, sad disc. A blistering one gives you the balloon.
It helps to understand what does the lifting. A little steam comes from the yeast’s fermentation gases, but the dramatic inflation is almost entirely water turning to vapour, which expands roughly 1,600 times its liquid volume the moment it boils. That is why the surface matters so much: a stone or steel plate at 250°C dumps its stored heat into the dough base in seconds, boiling the water before the top has time to set into a rigid skin that would trap nothing. Bake on a cold tray and the heat arrives too slowly, the crust sets first, and the steam simply seeps out of a bread that lies flat.
A bread of the eastern Mediterranean
Pita belongs to a family of flatbreads baked across the Levant and the eastern Mediterranean, and pocketed breads of this general kind are genuinely ancient; excavations at sites in the Fertile Crescent have turned up charred flatbread crumbs dated to well before the invention of agriculture. The word itself is worth a pause: the modern “pita” reaches English through Modern Greek píta, and linguists connect the wider family of terms to the same root that gives Italian pizza — bread as a flat, baked disc. Long before domestic ovens, breads like this were slapped onto the hot inner walls of a clay tannour or tabun, or cooked on a heated stone or a domed metal saj. Its enduring genius is usefulness: the pocket turns the bread itself into a vessel.
It is the natural home for falafel and salad, the scoop for hummus and baba ganoush, the wrap for grilled meat, the base for a hundred quick suppers. That versatility is exactly why it is worth making your own — fresh, warm, pliable pita lifts everything you put near it, and once you have tasted it straight from the oven the packet loses its appeal.
Making the dough
The dough is a plain, lean white bread dough with just enough olive oil to keep the crumb tender. Whisk the 7 g of instant yeast and 1 teaspoon of caster sugar into 250 ml of lukewarm water — blood temperature, so it feels neither warm nor cool on the inside of your wrist — and leave it for 5 minutes until it turns frothy. That froth is your proof that the yeast is alive; if nothing happens, the yeast is dead or the water was too hot, and it is worth starting again rather than baking a brick.
Combine the 400 g of strong white bread flour, the optional tablespoon of wholemeal, and the 1 teaspoon of fine salt in a large bowl, keeping the salt away from the yeast water until the flour is between them, since concentrated salt landing straight on yeast blunts it. Pour in the yeast water and the 2 tablespoons of olive oil and mix to a rough, shaggy dough. Tip it onto a lightly floured surface and knead for 8 to 10 minutes, or 5 minutes in a stand mixer with the dough hook, until it is smooth, elastic and slightly tacky rather than sticky. Strong bread flour matters here: its higher protein builds the gluten network that traps the steam later, and a plain plain-flour dough will puff far less reliably.
Shape the kneaded dough into a ball, turn it in a lightly oiled bowl to coat, cover, and leave it somewhere draught-free to rise until doubled, about an hour at normal room temperature. Then knock it back gently to expel the big bubbles, divide it into 8 equal pieces — weigh them if you want them to bake evenly — and roll each into a tight ball.
The details that matter
A short rest after dividing the dough is one of those small steps that makes a real difference. Rolling tightens up the gluten and makes the dough springy and reluctant to be shaped; let the balls relax under a cloth for 15 minutes and they roll out far more easily and evenly, which directly helps them puff.
Roll thicker than you think — about 4 to 5 mm. Too thin and the bread crisps into a cracker before it can balloon; a little thickness keeps it soft and chewy and gives the steam something to lift. Roll to an even thickness all over rather than a perfect circle: a raised ridge or a thin patch is where the puff fails, because the steam finds the weak spot and vents instead of building pressure. And work quickly once the oven is hot. Pita rewards a brisk, confident hand far more than a fussy one.
The 1 tablespoon of wholemeal flour is optional but I nearly always include it, because that small fraction of bran and germ adds a nutty, faintly earthy note without weighing the crumb down or stopping the puff. Go much beyond that and the bran starts cutting the gluten strands and the pockets get less reliable.
Troubleshooting the puff
If your pita refuses to balloon, work through the usual suspects in order. The tray was not hot enough: give it a full 20 minutes at maximum, and remember most domestic ovens read cooler than the dial claims. The dough was rolled unevenly, so it vented from a thin spot. The dough was over-floured and dry on the surface, which sets a stiff skin too early; brush off excess flour before it goes in. Or the dough was under-proved and short on the extensibility it needs to stretch. A pita that stays flat is not a failure, incidentally — it is just a soft flatbread, and it is delicious folded around a filling even without a pocket.
Keeping them soft and serving them
The moment your pita come out of the oven, wrap them in a clean tea towel. They emerge slightly crisp, but as they sit in their own trapped steam under the cloth they soften into the bendy, foldable texture you want. Skip this and they go brittle as they cool.
Eat them warm if you possibly can. Tear one open and stuff it with falafel, pickles and a slick of garlicky tahini; pile in the spiced, stacked meat from my chicken shawarma with a scatter of salad; or simply dunk strips of warm, charred pita straight into a bowl of hummus and call it lunch. They also make excellent dippers for a bowl of ribollita in place of the usual crusty loaf. They reheat well — a few seconds in a hot dry pan brings them back to life — and the dough freezes happily as balls if you want fresh pita on demand; just thaw and let them come back to room temperature before rolling. Make them once this way and the supermarket packet will never look the same again.
Related Content