Portuguese Custard Tarts (Pastéis de Nata)
Blistered tops, molten centres, scandalously good
Contents
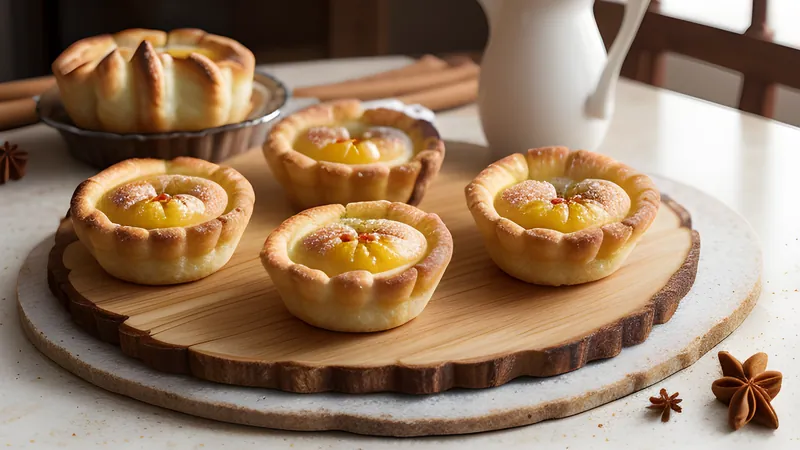
↓ Jump to recipeIf there is one pastry I would happily eat until I felt slightly unwell, it is the pastel de nata. Crisp, shattering pastry holding a wobbling, scorched custard that is somewhere between set and molten, eaten warm so the cinnamon catches in your throat a little. They are sold from glass cabinets all over Lisbon, and for years I assumed they were beyond a home cook. They are not. They are fiddly, yes, but the technique is learnable in an afternoon, and homemade ones eaten ten minutes out of the oven beat almost anything you can buy outside Portugal.
Portuguese Custard Tarts (Pastéis de Nata)
Ingredients
- 320g all-butter puff pastry (shop-bought or rough puff)
- 200g caster sugar
- 120ml water
- 1 cinnamon stick
- 1 strip of lemon peel
- 500ml whole milk
- 50g plain flour
- 6 large egg yolks
- 1 tsp vanilla extract
- 0.25 tsp fine salt
Method
- Make a sugar syrup by gently heating the sugar, water, cinnamon stick and lemon peel until the sugar dissolves and it reaches a light syrup, then remove from the heat.
- Whisk the flour with a little of the cold milk to a smooth paste, then whisk in the remaining milk and cook over medium heat, stirring, until thickened.
- Strain the warm syrup into the hot milk mixture in a steady stream, whisking constantly, then whisk in the egg yolks, vanilla and salt off the heat.
- Pass the custard through a sieve and let it cool slightly while you prepare the pastry.
- Roll the puff pastry into a tight spiral log, slice into 12 discs, and press each into a muffin tin, working the pastry up the sides into a thin cup.
- Fill each pastry cup three-quarters full with custard.
- Bake at the very top of an oven set as hot as it will go, ideally 250C or above, for 18 to 22 minutes until the tops are blistered and charred in spots.
- Cool briefly in the tin, then dust with cinnamon and serve warm.
A Pastry Born in a Monastery
The story of the pastel de nata begins, as so many great things do, with monks and an enormous surplus of egg yolks. In the convents and monasteries of Portugal, egg whites were used in vast quantities to starch nuns’ habits and to clarify wine. That left mountains of yolks, and the resourceful religious orders turned them into rich, golden custards and sweets. The pastel de nata is the most famous survivor of this tradition, developed at the Jerónimos Monastery in the Belém district of Lisbon before the early nineteenth century.
When the monasteries faced closure during the liberal upheavals of the 1830s, the monks sold their recipe to a nearby sugar refinery to raise money. The owners opened the Fábrica de Pastéis de Belém in 1837, and the recipe has been kept a closely guarded secret there ever since, made by a handful of pastry chefs sworn to silence. The tarts sold elsewhere are technically pastéis de nata, while only those from that one factory may be called pastéis de Belém. It is a lovely bit of pedantry to deploy at a dinner party.
The word nata simply means cream, and the tart travelled far beyond Belém. Portuguese emigration and empire carried it around the world, which is why you will find close cousins in Macau (the source, in turn, of the version that spread across east Asia), in Goa, in Brazil and in the Portuguese communities of Newark and Toronto. The Macanese tart, brought over by an English pharmacist who had tasted the Lisbon original in the 1980s, is baked slightly softer and less caramelised, and it is the one that conquered Hong Kong and beyond. All of them trace back to that convent surplus of yolks.
What you need
The ingredient list is short but exact. For twelve tarts you need 320g of all-butter puff pastry, 200g caster sugar, 120ml water, a cinnamon stick and a strip of lemon peel for the syrup, then 500ml whole milk, 50g plain flour, 6 large egg yolks, a teaspoon of vanilla extract and a quarter-teaspoon of fine salt for the custard.
Whole milk is not negotiable; semi-skimmed makes a thin, sad custard. All-butter puff matters just as much, because margarine-based pastry will not shatter the way a nata should. If you want to make your own rough puff it is well worth it, but a good chilled block from the supermarket is honestly fine here — the custard is where the magic lives.
The Two Components
A pastel de nata is really just two things done well: laminated pastry and a thickened custard. For the pastry, all-butter puff is essential, and my rough puff recipe is perfect here. The trick to that signature spiral pattern in the base is to roll the pastry into a tight log, slice it into rounds, and press each round cut-side-up into the tin so the layers spiral outward. Work the pastry thin up the sides with damp thumbs.
The custard is a cooked one, stabilised with a little flour so it holds its shape and develops that characteristic dense, almost flan-like set rather than running. The clever twist, and the part most home recipes skip, is infusing the sugar syrup with cinnamon and lemon peel and then streaming that hot syrup into the cooked milk-and-flour base. Cooking the custard in two stages like this gives you a far smoother, glossier result than simply whisking everything together, and the citrus-and-spice perfume runs all the way through rather than sitting only on top.
Method Notes That Matter
Strain the custard. Always. Even careful cooking leaves the odd lump of set egg or flour, and the texture of a good nata is flawlessly silky. Fill the pastry cups only three-quarters full, because the custard rises and bubbles as it bakes.
Then comes the single most important instruction in the whole recipe: heat. Pastéis de nata need a savage oven. The professionals bake them at temperatures of 350C or more, which is how they get those near-black blisters on top while the custard underneath stays barely set. A domestic oven cannot reach that, so set yours to maximum, usually 250C, put the tray as high as it will go, and accept that you will not get quite the same char. You can chase it by flashing the tarts under a hot grill for the final minute, watching them like a hawk.
Eating and Storing
Pastéis de nata are a warm pastry. Cold from the fridge they are still nice, but a little dull, the pastry softened and the custard stiff. Eat them within a couple of hours of baking if you can, dusted with extra cinnamon and, if you are feeling traditional, a whisper of icing sugar. A short, sharp espresso alongside is non-negotiable in my house.
If you must store them, keep them at room temperature for a day, then revive in a hot oven for a few minutes to re-crisp the pastry before serving. They never quite return to that first-bite glory, but reheated they are still worlds better than most things you could be eating instead. Make a full dozen. You will not regret it, and you will not have leftovers.
Troubleshooting the custard
Three things go wrong most often. A grainy or scrambled custard means the hot syrup went in too fast or the yolks cooked in the heat — stream the syrup slowly while whisking hard, and add the yolks off the heat. A weepy, watery tart usually means underbaking; the custard should be set with a slight wobble but not liquid, and a couple of extra minutes at full heat fixes it. And pale, unblistered tops are almost always a matter of oven position rather than timing: they need to sit as close to the top element as the tin will allow, taking the fierce direct heat that scorches the surface while the centre stays soft.
If your custard tastes flat, it is usually short on salt — that quarter-teaspoon does real work, sharpening the sweetness and the vanilla. And do let the filled tins rest a few minutes before they go in if the custard is still warm, so the pastry firms up rather than sliding down the sides.
Pastry problems are their own category. If the cups shrink or slump down the sides as they bake, the pastry was too warm when you shaped it — chill the lined tin for fifteen minutes before filling, and the layers hold their shape. Press the discs thin and even with damp thumbs, working the pastry all the way up the sides so there are no thick patches at the base that stay doughy. A little overhang at the rim is good; it crisps into shards. And if the bottoms come out pale and soft while the tops char, your tin is sitting too low or is too thick — a metal muffin tin conducts heat far better than a heavy ceramic one, and the higher the shelf, the better.
Variations and what to serve
Once you are comfortable with the method, the flavourings are yours to play with. A grating of orange zest into the syrup instead of lemon gives a rounder, warmer perfume; a scrape of tonka bean or a little extra cinnamon leans festive. Some cooks add a spoonful of cornflour alongside the plain flour for an even firmer set, which helps if your oven cannot get hot enough to blister the tops quickly.
If you want to lean into the origin story, a scrape of orange zest into the syrup is very Portuguese, and a splash of muscatel or a little tawny port in place of some of the water gives a grown-up, faintly boozy depth that suits the monastery pedigree. Some Lisbon bakers finish the tops with a light dusting of icing sugar as well as cinnamon, caramelising it briefly under the grill for an extra shattering layer. And for a party, you can bake them in mini muffin tins for two-bite versions, dropping the bake by a couple of minutes.
Serve them the Lisbon way, warm with a short espresso and a shake of cinnamon. If you have made a batch of custard-forward puddings before, the two-stage cooked custard here is a close relative of the baked filling in my rhubarb custard cake, where a loose batter sets around sharp fruit. And for a completely different but equally addictive sweet fix built on patience and restraint, the salted caramel sauce is the thing I reach for when I want to gild them further.
Related Content