Pão de Queijo From Tapioca Flour
The chewy Brazilian cheese ball that needs no wheat
Contents
↓ Jump to recipeThe first time I made pão de queijo I did everything the packet told me and ended up with two dozen flat, gummy pucks that stuck to the roof of my mouth. The problem was not the recipe. The problem was that I had bought the wrong starch, skipped the step that looked pointless, and pulled the trays too early because they had not browned like a scone. Every one of those mistakes is avoidable once someone tells you what the dough is actually doing, so let me tell you.
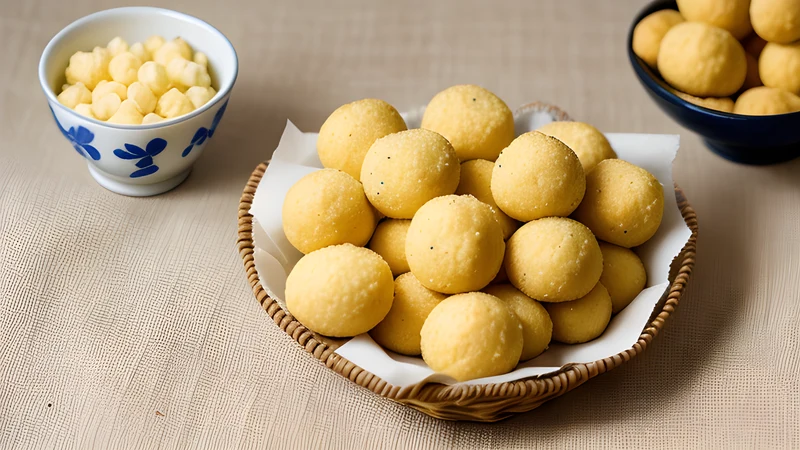
These are the little cheese rolls you find in every padaria in Brazil, sold hot by the bagful from a warming cabinet, eaten with coffee at seven in the morning and again at four in the afternoon. They are gluten-free by nature rather than by fashion, because the flour is really starch pressed from the cassava root. That single fact explains everything about their strange, wonderful texture: crisp and blistered outside, hollow and elastic within, closer to a cheese-flavoured mochi than to anything a wheat oven produces.
Pão de Queijo From Tapioca Flour
Ingredients
- 250g sour tapioca starch (polvilho azedo), or sweet tapioca starch if that is what you can find
- 120ml whole milk
- 60ml sunflower or other neutral oil
- 5g fine salt
- 2 large eggs, at room temperature
- 120g mature hard cheese, finely grated (aged Minas, or a mix of parmesan and mild cheddar)
Method
- Put the tapioca starch in a large heatproof bowl.
- Combine the milk, oil and salt in a small pan and bring to a rolling boil.
- Pour the boiling liquid over the starch all at once and stir hard with a wooden spoon. It will look lumpy and stringy — that is correct.
- Let the mixture cool for 10 minutes until warm rather than hot.
- Beat in the eggs one at a time, working each in fully before adding the next. Then work in the grated cheese. Knead in the bowl until you have a soft, tacky, uniform dough.
- Heat the oven to 190C fan. Line two trays with baking paper.
- Oil your hands and roll walnut-sized balls, spacing them 4cm apart.
- Bake for 20 to 22 minutes until puffed and pale gold with no wet sheen. Eat within the hour.
Why cassava, and why the sour kind
Cassava has fed the interior of Brazil for far longer than wheat has. The plant is native to the continent, indigenous communities were cultivating and detoxifying it for millennia before the Portuguese arrived, and in the state of Minas Gerais it became the backbone of the rural kitchen. The colonial dairy farms of Minas produced a fresh, tangy cows’-milk cheese, and somewhere in the eighteenth or nineteenth century the two local staples — cassava starch and farm cheese — were bound together with egg and baked. Pão de queijo is a Minas invention that went national, and later international, but it still tastes like the highlands it came from.
The starch you want is called polvilho. It comes two ways, and the difference matters more than any other choice in this recipe. Polvilho doce is sweet tapioca starch, the neutral white powder sold everywhere as tapioca flour. Polvilho azedo is the same starch after it has been left to ferment and sun-dry, which gives it a faint sourness and, crucially, the ability to expand dramatically in the oven. Sour polvilho makes the airy, hollow, slightly tangy roll that Brazilians consider the real thing. Sweet polvilho makes a denser, chewier ball that is still very good. If your shop only stocks tapioca flour without the word azedo, use it — just know you are making the denser version, and do not expect the same dramatic puff.
The scald is not optional
Here is the step people skip, and it is the one that makes the whole thing work. You bring milk, oil and salt to a proper boil and pour it over the raw starch, then stir like you mean it. This is a technique the Brazilians call escaldar, scalding, and it partly gelatinises the tapioca. The mixture turns lumpy, glossy and stringy, hanging off the spoon in weird elastic ropes. It looks broken. It is not.
What you have done is pre-cook some of the starch so that it can hold onto the moisture and the air later. Skip the scald and stir the eggs into raw starch and you get a batter that spreads and flattens in the heat instead of ballooning. Skip it and the inside stays pasty. The scald is the entire reason a scoop of what looks like wallpaper paste turns into a hollow shell. Do not rush it and do not try to shortcut it in a food processor with cold milk.
Getting the dough right
After the scald, let the mixture cool for a full ten minutes. If you add eggs to a mixture that is still scorching you will scramble them, and you will see little cooked yellow flecks through the dough. Warm is fine; hot is not. Touch the bowl — it should be comfortable against your palm.
Beat the eggs in one at a time. The dough will fight you and go slippery and strange as each egg goes in, then come back together. Once both eggs are worked through, add the cheese. Traditional pão de queijo uses queijo Minas curado, a semi-hard aged version of that Minas cheese, but it is hard to find outside Brazil. My reliable substitute is a mix of finely grated parmesan for the savoury depth and a mild hard cheese such as a young cheddar or a low-moisture mozzarella for the stretch and melt. Parmesan alone is too sharp and too dry; use it as half the total, not all of it.
The finished dough is soft, tacky and a little sticky, somewhere between a thick paste and a pliable dough. If it is so loose it will not hold a ball, work in another spoonful of starch. If it is stiff and cracks, a splash of milk loosens it. Tapioca starch varies in how much liquid it drinks, so treat the quantities as a strong starting point and adjust by feel.
Shaping and baking
Oil your hands well, because this dough clings. Roll walnut-sized balls — about 30g each — and set them on lined trays with a good 4cm between them, as they spread a little before they rise. For a smoother professional look, some cooks pipe the softer version, but hand-rolling is how it is done at home.
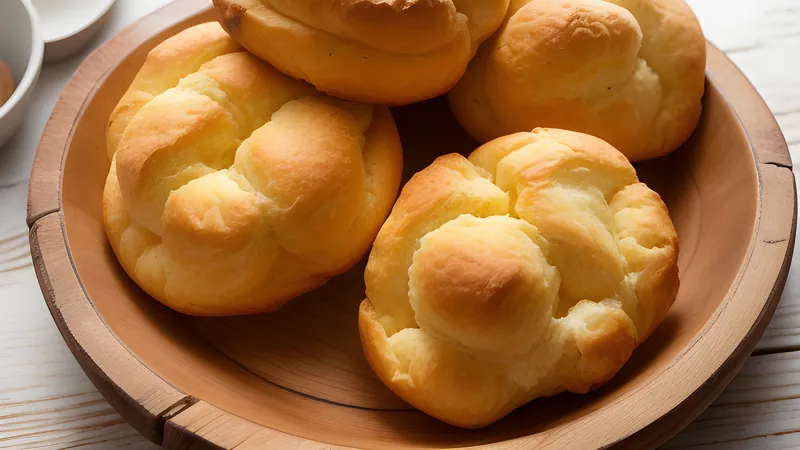
Bake at 190C fan. They are ready at around 20 minutes when they have puffed, the surface has lost its wet shine and they are pale gold rather than brown. Resist the urge to keep them in until they colour like a bread roll: tapioca browns reluctantly, and by the time they are properly tanned the insides have dried out. A pale, cracked, cheerful little dome is the goal. Give one the tap test — it should sound hollow.
Eat them hot. This is the honest truth about pão de queijo and the reason the padarias sell them straight from the cabinet: they are sublime within twenty minutes of the oven and merely pleasant an hour later. The chew tightens as they cool and turns rubbery by the next day.
Make-ahead, storage and the freezer trick
The single best thing about this recipe is that raw shaped balls freeze beautifully, and you bake them from frozen. Roll the whole batch, freeze them solid on a tray, then bag them up. When you want fresh pão de queijo, put as many as you like straight onto a lined tray and bake — add three or four minutes to the time. This is how you get warm cheese bread with a coffee on a Tuesday without making a mess. I always make a double batch and freeze most of it raw for exactly this reason.
Baked ones keep poorly, but if you have leftovers, a two-minute blast in a hot oven brings back some of the crispness. The microwave turns them into bouncy erasers, so avoid it.
When they go wrong
Flat and spread out: your dough was too loose, or you used sweet polvilho and expected sour-polvilho lift, or the oven was not hot enough when they went in. Preheat properly and firm the dough with a little extra starch.
Gummy and pasty inside: underbaked, or the scald was skipped or done with liquid that never reached a true boil. Give them the full time and make sure the milk is at a rolling boil before it hits the starch.
Rock hard by the time they cool: normal, up to a point — they are best hot. But cheese that is too dry (all parmesan, no melting cheese) makes them tighten faster, so keep that mild melting cheese in the mix.
Cracked tops: entirely fine and traditional. The shell puffs faster than it can stretch and splits a little. A cracked, blistered dome is what you want.
Variations worth trying
Once the base is in your hands, it takes flavourings gladly. Fold chopped cooked bacon or crisp guanciale through the dough for a smoky version. Work in a spoonful of finely chopped rosemary and a little black pepper. Swap a third of the cheese for a blue cheese if you want something adult and pungent. In Minas they sometimes make a larger, flatter version to split and fill with cream cheese and guava paste, the classic Romeu e Julieta pairing, for something between bread and dessert.
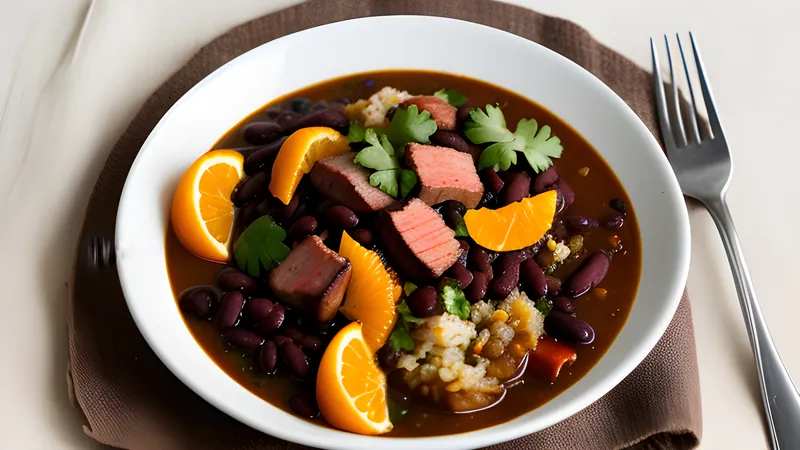
If you enjoy this way of cooking — big flavour from humble roots — the rest of the Brazilian table rewards the effort. The same cheese and starch world sits next to the deep-fried coxinha, and a weekend of proper Brazilian cooking usually ends in a pot of feijoada completa. For something lighter and coastal, the Bahian fish stew moqueca baiana is a good companion to a bowl of these while dinner cooks.
Make the scald properly, buy the sour starch if you possibly can, pull them from the oven pale, and eat them hot. That is the whole secret, and it is genuinely not a difficult one once you stop treating cassava starch like flour.
Related Content