Onigiri: Rice Balls With Three Fillings
Japan's everyday rice ball, built right so the nori stays crisp and the rice doesn't turn to glue
Contents
↓ Jump to recipeOnigiri: Rice Balls With Three Fillings
Ingredients
- 450g Japanese short-grain rice (uncooked weight), rinsed until the water runs clear
- 500ml water, for the rice cooker or pot
- 1 tbsp rice vinegar (optional, for a lightly seasoned rice)
- 1 tsp fine salt, plus extra for shaping
- 2 umeboshi (pickled plums), stones removed, flesh chopped
- 1 salmon fillet (about 150g), skin on
- 2 tbsp katsuobushi (bonito flakes)
- 1 tsp soy sauce
- 1/2 tsp sesame oil
- 2 sheets nori, cut into thirds
- toasted sesame seeds, optional, for the okaka filling
- cold water, for wetting hands during shaping
Method
- Rinse the rice in several changes of cold water until it runs mostly clear, then cook with the water in a rice cooker or covered pot until tender (about 20 minutes on the stove, resting for 10 minutes off the heat afterwards).
- While the rice cooks, grill or pan-fry the salmon fillet skin-side down until cooked through, about 6–8 minutes, then flake the flesh off the skin and bones into small pieces, discarding the skin or crisping it separately as a snack.
- Make the okaka filling by mixing the katsuobushi with soy sauce and sesame oil in a small bowl until the flakes are evenly coated and slightly damp.
- Turn the hot cooked rice out into a wide bowl and fold through the rice vinegar if using, working gently with a rice paddle to avoid crushing the grains.
- Wet your hands with cold water, then rub a small pinch of salt across your palms — this seasons the outer layer of rice and stops it sticking as you shape.
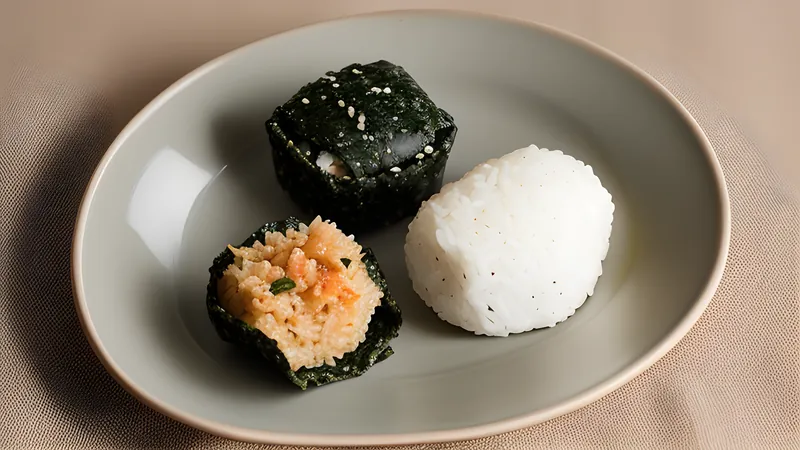
- Take roughly 100g of warm rice into one palm, press a shallow well into the centre with your thumb, and add a small spoonful of one filling (umeko, salmon or okaka).
- Fold the rice over the filling to enclose it completely, then shape into a triangle by cupping it between both palms and pressing three firm, even sides — rotate and press three or four times rather than squeezing continuously.
- Repeat with the remaining rice and fillings, re-wetting and re-salting your hands between each onigiri.
- Wrap a strip of nori around the base of each onigiri just before eating, not before, so the seaweed stays crisp rather than going soft and chewy against the warm rice.
The rice ball that runs the country
Onigiri is the food most Japanese people actually eat most often, more than sushi and far more than ramen, sold from every convenience store in the country in dozens of varieties and packed into lunchboxes by parents who might never make sushi rice at home but will absolutely have an opinion about how their onigiri should be shaped. It’s rice, salt, a filling and often a strip of nori, and the entire dish lives or dies on details that look trivial written down: how hard you press the rice, how much salt goes on your hands rather than in the rice itself, and when exactly the nori goes on.
The name comes from nigiru, to grip or squeeze, and that’s a more useful way to think about the shaping than “rolling” or “moulding” — you’re compressing rice grains against each other just enough that they hold together, not so much that you crush the individual grains into a paste. Convenience-store onigiri, made by machine, achieve a consistency that’s genuinely hard to replicate exactly by hand, but a slightly less uniform, hand-shaped onigiri with a bit more give in the middle is, if anything, the better eating experience — the shop version is built for shelf life and machine handling, not for the moment you actually bite into it.
A history longer than sushi’s
Rice balls carried by hand for travel or fieldwork show up in Japanese written records as far back as the Heian period, well before sushi in anything like its modern form existed, and long before nori was cheap or common enough to wrap around them as standard practice — that came later, once nori cultivation became widespread enough in the Edo period for ordinary households to afford it regularly. What stayed constant across centuries was the basic logic: cooked rice, salted heavily enough to keep for a day or two without spoiling, shaped by hand into something portable enough to eat without a bowl or chopsticks. Convenience stores didn’t invent onigiri so much as industrialise something that had already been a staple of Japanese travel food, lunchboxes and army rations for a very long time, right down to the double-wrapper trick that keeps shop-bought nori crisp, which is itself just a mechanised solution to a problem home cooks solved for generations by wrapping the nori on at the table.
The rice is the recipe
Japanese short-grain rice, cooked slightly firmer than you’d want for a bowl of plain rice to eat with chopsticks, is the only rice that works properly here. Its higher starch content is what lets the grains bond together under light pressure without needing egg, batter or anything else to hold the shape — this is completely different chemistry from long-grain rice, which stays separate no matter how hard you press it and will simply crumble apart in your hand. Rinsing the rice thoroughly before cooking, until the water runs close to clear, removes the surface starch dust that would otherwise make the cooked rice gluey rather than tender-but-distinct grain by grain, which is the texture you actually want inside a finished onigiri.
A splash of rice vinegar folded through the hot rice is optional and not traditional in the plainest versions, but it brightens the rice slightly and helps it keep a little longer without tasting sour the way proper sushi rice does — use a much smaller amount than you would for sushi rice if you include it at all. What is not optional is working with the rice while it’s still hot. Rice that’s cooled fully before shaping has lost the surface tackiness that lets grains bond, and you’ll find yourself compressing much harder to get a shape to hold, which crushes the rice and gives you a dense, gluey ball rather than a tender one.
Salting the hands as much as the rice
The characteristic seasoning of onigiri comes mostly from salt rubbed onto your palms rather than mixed into the rice itself, which might look like a strange half-measure written down but makes sense once you’ve made a few. Salting the rice evenly throughout would season every grain the same amount, but a lot of onigiri’s appeal is a slightly saltier, faintly savoury crust on the outside against plain rice within — closer to the contrast a good loaf of bread has between crust and crumb than to a uniformly seasoned rice dish. Wet hands first, so the salt sticks in an even film rather than clumping, and refresh both the water and the salt between onigiri rather than trying to make one salting last for a whole batch.
Three fillings, three logics
Umeboshi, the pickled plum, is the classic onigiri filling and the one that makes the most sense of the format’s history — it’s intensely sour and salty, which acts as a natural preservative, a genuinely important quality in a food designed to travel in a lunchbox or a soldier’s pack long before refrigeration was assumed. A single small plum, stone removed and the flesh roughly chopped, is plenty; more reads as overwhelming rather than generous, since umeboshi are far more concentrated in flavour than most people expect on first taste.
Salmon, grilled or pan-fried until the skin crisps and the flesh flakes apart easily, is the other classic and the most approachable for anyone trying onigiri for the first time — salt the fillet generously before cooking rather than relying on the rice’s seasoning to carry it, since the filling needs to taste distinct on its own inside a fairly plain rice shell. Flake it finely enough that it distributes through a bite rather than arriving as one large piece the filling well wasn’t built to hold.
Okaka — bonito flakes bound with a little soy sauce and sesame oil until they clump slightly — is the filling most home cooks skip and shouldn’t, since it takes about ninety seconds to make and delivers a deep, smoky-savoury depth entirely disproportionate to the effort. It’s also the most forgiving filling to have ready in the fridge, keeping for several days once mixed, for whenever you want an onigiri without planning a filling in advance.
Shaping without crushing
The triangular shape is traditional and practical — it packs efficiently into a lunchbox and gives you three flat sides to bite into rather than one continuous curve — but the technique matters more than the geometry. Cup the rice between both palms and press with three or four firm, deliberate motions, rotating slightly between each, rather than one long continuous squeeze. Continuous pressure crushes rice grains against each other past the point of bonding and into paste; short, firm presses compact the outer layer enough to hold a shape while leaving the rice inside the onigiri looser and more tender, which is the texture that actually eats well.
Nori goes on last, at the point of eating rather than at the point of shaping, for anyone taking their onigiri anywhere or eating it more than a few minutes after making it. Nori wrapped around warm rice immediately starts absorbing moisture and turns soft and slightly rubbery within twenty minutes or so — fine if you like that texture (some onigiri styles are built around it deliberately) but not what most people picture when they think of a crisp sheet of seaweed around their rice. Convenience stores solve this with a clever double-wrapper that keeps the nori physically separate from the rice until the plastic is peeled away just before eating; at home, simply wrapping the nori on separately just before you bite in achieves the same thing.
Tools, shortcuts and a related sandwich
Plastic onigiri moulds, sold cheaply at most Japanese or Asian grocers, are a legitimate shortcut if your hands struggle with the triangular shape — press the rice and filling into the mould, close it, and it pops out pre-shaped, though the result is noticeably more compact and less tender than a properly hand-pressed one, since the mould compresses the rice uniformly rather than leaving the loose, three-press texture that hand shaping produces. They’re worth having for children learning to make their own lunch, less worth it once you’ve got the hand technique down, since the difference in eating quality is real.
Onigirazu, a flattened, sandwich-style relative that wraps a full sheet of nori around a stack of rice, filling and often lettuce or a fried cutlet, then cuts the whole thing in half like a sandwich, has become popular enough in the last couple of decades to count as a genre in its own right rather than just a variant. It solves the same portability problem with a completely different shape and is worth trying once you understand what makes standard onigiri work, since several of the same principles — hot rice, a distinct filling, nori added with the moisture question in mind — carry over directly.
Storage, variations and what to serve alongside
Onigiri are best eaten within a few hours of shaping, at room temperature rather than chilled — refrigeration firms up the starch structure in a way that makes the rice taste hard and slightly chalky once it’s cold, a texture change specific to rice starch that doesn’t really reverse on reheating the way it might with other starches. If you need to make them ahead, wrap each in cling film without the nori and keep at cool room temperature for the day, adding nori only just before serving.
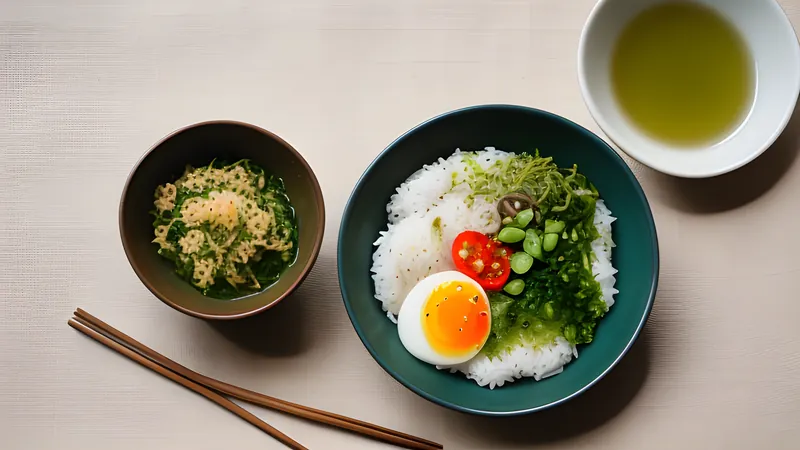
Other classic fillings worth trying once you’ve got the shaping down include tarako (salted cod roe), kombu simmered in soy and mirin until sticky, and a simple mayonnaise-bound tuna mix — none of them harder to make than the three here, just less essential to learn first. Whatever the filling, keep it dry rather than saucy; anything with excess liquid, from a wet mayonnaise mix to an under-drained pickle, will seep out into the surrounding rice and turn the texture patchy rather than staying contained in its own well at the centre. For something to serve alongside, a bowl of ochazuke makes good use of the same short-grain rice and a similar sense of restraint, while a jar of homemade umeboshi is worth starting months in advance if you want to fill your own onigiri with plums you salted and dried yourself rather than a jarred version bought from the shop.
Related Content