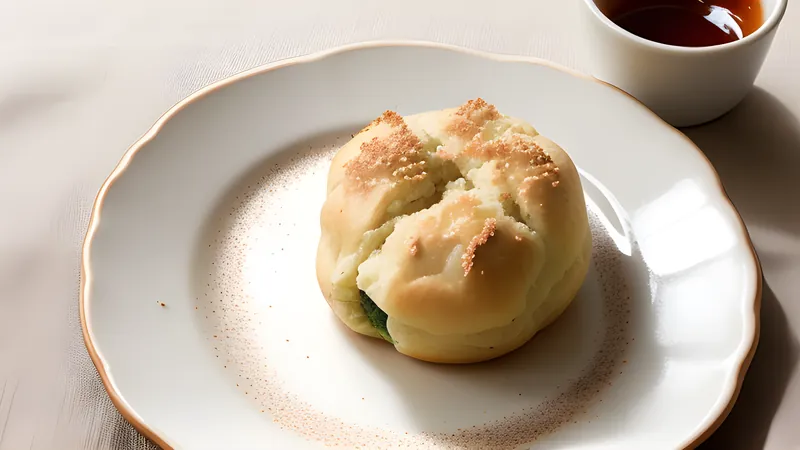
Melonpan: The Crackle-Topped Sweet Bun
A soft milk bread bun under a thin, crackled biscuit crust, named for its shape rather than its flavour
Contents
↓ Jump to recipeMelonpan: The Crackle-Topped Sweet Bun
Ingredients
- 300g strong white bread flour
- 30g caster sugar
- 5g fine salt
- 6g instant dried yeast
- 1 egg, beaten
- 150ml warm whole milk
- 30g unsalted butter, softened
- 1 tsp vanilla extract, for the dough
- 120g plain flour, for the cookie crust
- 80g unsalted butter, softened, for the crust
- 80g caster sugar, for the crust
- 1 egg, for the crust
- 1/2 tsp baking powder
- 1/2 tsp vanilla extract, for the crust
- granulated sugar, for rolling the crust dough balls
Method
- Make the bread dough: combine the flour, sugar, salt and yeast in a bowl, keeping the yeast away from direct contact with the salt. Add the egg, warm milk and vanilla, and mix to a rough dough.
- Knead for 10 minutes by hand or 6–7 minutes in a stand mixer until smooth and elastic, then work in the softened butter a little at a time until fully incorporated and the dough is glossy.
- Cover and prove in a warm place for 60–75 minutes, until roughly doubled in size.
- While the dough proves, make the cookie crust: cream the softened butter and sugar together until pale, then beat in the egg and vanilla.
- Fold in the plain flour and baking powder until you have a soft, slightly sticky cookie dough. Chill for 20–30 minutes to firm up.
- Once the bread dough has doubled, knock it back gently and divide into 8 equal pieces, shaping each into a tight ball. Rest for 10 minutes under a cloth.
- Divide the chilled cookie dough into 8 pieces and flatten each into a thin disc large enough to cover the top two-thirds of a bread dough ball.
- Drape a cookie dough disc over each bread ball, pressing gently to adhere and cover most of the surface, leaving the base bare.
- Roll the topped buns in granulated sugar, then score a shallow crosshatch pattern into the cookie crust with a knife or bench scraper, without cutting into the bread dough beneath.
- Prove the shaped buns for a further 30–40 minutes, until visibly puffed, then bake at 180°C (fan 160°C) for 15–18 minutes until deep golden and the crust has cracked along the scored lines.
- Cool on a wire rack for at least 10 minutes before eating — the crust firms up as it cools.
A melon that was never there
Melonpan doesn’t contain melon, taste much of melon, or have any real connection to the fruit beyond its shape and its surface pattern of shallow cracks, which some say resembles the netted skin of a cantaloupe closely enough to have given the bun its name sometime in the early 20th century. Others trace the name instead to an older bun called meronpan modelled on a completely different shape, or to a simple resemblance to a rounded melon in outline once the dough puffs up in the oven. Nobody involved in the bun’s early history seems to have settled the question definitively, and most Japanese bakeries selling it today aren’t especially bothered by the ambiguity — it’s simply the bun with the cracked, sugary crust, melon or no melon, and it’s one of the most recognisable items in a country’s bakery case that also contains a great many other Western-derived breads reworked into something distinctly Japanese.
Some modern versions do add a genuine melon flavouring to the dough or the crust as a wink to the name, using melon essence or a pale green tint, but the classic, most widely eaten version is plain vanilla throughout — sweet milk bread under a crisp, plain sugar-cookie crust, with the “melon” existing only in shape and name. This recipe makes the classic, unflavoured version, which is also the more useful one to learn first since the technique transfers directly to a melon- flavoured version if you want to add it later.
Two doughs, two very different jobs
Melonpan’s whole identity rests on the contrast between its two components, and getting that contrast right depends on treating them as genuinely separate doughs with separate goals rather than variations on a theme. The bread dough underneath is an enriched milk bread — soft, slightly sweet, given real structure by gluten development during a proper knead — built to rise, hold air, and stay tender for a day or two after baking, exactly like any other soft milk roll. The cookie dough on top is deliberately built without any yeast or leavening beyond a small amount of baking powder, creamed the way a shortbread or sugar cookie is, so that it bakes into something crisp and faintly crumbly rather than soft and bready.
The trick is that these two doughs, baked together, behave differently under heat: the bread dough continues to rise and expand in the oven, while the cookie crust, already committing to a firmer, drier structure, stretches to accommodate that expansion and cracks rather than rising along with it. That crackle is not a decorative afterthought scored in for looks — it’s the direct physical consequence of a stretchy, expanding dough underneath a comparatively rigid, non-elastic crust on top, and the scoring you do by hand before baking simply directs where those inevitable cracks will form, giving you the neat crosshatch pattern rather than a random scatter of splits.
A convenience-store staple with bakery roots
Melonpan sits in an unusual spot in Japanese food culture: genuinely sold everywhere, from neighbourhood bakeries to every convenience store chain in the country, cheap enough to be an everyday snack, and yet still made with real technique behind it — a proper enriched dough and a properly creamed cookie crust, not a shortcut version, even in its mass-produced convenience-store form. It belongs to the same broad category of Japanese bakery bread (pan, from the Portuguese via the same 16th-century contact that gave Japan tempura and nanbanzuke) as anpan, filled with sweet red bean paste, and curry pan, a deep-fried bun filled with curry — all Western bread technique absorbed and redirected towards distinctly Japanese fillings and shapes over the following centuries. Melonpan’s specific innovation, the cookie crust, doesn’t appear to have a clean single point of origin the way some of these other buns do, and various bakeries across Japan and Osaka in particular have made competing historical claims to having invented it first.
Building the bread dough properly
Treat the milk bread underneath exactly as you would any other enriched dough: knead it long enough to develop real gluten structure — the dough should turn from a shaggy, tearing mass into something smooth, elastic and only slightly tacky, which usually takes a good ten minutes by hand — and add the butter only once the gluten has already started developing, working it in gradually rather than all at once, since fat coats flour proteins and can slow gluten formation if it’s added too early in the process.
A generous first prove, to roughly double in size, matters more here than in a lean dough, since this is largely where the bread’s characteristic softness and open crumb get built; rushing this stage under the pressure of wanting to get to the more visually interesting cookie-topping stage is one of the more common reasons a home melonpan turns out denser than it should. Warm milk, around body temperature rather than hot, activates the yeast without risking killing it, and a genuinely warm spot for proving — near a radiator, inside a switched-off oven with the light left on, or simply a warm kitchen counter — makes a bigger difference to how reliably the dough rises than most home bakers give it credit for, especially in a cooler kitchen in winter.
Making and applying the cookie crust
Cream the butter and sugar for the crust properly, until genuinely pale and slightly fluffy rather than just combined, since this incorporates air that helps the crust stay a touch lighter rather than baking into something closer to a hard biscuit. Chilling the finished cookie dough before shaping is not optional — a soft, warm cookie dough is nearly impossible to drape evenly over a round bread ball without tearing or sliding straight off, while a well-chilled dough holds a flat disc shape and drapes cleanly.
Press the disc onto the bread ball gently rather than stretching or pulling it into place, since overworking the cookie dough at this stage will warm it back up and undo the chilling you just did. Rolling the assembled bun in granulated sugar before scoring gives the finished crust its characteristic sparkly, slightly crunchy surface — a step easy to skip in a rush, but one that makes a genuinely noticeable difference to how the finished bun looks and how the crust’s texture reads against your teeth.
Scoring, proving and baking
Score the crosshatch pattern with a light hand — you’re marking where the crust should crack, not cutting all the way through it, and definitely not into the bread dough underneath, which would let it bulge unevenly through the cuts rather than lifting the whole crust as one connected sheet riddled with clean cracks. The final proving stage, after shaping and scoring, needs to be respected too; an underproved bun will still crack attractively in the oven but the bread beneath will be dense and tight, undermining the entire point of the soft bread base.
Bake hot enough, and long enough, that the crust genuinely browns rather than staying pale — a pale melonpan crust tends to stay slightly soft rather than achieving the properly crisp, faintly crumbly texture that’s meant to contrast against the bread. Let the buns cool for a good ten minutes before eating; the crust is noticeably softer straight from the oven and firms up considerably as it cools, which is easy to mistake for underbaking if you taste one too early.
Troubleshooting the crust
A crust that slides off the bread ball rather than staying put during proving and baking usually means the cookie dough wasn’t chilled firmly enough before being draped on, or that it was pressed on too thin at the edges to grip the bread properly — aim for an even thickness across the whole disc, thin enough to crack cleanly but thick enough to hold together as one sheet rather than tearing into fragments as the bread rises underneath it. A crust that bakes pale and stays disappointingly soft, even after cooling, is nearly always an underbaking problem rather than a dough problem; give it another two or three minutes in the oven next time and watch for a genuine deep gold colour rather than pulling the buns as soon as they look merely done.
If the crosshatch scoring disappears entirely during baking rather than opening into visible cracks, the cuts were likely too shallow to begin with — press firmly enough with the scoring tool that you can see a clear indentation in the chilled dough before it goes anywhere near the oven, since a barely-there score line has nothing to catch and open as the bread swells beneath it.
Storage and variations
Melonpan is best eaten the day it’s baked, when the contrast between soft bread and crisp crust is at its sharpest — by the second day, moisture migrates from the bread into the crust and softens it noticeably, though the buns are still perfectly good split and lightly toasted, which restores some of the crust’s crispness. Store any leftovers at room temperature in a paper or loosely closed bag rather than sealed tightly in plastic, which traps moisture against the crust and speeds up the softening considerably.
A genuine melon-flavoured version simply adds a small amount of melon essence and a drop of green food colouring to the cookie crust dough, and some bakeries fill the centre of the bun with a disc of whipped cream or custard after baking and cooling, split partway through, for a version closer to a filled pastry than the plain classic bun. Chocolate chip melonpan, with a handful of small chips folded through the cookie dough before it’s chilled, is another common bakery variation and an easy one to try once the base method is reliable — just chill the dough slightly longer if the chips make it noticeably softer to handle.
Freezing baked melonpan works better than most soft breads manage, since the firm cookie crust protects the bread underneath reasonably well through a freeze and thaw — wrap individually, freeze for up to a month, and thaw at room temperature for a couple of hours before a very brief reheat in a low oven to bring some crispness back to the crust rather than eating it straight from frozen, which leaves the crust noticeably tougher than it should be. If you’re building a wider Japanese sweets table, my dorayaki shares the same instinct for soft, faintly sweet dough, though the technique is otherwise unrelated, and a matcha latte alongside a warm melonpan makes for a genuinely good simple breakfast.
Related Content