Medu Vada: Fermented Lentil Doughnuts
Whipped urad dal batter, briefly fermented, shaped by hand and fried crisp

Contents
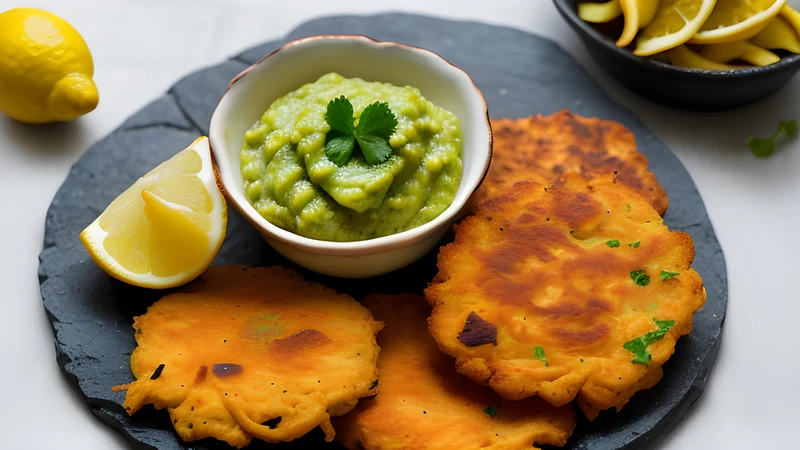
↓ Jump to recipeMedu vada are savoury lentil doughnuts, ring-shaped for the same reason a real doughnut is: the hole lets the inside cook through as quickly and evenly as the outside, so a piece the size of your palm fries crisp on every surface without ever going raw in the middle. Made properly they are impossibly light for something built almost entirely from ground lentils — craggy and golden outside, honeycombed with air pockets within, closer in texture to a savoury choux than to anything you would call dense.
My twist is to actually let the ground batter ferment before frying, for six to eight hours rather than the twenty-minute rest a lot of shortcut recipes settle for. A short natural ferment does two things a same-day batter cannot: it lightens the crumb further as the batter’s own wild yeasts and bacteria produce a little extra gas, and it adds a faint, genuine sourness underneath the pepper and chilli that a quick version simply does not have. It is the same principle behind a properly fermented dosa batter, just on a shorter clock because vada batter is thicker and has less rice in it to slow things down.
Medu Vada: Fermented Lentil Doughnuts
Ingredients
- 250g split, husked urad dal (white lentils), soaked 4 hours
- Cold water, as needed for grinding
- 1 tsp fine sea salt
- 1 tbsp black peppercorns, coarsely cracked
- 1 tbsp cumin seeds
- 2 green chillies, finely chopped
- 1 thumb ginger, finely chopped
- 2 sprigs fresh curry leaves, finely shredded
- 1 small onion, finely diced (optional)
- 1/4 tsp asafoetida
- Neutral oil, for deep-frying
Method
- Drain the soaked urad dal and grind in a blender with only as much cold water as needed to keep the blades turning — a few tablespoons at a time — until you have a thick, smooth batter roughly the consistency of soft-whipped cream. Over-adding water at this stage cannot be undone.
- Whip the batter vigorously by hand for 4-5 minutes, or on low speed in a stand mixer, until visibly lighter and increased in volume, with small air bubbles throughout. Test by dropping a small ball into a bowl of water; it should float.
- Cover and leave at room temperature for 6-8 hours, or overnight in a cool kitchen, until faintly puffed and lightly sour-smelling. In a hot climate this may take half that time; in a cold kitchen it may need longer.
- Fold in the salt, cracked pepper, cumin, green chillies, ginger, curry leaves, onion if using, and asafoetida, taking care not to knock too much air out of the batter.
- Heat oil to 170-180C in a deep pan or wok. Wet your hands and a small square of plastic or banana leaf. Take a portion of batter, pat it into a disc on the wet surface, and poke a hole through the centre with a wet finger to form a ring.
- Slide each ring gently into the hot oil off the wet surface. Fry in batches of 3-4, turning occasionally, for 6-7 minutes until deep golden brown and crisp all over.
- Drain on a wire rack rather than paper towels, which trap steam underneath and soften the base. Serve immediately, hot, with coconut chutney and sambar.
A snack older than most of what shares its plate
Vada in some form appears in Sangam-era Tamil literature from roughly two thousand years ago, making it one of the oldest continuously cooked dishes in the South Indian repertoire — older, certainly, than the tomato-based rasam or the tamarind chutneys that now sit alongside it on the same plate. The word itself is thought to derive from the Sanskrit vata or vataka, meaning a small round cake, and the dish has splintered into regional versions with their own names: uddina vade in Karnataka, garelu in Andhra Pradesh, ulundu vadai in Tamil Nadu. The base technique — ground urad dal, whipped for air, shaped by hand, fried — stays remarkably consistent across all of them even as the seasoning shifts.
Medu, specifically, is a Kannada word meaning soft, describing the ideal texture of the interior once you bite through the crisp shell, and it has become the common name for this particular ring-shaped, plain-batter version across most of South India regardless of which state’s dialect coined it. Vada also carries genuine religious weight in the south: it is a standard offering at temples alongside rice dishes like ven pongal, and the pairing of vada with sambar and chutney has become such a fixed unit of South Indian breakfast culture that ordering “one vada” in a Chennai café gets you a plate with both accompaniments without needing to ask.
Why the batter has to be nearly dry
The single hardest technical skill in this recipe is controlling how much water goes into the grinder, and it is also the reason most home attempts turn out flat and oily rather than light and crisp. Urad dal grinds into a thick, sticky paste that wants very little liquid; add water freely the way you might for a pancake batter and you end up with something too loose to shape and too wet to hold air, which fries dense and greasy because the batter cannot support the steam bubbles that would otherwise puff it up. Add water in tablespoons, pulsing the blender rather than running it continuously, and stop the moment the blades turn freely — you are aiming for something closer to a thick, spoonable paste than a pourable batter.
The float test is the reliable check: drop a small ball of finished batter into a bowl of plain water, and it should float rather than sink. A batter that sinks is either under-whipped, meaning it has not incorporated enough air, or too wet, meaning the structure cannot hold what air it has. Whipping by hand, using a cupped palm to repeatedly lift and slap the batter back into the bowl, works the same way whisking egg whites does, mechanically folding air into a matrix of proteins that will later set around it in the hot oil.
The short ferment, and what it’s actually doing
Urad dal batter contains enough natural bacteria and wild yeast on the lentils themselves to begin fermenting on its own within a few hours at warm room temperature, the same organisms responsible for the longer, better-known ferment behind masala dosa’s two-day batter. Vada batter needs far less time because it is thicker, has no rice diluting the lentil proportion, and is not being asked to develop the same degree of tang a dosa batter wants — six to eight hours gets you a batter that is visibly puffier and smells faintly sour without tipping into the assertively fermented flavour a longer rest would produce. In a hot kitchen, check it at the four-hour mark; overproofed vada batter goes slack and loses the structure it needs to hold a shape.
Shaping without a mess
Wetting your hands and the surface you shape on, rather than flouring them, is not optional. Urad dal batter sticks aggressively to dry skin and to any dry surface, and a floured hand introduces raw flour taste and a gluey outer layer that fries differently from the batter itself. Keep a bowl of water within reach, re-wet your palm between every vada, and work quickly — a batter left sitting on a wet plastic square starts to weep water back out and loses its shape if you dawdle. Poking the central hole with a wet finger rather than a spoon handle gives a cleaner, more even ring, since a finger flexes slightly with the batter’s resistance in a way a rigid tool does not.
Frying temperature and why it drifts
Oil at 170-180C is the target, hot enough that a small piece of batter dropped in rises to the surface within a couple of seconds, trailing bubbles, rather than sitting on the bottom. Frying in batches of three or four rather than crowding the pan matters because each cold vada dropped into the oil drops the overall temperature, and an oil bath that has cooled below about 160C fries vada that absorb noticeably more oil and never crisp properly — greasy rather than light. Let the temperature recover between batches rather than rushing the next one in.
Serving and keeping
Medu vada are at their best within minutes of frying, while the outside is still audibly crisp; they soften on standing as residual steam from the interior migrates outward, which is why draining on a rack rather than paper towels matters — trapped steam underneath speeds up exactly this softening. Serve with coconut chutney and a bowl of hot rasam or sambar for dunking, the classic South Indian breakfast trio.
They do not keep well fried; the texture is genuinely a one-sitting thing. If you want to prepare ahead, the fermented batter itself keeps in the fridge for up to two days in a sealed container, and you can shape and fry vada fresh in smaller batches as needed rather than frying the whole quantity at once and trying to revive it later. Reheating already-fried vada in a low oven brings back some crispness but never fully recovers the original texture — a fresh fry from stored batter is always the better option if you have the time.
Related but different: masala vada
It is worth being clear about what medu vada is not, because the name “vada” covers a family of fried lentil snacks that get confused with each other outside India. Masala vada, sometimes called parippu vada, is made from chana dal or a mix of lentils ground coarsely rather than smooth, shaped into rough flat discs rather than rings, and deliberately left chunky in texture with visible lentil fragments — closer to a lentil fritter than the smooth, whipped, doughnut-like medu vada here. The two are cooked side by side at most South Indian snack counters but are genuinely different dishes with different batters, different textures and different roles on the plate; masala vada is often eaten on its own as a teatime snack, while medu vada is built specifically to be paired with sambar and chutney.
Onion vada is closer kin to medu vada, using largely the same batter with a more generous handful of finely diced onion folded through, and shaped as a rough disc rather than a precise ring since the onion pieces make a clean hole harder to hold. If you want that version, double the onion in the ingredient list here and skip the central hole — onion vada is traditionally shaped free-form and dropped straight into the oil from a spoon.
What goes wrong, and why
Dense, oily vada almost always trace back to one of two causes: too much water in the batter, or oil that was not hot enough. Both produce a similar result, a heavy, greasy exterior, but they come from opposite ends of the process, which is why it is worth diagnosing rather than just adjusting blindly the next time. If the raw batter looked properly thick and held its shape on a spoon but the fried vada still turned out heavy, suspect the oil temperature first — a thermometer removes the guesswork, since judging 170C by eye alone is a skill that takes a few batches to build.
The second common failure is a batter that never puffs during the ferment, usually because the kitchen was too cold or the dal was old and had lost some of its natural fermenting bacteria. If your batter looks exactly the same after eight hours as it did fresh off the blender, move the bowl somewhere warmer — near a switched-on oven with just the light on, or wrapped in a towel — rather than assuming the recipe has failed; urad dal batter is forgiving of a slow start but does eventually need some warmth to get going.
A cracked or uneven ring, meanwhile, is almost always a wet-hands problem rather than a batter problem — re-wet your palm before every single vada, since the batter dries and grips within seconds on skin that has started to dry out between shapings.
Soaking time for the dal is the other quiet variable. Four hours is a minimum; the dal needs to soften enough to grind into a genuinely smooth paste rather than a gritty one, and a gritty grind never whips to the same volume no matter how long you work at it by hand. If your kitchen runs cold, add an extra hour of soaking rather than trying to compensate with more grinding time later.
Related Content