Hazelnut Dacquoise with Coffee Buttercream
Crisp nutty meringue layers and a silky coffee filling
Contents
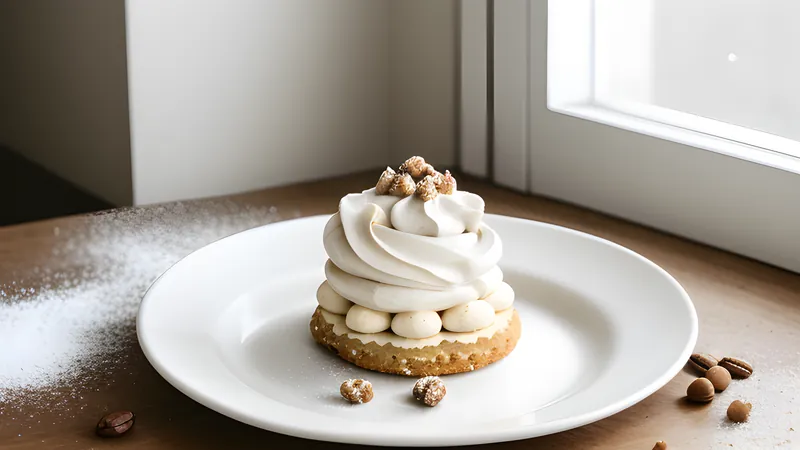
↓ Jump to recipeThere is a particular kind of pudding that looks far harder than it is, and dacquoise sits comfortably at the top of that list. Underneath the elegant name is a stack of nutty meringue discs, baked until crisp and faintly chewy, layered with a buttercream that here is shot through with proper coffee. It is the sort of thing you bring to the table and watch people sit up a little straighter, yet the whole construction rests on egg whites, ground nuts and a bit of patience. The twist that lifts it from good to genuinely memorable is leaning hard into the coffee: both fresh espresso and instant espresso powder, so the bitterness has somewhere to land against all that sweetness.
Hazelnut Dacquoise with Coffee Buttercream
Ingredients
- 150g blanched hazelnuts, plus 30g for decoration
- 200g icing sugar, plus extra for dusting
- 30g plain flour
- 5 large egg whites (about 165g)
- 100g caster sugar
- 0.25 tsp fine salt
- 200g unsalted butter, softened
- 150g icing sugar, for the buttercream
- 2 large egg yolks
- 3 tbsp strong espresso, cooled
- 1 tbsp instant espresso powder dissolved in 1 tbsp boiling water
- 1 tsp vanilla extract
Method
- Heat the oven to 160°C fan and toast 180g hazelnuts on a tray for 10 minutes until fragrant, then cool.
- Blitz 150g toasted hazelnuts with 200g icing sugar and 30g flour until finely ground but not oily.
- Whisk 5 egg whites with 0.25 tsp salt to soft peaks, then add 100g caster sugar a spoonful at a time, whisking to a stiff, glossy meringue.
- Fold the nut mixture gently into the meringue in three additions, keeping as much air as possible.
- Pipe or spread the mixture into three 20cm discs on lined trays and bake at 150°C fan for 75 to 90 minutes until dry and crisp, then cool completely.
- Beat 200g softened butter with 150g icing sugar until pale and fluffy.
- Beat in 2 egg yolks one at a time, then 3 tbsp espresso, the dissolved instant espresso, and 1 tsp vanilla until smooth.
- Stack the three discs with buttercream between each layer, finishing with a thin coat on top.
- Dust with icing sugar, scatter with 30g chopped toasted hazelnuts, and chill for 1 hour before slicing.
A meringue with a French pedigree
Dacquoise takes its name from Dax, a spa town on the Adour river in southwest France; dacquois simply means “of Dax”. The word originally described a cake in the style of that town, and over time it came to mean the component itself — a meringue enriched with ground almonds or hazelnuts that bakes firmer and more substantial than a plain Pavlova-style meringue. The most reliable accounts place its rise in the late nineteenth and early twentieth centuries, drawing on the almond and hazelnut harvests of the southwest and local Pyrenean pastry technique. The nuts and a little flour give it backbone, so it can be stacked and filled without collapsing into chewy rubble.
You will find dacquoise hiding inside some of the grandest French gateaux, where pastry chefs use the discs as a structural layer between mousses and ganaches. The most famous descendant is the marjolaine, a long rectangular cake credited to the chef Fernand Point, which layers almond and hazelnut dacquoise with chocolate buttercream. The hazelnut-and-coffee pairing I use here belongs to the same tradition, echoing a good gianduja or a strong morning espresso beside a pastry. Making it at home strips away the intimidation: you are baking three nutty meringues and sandwiching them, which is well within reach of an ordinary kitchen.
How it comes together
Start by toasting the hazelnuts, which wakes up their flavour and loosens any remaining skins so you can rub them off in a tea towel. Toast a little extra — around 180g — so you have 30g left for the top. Once cooled, blitz 150g of them with the icing sugar and flour. The sugar stops the nuts turning to paste, so pulse in short bursts rather than blending continuously, and stop the moment you have a fine, sandy meal. Go further and the nuts release their oil and clump.
The meringue is straightforward. Whisk the whites with the salt to soft peaks, then rain in the caster sugar a spoonful at a time to build a stiff, glossy structure that holds a firm peak on the whisk. Fold the nut mixture in gently and in three stages, treating the meringue like something fragile, because every knock is air you lose and air is what keeps the discs light. Spread or pipe three even 20cm discs onto lined trays and bake low and slow at 150°C fan for 75 to 90 minutes, until dry all the way through. This long, gentle bake is what gives dacquoise its signature crackly top and tender, biscuit-like interior.
The buttercream here is a simple French-style one, built on softened butter, icing sugar and egg yolks for richness, then flavoured generously with coffee. Using cooled espresso plus a spoonful of dissolved instant coffee gives a deep, slightly bitter edge that keeps the dessert from cloying — the instant powder concentrates the coffee note without adding more liquid to slacken the butter. Stack the discs with the buttercream, dust the top with icing sugar, scatter the reserved chopped hazelnuts, and let it settle in the fridge for an hour so the layers marry and slice cleanly.
Getting the meringue right
The meringue is the whole foundation, so it is worth understanding what you are doing to it. Start with a scrupulously clean, grease-free bowl and whisk, because even a trace of fat — a smear of yolk, an oily bowl — will stop the whites whipping to a proper foam. Separate the eggs carefully one at a time into a small cup before adding each white to the bowl, so a broken yolk spoils only one egg rather than the lot. Whites whip best at room temperature, so take them out of the fridge half an hour ahead.
Whisk to soft peaks first — the point where the foam holds a peak that flops gently at the tip — then add the caster sugar a spoonful at a time. Adding it too early or all at once collapses the foam and gives a dense, weepy meringue; adding it gradually lets each spoonful dissolve into the structure and builds the glossy, stable meringue you need. It is ready when it stands in a stiff, shining peak and you can rub a little between your fingers without feeling grains of undissolved sugar. Only then fold in the nut mixture, and fold with a big metal spoon or spatula in slow, deliberate strokes, cutting down through the middle and turning the bowl. You are trying to keep the air you just worked so hard to build in.
Baking the discs
Draw three 20cm circles on your baking parchment as a guide, flip the paper over so the pencil does not touch the meringue, and either pipe the mixture in a spiral from the centre out or spread it with a palette knife to the lines. Bake low, at 150°C fan, for 75 to 90 minutes. This is closer to drying than baking: you want the moisture driven out slowly so the discs set crisp without browning much beyond a pale gold. If your oven has hot spots, rotate the trays halfway. The discs are done when they lift cleanly off the paper and sound hollow and papery when you tap the underside. Let them cool completely on the trays before you even think about moving them, because warm meringue is fragile and bends.
Tips, make-ahead and variations
The meringue discs are the part that can go wrong, and almost always for the same reason: underbaking. If they are still tacky or bendy when cool, they will weep under the buttercream and the whole stack turns damp. Bake them until they lift cleanly off the paper and feel light and crisp, and if your oven runs hot, drop the temperature and extend the time rather than risk them browning.
This is an excellent make-ahead pudding. The baked discs keep for several days in an airtight tin, so you can spread the work out over an afternoon and an evening. Assemble it the day before serving and keep it chilled; an overnight rest actually improves the texture as the buttercream softens the meringue very slightly into a melting, almost mousse-like layer. Bring it to cool room temperature for twenty minutes before serving so the buttercream is not fridge-hard.
For variations, swap the hazelnuts for almonds or pistachios, or fold a tablespoon of cocoa into the nut mixture for a chocolate-hazelnut version that leans towards the classic gianduja profile. If coffee is not your thing, a praline or salted caramel buttercream works beautifully against the same nutty base — the salted caramel sauce I keep in the fridge folds straight into softened butter for exactly that. If you love the chocolate-and-hazelnut axis, my chocolate hazelnut and sea salt tart chases the same flavour from a different direction. You can also pipe the discs as smaller rounds and build individual dacquoise stacks for a dinner party, which look impressive and remove the worry of cutting cleanly at the table. And do not skip the pinch of salt in the meringue: it is the quiet thing that stops the dessert tasting flatly sweet and lets the coffee sing.
A word on serving and cutting, since a dacquoise is only as impressive as the slice you put on the plate. Use a long, thin knife — a bread knife works well — and dip it in a jug of hot water and wipe it dry between each cut. The warm blade glides through the crisp meringue instead of shattering it, and wiping stops buttercream dragging from one slice to the next. Cut with a gentle sawing motion rather than pressing straight down, which crushes the layers. A well-rested dacquoise, cut this way, gives clean stripes of pale meringue and coffee cream that look every bit as good as the effort suggests. Serve it with nothing more than a strong black coffee alongside; it needs no cream, no sauce, no fruit.
One final word on weather. Meringue hates humidity, because sugar is hygroscopic and pulls moisture from damp air. On a wet day the discs take longer to dry out and may soften again once cooled, so bake them on a dry day if you can, and store them somewhere dry until you assemble. Get that right, and a homemade dacquoise will quietly outclass most of what you could buy.
Related Content