Fermented Hot Sauce with Habanero and Garlic
a living jar of fire that gets better with time
Contents
↓ Jump to recipeWear gloves. I am opening with that because every fermented hot sauce story should, and because I learned the hard way that habanero oils do not care about your plans for the rest of the day. The heat in a chilli comes from capsaicin, an oil-soluble compound concentrated in the pale pith and seeds, and once it is on your fingers water will not shift it; it will, however, transfer cheerfully to your eyes, your nose and anywhere else you touch for hours afterwards. Nitrile gloves cost pennies and save an evening of regret. With that out of the way: this is the condiment that turned me from someone who owned seven half-finished bottles of shop hot sauce into someone who makes one bottle that beats all of them.
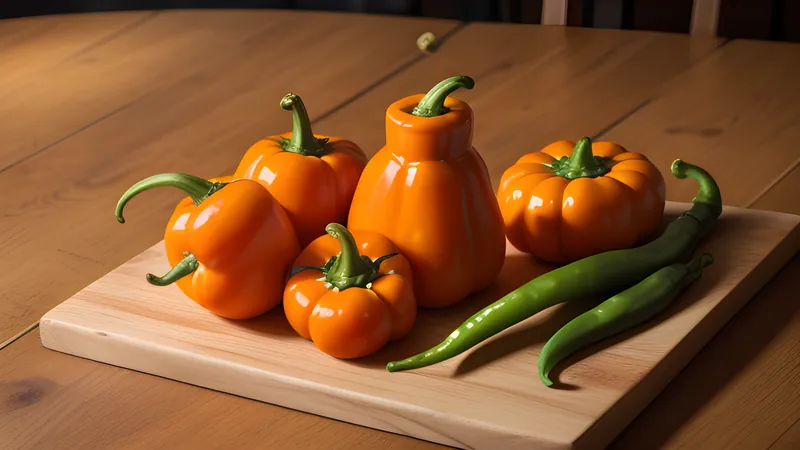
The habanero and its close relative the Scotch bonnet sit near the top of the everyday heat scale, around 100,000 to 350,000 on the Scoville scale, roughly forty times hotter than a jalapeño. But they are not just heat: under the burn there is a genuine fruitiness, almost tropical, with notes of apricot and citrus, and it is that character the ferment coaxes forward. If habaneros frighten you, this same method works with any chilli at all, so start with something gentler and work up.
Fermented hot sauce is not just chillies blitzed with vinegar. The fermentation step changes everything. You submerge the chillies in a simple salt brine, let wild lactic acid bacteria go to work for a week or two, and they transform the raw, one-dimensional heat into something layered, tangy and deeply savoury. It is the same family of process, lactic fermentation, that gives you sauerkraut, kimchi and, yes, the famous aged-mash hot sauces sold in little wooden-crate bottles, whose makers ferment their pepper mash in oak barrels for years. You are doing the same thing on a small, fast, kitchen scale.
Fermented Hot Sauce with Habanero and Garlic
Ingredients
- 200g fresh habanero or Scotch bonnet chillies, stalks removed
- 1 medium carrot, roughly chopped (about 80g)
- 6 fat garlic cloves, peeled
- 1/2 small onion, roughly chopped
- 500ml unchlorinated water
- 25g (about 2 tbsp) fine sea salt, plus extra
- 3–4 tbsp apple cider vinegar, to finish
Method
- Dissolve the salt in the water to make a 5% brine.
- Pack the chillies, carrot, garlic and onion into a clean jar, leaving headroom at the top.
- Pour over the brine until everything is submerged, then weigh the vegetables down so nothing floats.
- Loosely cover and leave at room temperature for 7–14 days, burping the jar daily, until pleasantly sour and fizzy.
- Strain, reserving the brine, and blend the solids with enough brine to reach a pourable consistency.
- Blend in the vinegar to taste, bottle, and refrigerate.
Why ferment instead of just blending?
Raw chilli sauce tastes like raw chilli: sharp, green, and aggressive in a way that flattens whatever it touches. Fermenting it does what time does to most good things — it rounds the edges. The process is driven by Lactobacillus and related bacteria that live naturally on the surface of fresh vegetables. In the oxygen-free environment under the brine, and with salt holding back their competitors, they feed on the plant sugars and produce lactic acid as a by-product. That acid gives a clean, complex, yoghurty sourness very different from the harsh, one-note hit of straight vinegar. The bacteria also break down the chillies and garlic into something mellower and more aromatic, generating new savoury and fruity compounds along the way and building a backbone of flavour you simply cannot fake by blending. The result is hot, yes, but it is also interesting, and you find yourself reaching for it on eggs, tacos, roast vegetables, soup, and frankly most things that are not pudding. A spoonful stirred into a pot of chicken enchiladas or drizzled over a smash burger does more for the plate than any bottle from the supermarket shelf.
The one clever twist: a carrot in the jar
Here is the small move that makes this sauce better than most: ferment a chopped carrot alongside the chillies. It sounds odd. It is not. The carrot contributes a gentle natural sweetness and a little body that balances the searing heat of the habaneros, so the finished sauce has roundness rather than just a wall of fire. It also feeds the fermentation nicely. You will not taste “carrot” in the final bottle — you will taste a hot sauce that is somehow more complete, with a faintly fruity warmth under the burn. People assume there is some secret ingredient. The secret is a vegetable that costs ten pence.
Building the ferment
Everything hinges on the brine. Make it 5% salt by weight of water — 25g of salt to 500ml is the easy ratio to remember — because that concentration favours the good lactic bacteria and discourages the spoilage organisms you do not want. Use unchlorinated water if you can; chlorine can stall a ferment. Filtered or briefly boiled and cooled tap water both work.
Pack the chillies, carrot, garlic and onion into a clean jar with a couple of centimetres of headroom. Pour over the brine until everything is covered, then weigh it down. This is the non-negotiable bit: anything floating above the brine can grow mould. A small water-filled bag, a fermentation weight, or even a clean shot glass pressed on top all do the job.
Cover loosely — fermentation produces gas and the jar needs to vent. Leave it somewhere around 18–22°C, out of direct sun. Within a day or two you should see tiny bubbles and the brine turning cloudy; that is the ferment waking up. “Burp” the jar daily by briefly loosening the lid to release pressure.
Knowing when it is ready
Taste it after about a week, using a clean spoon each time so you do not introduce anything unwanted. You are looking for a pleasant, clean sourness and a gentle fizz on the tongue — bright, lively, a little tangy, with the raw green edge of the chilli gone. In a warm kitchen this can take 7 days; in a cooler one, up to 14; temperature is the main lever, and warmer means faster but also a little less controlled. There is no exact finish line; ferment until you like the flavour. A healthy ferment smells sour and appetising. If it ever smells genuinely rotten or grows fuzzy, coloured mould, throw it out — but with the vegetables kept submerged, this almost never happens.
When you are happy, strain the solids from the brine and blend them, adding brine back a splash at a time until the sauce pours the way you like. Finish with apple cider vinegar to taste; this both sharpens the flavour and lowers the pH for safe keeping. Bottle it and store it in the fridge, where it keeps for months and quietly improves for the first few weeks.
A word on safety and salt
Lacto-fermentation is one of the oldest and safest forms of food preservation, but it earns that safety through two things you must not shortcut: salt and submersion. The 5% brine is not arbitrary. At that concentration the salt tolerates the lactic bacteria you want while suppressing most of the spoilage microbes and moulds you do not, and as the ferment gets going the falling pH takes over as the main line of defence. That is why the acidity climbs steadily over the days: the environment becomes progressively more hostile to anything harmful. Keeping everything under the brine matters just as much, because mould and the film-forming yeasts called kahm need air to grow. Kahm yeast, a wrinkly white film that sometimes appears on the surface, is harmless and can be skimmed off; fuzzy, coloured, dry-looking mould is not, and means the batch goes in the bin. Weigh your vegetables down and you will rarely, if ever, meet either.
Finishing with vinegar is a small extra insurance. It drops the pH of the blended sauce below 4.0, the level generally considered safe for an acidified condiment, and it also brightens the flavour. If you want to be exact, a cheap pH strip or meter takes the guesswork out; aim for a reading of 3.5 or lower before you call it done and stash it in the fridge.
Make it yours
Once you have the method, the variations are endless. Swap in red jalapeños for a milder, smokier sauce, throw in a roasted red pepper for sweetness, or add a thumb of ginger to the jar. A few smashed garlic cloves more will push it firmly into garlic-lover territory, which is where I usually take it. A charred, smoky version comes from blackening the chillies over a flame before they go into the brine; a fruitier one from fermenting a chopped mango or a handful of pineapple alongside, though sweeter ferments move faster so watch them closely. Whatever you do, keep the salt ratio and keep everything submerged, and the bacteria will reward you.
What to do with a bottle of it
The whole point of a good hot sauce is that it goes on almost everything, and a fermented one, being tangy as well as hot, works in places a straight vinegar sauce would jar. A few drops wake up scrambled or fried eggs; it cuts through the richness of roast pork or a fatty burger; it lifts a bowl of beans, a dull soup, or roast vegetables that need an edge. I keep it on the table for tacos and for anything involving cheese, where the acidity does the same job a squeeze of lime would. Stir a teaspoon into mayonnaise for an instant spicy dressing, or whisk it into a marinade. Because it is fermented and lively rather than merely hot, it seasons rather than simply scorches, and that is what keeps you reaching for it. One bottle, made once, will see off your entire cupboard of forgotten shop sauces, and you will have made something genuinely, gloriously alive.
Related Content