Danish Pastry Dough from Scratch (with Three Fillings)
Laminated dough, three ways: custard, almond, cinnamon
Contents
↓ Jump to recipeThere is a quiet smugness that comes from pulling a tray of homemade Danish pastries out of your own oven, and it is entirely earned. Laminated dough has a fearsome reputation, but Danish is the friendliest of the laminated family. It is enriched with egg, sugar and milk, so it is forgiving where puff pastry is precise, and it rises with yeast as well as steam, which papers over a multitude of small sins in your folding. Spend one unhurried morning on it and you will never look at a supermarket pain au raisin the same way again. What follows is one dough, one small twist, and three fillings that turn it into a proper bakery selection.
Danish Pastry Dough from Scratch (with Three Fillings)
Ingredients
- 500g strong white bread flour
- 60g caster sugar
- 10g fine salt
- 10g fast-action dried yeast
- 1 tsp ground cardamom (optional but recommended)
- 1 large egg
- 200ml cold milk
- 50g soft butter (for the dough)
- 250g cold unsalted butter (for laminating)
- 1 egg, beaten, to glaze
- For the custard filling: 300ml milk, 4 egg yolks, 60g sugar, 25g cornflour, 1 tsp vanilla
- For the almond filling: 100g butter, 100g sugar, 100g ground almonds, 1 egg
- For the cinnamon filling: 75g soft butter, 75g brown sugar, 2 tsp cinnamon
- 100g icing sugar and a little water, to glaze
Method
- Mix the flour, sugar, salt, yeast, cardamom, egg, milk and soft butter into a smooth dough, then chill for 30 minutes.
- Beat the laminating butter into a flat 18cm square between two sheets of baking paper and keep cold.
- Roll the dough to a rectangle, enclose the butter slab, and give three single turns, chilling 30 minutes between each.
- For the custard, whisk yolks, sugar and cornflour, pour on hot milk, cook until thick, add vanilla and cool with cling film on the surface.
- For the almond filling, beat butter and sugar, then mix in the almonds and egg; for the cinnamon, beat butter, brown sugar and cinnamon to a paste.
- Roll the laminated dough to about 5mm thick and cut into 12 squares or strips.
- Shape and fill: pinwheels with custard, envelopes with almond, rolled spirals with cinnamon.
- Prove the shaped pastries for 45-60 minutes until puffy, glaze with beaten egg, and bake at 200C fan for 16 to 20 minutes until deep golden; brush with a thin icing while still warm.
What makes a Danish a Danish
Despite the name, the laminated breakfast pastry we call Danish was not invented in Denmark. It arrived in the 1850s, when a strike among Danish bakery workers led owners to bring in bakers from abroad, several of them Austrian. Those Austrians carried with them the Viennese technique of plundergebäck, dough laminated with butter, and Danish bakers apprenticed under them, then travelled to Vienna to learn more. When the dispute ended the Danes kept the method but made it their own, enriching the dough with more egg and butter and adding their own fillings. To this day Danes call these pastries wienerbrød, or Vienna bread, in a nod to that origin. The defining trait is butter folded into yeasted, enriched dough, producing layers that are flaky and bready at once, somewhere between a croissant and a sweet roll.
The clever twist: cardamom in the dough
My one small change from the textbook recipe is to grind a teaspoon of cardamom into the flour. In Sweden and Denmark, cardamom is the scent of the bakery; it perfumes the buns, the breads and the festive loaves, a legacy of the spice routes that reached Scandinavia centuries ago. A whisper of it through Danish dough adds a fragrant, faintly citrussy warmth that makes the pastries smell unmistakably Scandinavian rather than generically sweet. Grind whole green pods and sift out the husks for the best aroma, since pre-ground cardamom fades fast. It is optional, but once you have tried it you will keep doing it.
Laminating without fear
The principle is simple: you trap a flat slab of cold butter inside a sheet of dough, then roll and fold repeatedly to build up alternating layers of dough and fat. As those layers bake, the water in the butter turns to steam and pushes the sheets of dough apart, while the yeast inflates them from within. That is where the flake comes from.
The single most important variable is temperature. The butter must stay cold and pliable, bending without cracking, rather than warm and greasy or so cold it shatters and tears through the dough. If the butter warms up it soaks into the dough instead of staying in discrete sheets, and you lose the layers entirely. A useful test: press the butter slab with a finger, and it should take a shallow dent without cracking. If at any point things start to feel soft or sticky, stop and chill for half an hour. There is no rushing lamination; the fridge is your friend.
Give the dough three single turns, resting and chilling between each. Three turns is plenty for Danish; you are after distinct, flaky layers, not the cloud-like hundreds in a croissant. Roll firmly and evenly in one direction, keep your corners square so the butter reaches right to the edges, and try not to let the butter break through to the surface. If it does, dust the spot with flour and chill before carrying on.
Three fillings, one dough
The joy of making a full batch is that you can split it three ways and end up with a proper bakery selection.
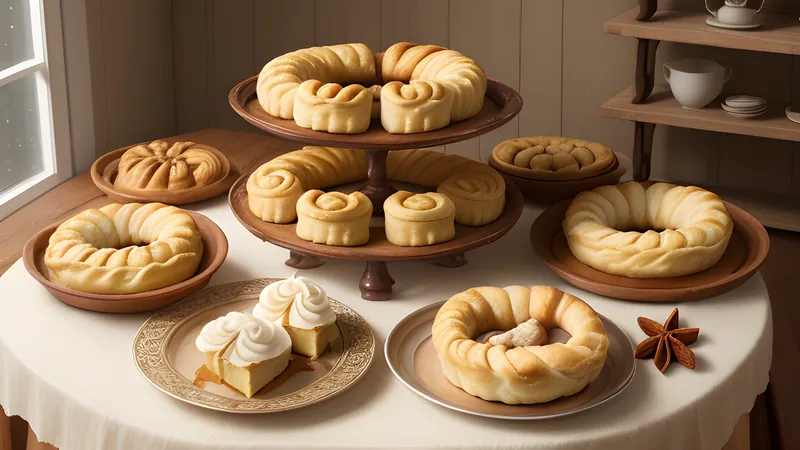
The custard pastries are pinwheels: cut squares, fold alternate corners into the centre, and spoon a blob of thick vanilla creme patissiere into the middle before baking. Make the custard first so it has time to cool completely, and press cling film onto its surface as it cools so it does not form a skin. The almond ones are richer; spread a band of almond frangipane down the centre of a square, fold it into an envelope, and scatter flaked almonds on top. The cinnamon ones are the homeliest: spread a cinnamon-butter paste over a rectangle, roll it up tight like a Chelsea bun, and slice into spirals cut-side up. Make all three fillings while the dough rests between turns and you lose no time at all.
Proving, glazing and baking
Once shaped, the pastries need a proper second prove, 45 minutes to an hour somewhere warm, until they look visibly puffy and pillowy and wobble when the tray is nudged. This is what gives them their light, layered crumb; rushing the prove gives you dense, tight pastries that leak butter as they bake. Glaze them with beaten egg for shine, taking care not to glue the cut edges of the layers together, then bake hot at 200C fan until deeply golden. Pale Danish is underbaked Danish, and the butter needs the heat to crisp the layers rather than sit heavy and raw.
Tips and getting ahead
The dough can be made up to the final shaping and kept overnight in the fridge, which actually improves the flavour and means warm pastries for breakfast with only a prove and a bake in the morning. You can also freeze the shaped, unproven pastries: freeze them solid on a tray, bag them, and then prove from frozen the night before, which takes several hours in the fridge, before baking as usual. Finish them with a thin water icing while still warm so it sets to a glossy crackle. They are best the day they are made, but a quick five minutes in a hot oven brings day-two pastries most of the way back. The effort is real, but so is the smugness.
When it goes wrong, and why
Most Danish failures trace back to one of three things, and each has a clear cause. If butter leaks out into the tin during baking and the pastries sit in a greasy puddle, the layers were not sealed: either the butter warmed and merged with the dough during rolling, or the cut edges were glued shut by egg wash, trapping steam that then blew out sideways. If the pastries are dense and bready with no visible layers, the butter was too cold and cracked into shards instead of rolling out into continuous sheets, or the dough was overworked and the layers smeared together. And if they are pale and doughy in the centre despite a golden top, they went into the oven under-proved or the oven was not hot enough; a laminated pastry needs a genuinely hot start to set the layers before the butter melts through.
The remedy for all three is patience and a cool kitchen. A marble slab or a chilled worktop helps enormously in a warm room, as does working quickly and returning the dough to the fridge the moment it softens. If you only take one thing from this recipe, let it be that: chilled dough forgives almost everything, warm dough forgives nothing.
Variations worth trying
Once the base dough is second nature, the fillings are only a starting point. Swap the vanilla custard for a lemon curd, or fold a spoonful of jam into the centre of the almond envelopes for a Danish that leans towards a bakewell. A handful of soaked raisins rolled into the cinnamon spirals gives you a pain au raisin in all but name, and a few thin slices of cooked apple tucked into the custard pinwheels before baking turn them into a rustic apple Danish. Berries work too, though scatter them sparingly, as too much fruit weeps juice that stops the layers crisping. For something savoury, leave the cardamom out, cut the sugar in the dough to 30g, and fill the squares with grated Gruyere and a little Dijon before folding, for a breakfast pastry with a French accent. Whatever you fill them with, the dough does the heavy lifting, and by the third batch you will be laminating without a second thought. The measure of a good Danish is not perfection but the shatter of the crust and the pull of the layers as you tear one open, and that comes with practice far more than precision. Make them often enough and the whole process stops feeling like a project and starts feeling like a pleasant, floury way to spend a slow morning.
If lamination has won you over, the next step is rough puff pastry, a quicker cheat’s layering that teaches the same butter-and-fold logic in less time, and brioche feuilletee, which laminates an even richer, more buttery enriched dough. For an easier morning bake that still leans on yeast and a long, slow ferment, homemade crumpets from scratch are a gentle place to start.
Related Content