Crumpets from Scratch: Holey, Chewy, Better Than Shop-Bought
All those open holes, ready to drink butter
Contents
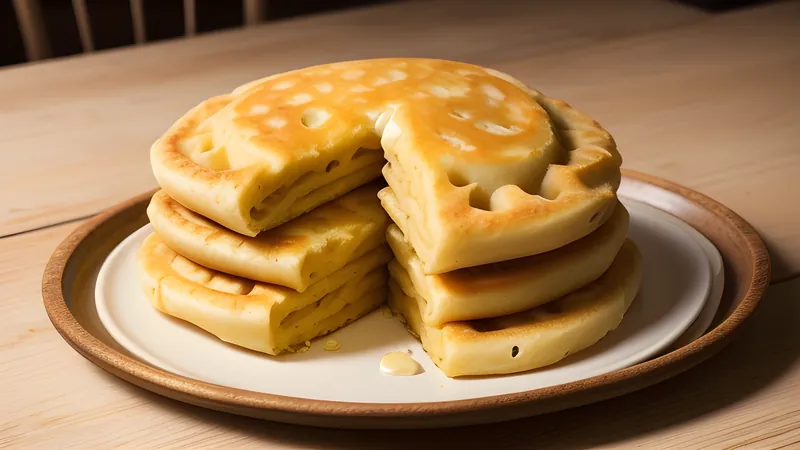
↓ Jump to recipeThere is a particular small heartbreak in a shop-bought crumpet: you toast it, you butter it, and the butter just sits on top like rain on a closed road. The holes are there for decoration, sealed somewhere underneath a pale, dense crumb. A proper homemade crumpet is the opposite. It is honeycombed all the way through with open, glistening holes, chewy and slightly tangy, and when you spread cold butter on a hot one it disappears straight down into the structure and reappears soaking through the base. The clever twist here is barely a twist at all, more a reclaimed secret: a hit of bicarbonate of soda stirred in at the very end, on top of the yeast, which is what blows those tunnels wide open. Once you have made a batch, the plastic-bagged ones lose their appeal for good.
Crumpets from Scratch: Holey, Chewy, Better Than Shop-Bought
Ingredients
- 225g plain flour
- 100g strong white bread flour
- 7g fast-action dried yeast
- 1 tsp caster sugar
- 300ml warm whole milk
- 150ml warm water
- 1 tsp fine salt
- 0.5 tsp bicarbonate of soda dissolved in 2 tbsp warm water
- Oil and a little butter, for the rings and pan
- 4 greased crumpet or metal rings, about 9cm
Method
- Whisk both flours, the yeast and the sugar together in a large bowl.
- Warm the milk and water together to about 37C, just blood-warm, then beat into the dry ingredients to make a smooth, thick batter. Cover and leave somewhere warm for 1 hour, until risen, bubbly and slightly collapsing.
- Dissolve the salt and bicarbonate of soda in the 2 tbsp warm water, then beat this into the batter. Rest for 15 minutes; you want a surface alive with tiny bubbles.
- Heat a heavy frying pan or flat griddle over a low-medium heat. Oil the inside of the rings and set them in the pan.
- Spoon batter into each ring to a depth of about 1.5cm. Cook gently for 8 to 10 minutes, until the surface is set, dry and riddled with open holes.
- Slip off the rings, flip the crumpets and cook the tops for just 1 to 2 minutes to colour lightly.
- Cool on a rack, then toast before serving with cold butter. Repeat with the remaining batter, regreasing the rings each time.
A Very British Hole
The crumpet is one of those foods Britain quietly assumes the whole world eats, and is faintly surprised to learn it does not. It descends from a long line of griddle breads cooked on a bakestone over an open fire, cousins of the pikelet, the muffin and the Welsh crempog. The word itself is old and slightly mysterious: it appears in the fourteenth century in the form “crompid cake”, and is thought to relate to a Middle English term for something curled or crumpled, likely describing a thin, crimped griddle cake rather than the thick sponge we know now. By the Victorian era the crumpet had settled into its modern form, cooked in rings to give it that neat cylindrical shape, and become a centrepiece of the fireside tea, toasted on a long fork and dripping with butter.
What makes a crumpet a crumpet rather than a thick pancake is the texture: dense and chewy underneath, open and spongy on top, with those signature holes running through it. Getting them is the whole game, and it is more controllable than it looks once you know what each ingredient is actually doing.
Why the Bicarbonate Matters
A crumpet batter is leavened twice. The yeast does the first job, fermenting for an hour to develop flavour and fill the batter with gas, which is where the faint sourness and the chew come from. But yeast alone gives you a softly bubbled top, not the dramatic open tunnels people love. That is the job of the bicarbonate of soda, stirred in at the last minute along with the salt.
The bicarb reacts with the now slightly acidic, fermented batter and releases a fresh flush of carbon dioxide just as the crumpets hit the heat. Because the batter is loose and the rings hold it in, the bubbles rise straight up and break through the surface, leaving the holes open rather than trapped. Salt is held back until this final stage because adding it early would slow the yeast down; introducing salt and bicarb together at the end gives you fermentation first, then lift. Skip the bicarb and your crumpets will still taste good, but the top will be shy and closed rather than riddled with tunnels.
Getting the Batter and Heat Right
Consistency is everything. The batter should be thick enough to mound on a spoon but loose enough to find its own level in the ring, somewhere between double cream and a thick pancake batter. Too thick and the bubbles cannot break the surface; too thin and it runs under the rings and the crumpet stays flat. If your first crumpet comes out with too few holes, beat in a tablespoon of warm water to loosen the batter and try again.
Heat is the other half. A crumpet must cook slowly, on a low-medium flame, so the inside sets and dries out before the base scorches. Rush it and you get burnt bottoms and a gummy, sealed middle. Watch for the holes appearing and the surface turning from glossy and wet to matte and dry; that change tells you the structure has set and it is safe to lift the ring. The brief flip at the end is only to give the holey top a little colour, not to cook it through, so keep it to a minute or two.
The rings, and going without
Proper crumpet rings make life easier, but any straight-sided metal ring of about 9cm works: a well-scrubbed tuna tin with both ends removed, or an egg ring. Grease the inside walls generously, because a sticking crumpet is a torn crumpet. If you have no rings at all, you can cook the batter free-form as thick pikelets straight on the griddle; they will spread wider and hole less dramatically, but they toast and butter just as happily.
Eating Them
A crumpet wants to be toasted to the edge of crisp, then buttered while it is too hot to hold comfortably, so the butter sinks down the holes and pools in the base. After that, the floor is open. Honey, Marmite, a slick of golden syrup, crumbled cheese melted under the grill, or a poached egg balanced on top all have their devotees. I am firmly of the butter-and-honey school for a quiet morning and the cheese-and-grill school for a cold afternoon, and I see no contradiction in that. A pot of tea is non-negotiable; a mug of spiced chai concentrate let down with hot milk is my winter alternative.
They keep for two or three days in a sealed bag and freeze beautifully, ready to drop straight from the freezer into the toaster. Make a double batch; they go faster than you expect.
Storage, make-ahead and a word on flour
Crumpets are unusual in that they are meant to be cooked, cooled and then toasted, rather than eaten straight from the pan. Cooking them ahead is not a compromise; it is the correct method, because a freshly griddled crumpet is a little damp inside, and it is the toaster that crisps the edges and dries the crumb to its proper chewy state. So there is no downside to making them a day or two before you want them. Cool them completely on a rack before bagging, or they will sweat and go soggy. In the freezer they last a good three months and defrost as they toast, which makes a batch a genuinely useful thing to have tucked away for slow weekend mornings.
The flour blend is worth a note too. Plain flour alone gives a tender but slightly fragile crumpet; adding a portion of strong bread flour, with its higher protein and therefore more gluten, builds the stretchy structure that lets the bubbles climb and hold their open tunnels rather than collapsing. If you only have plain flour you will still get respectable crumpets, just a touch more delicate. Do not be tempted to use self-raising flour: it already contains a raising agent in the wrong proportion for this batter and will muddle the careful two-stage leavening the recipe depends on.
Variations
The classic is plain, but the batter takes gentle additions well. A handful of grated strong cheese folded through before cooking gives savoury cheese crumpets that are extraordinary toasted and topped with a fried egg. A spoonful of wholemeal flour swapped in for some of the plain adds a nuttier, more rustic character. Some cooks add a splash of vinegar or a little extra sugar to sharpen the tang or feed the yeast; both are optional refinements once you have the basic method reliably producing holes.
If crumpets give you the taste for cooking your own bread from a live batter or dough, two more are worth your morning: puffy charred pita bread, which puffs into a hollow pocket on fierce heat, and Danish pastry dough, a laminated project for when you have a whole unhurried morning to give it.
Related Content