Buta no Kakuni: Slow-Braised Pork Belly Cubes
Pork belly braised until a chopstick goes through it clean
Contents
↓ Jump to recipeButa no kakuni is judged by a single, almost absurdly simple test: can you cut through a cube of pork belly using nothing but the edge of a chopstick? If the answer is yes, the fat has rendered down to something closer to a soft, quivering jelly than solid fat, and the meat beneath it has gone tender enough to fall apart under the lightest pressure. Getting there takes hours, not minutes, and there’s no real shortcut — this is a dish about what patient, low heat does to a tough cut of meat over time, not about clever technique compressing that time down.
Buta no Kakuni: Slow-Braised Pork Belly Cubes
Ingredients
- 1kg pork belly, skin on, cut into 4-5cm cubes
- 2 spring onions, plus extra sliced to serve
- 4 slices fresh ginger, plus 1 tbsp grated ginger
- 1 litre water, plus more as needed
- 150ml soy sauce
- 150ml sake
- 100ml mirin
- 3 tbsp sugar
- 4 soft-boiled eggs, peeled
- English or Japanese mustard, to serve
Method
- Bring a large pot of water to the boil and blanch the pork belly cubes for 5 minutes to remove surface impurities. Drain and rinse under cold water.
- Return the pork to a clean pot with the 2 whole spring onions, sliced ginger and 1 litre fresh water. Bring to a simmer, skim off any scum, then cover and simmer gently for 90 minutes.
- Remove the pork with a slotted spoon; discard the spring onion and ginger, and reserve the cooking liquid.
- Return the pork to the pot with 500ml of the reserved cooking liquid, the soy sauce, sake, mirin, sugar and grated ginger.
- Cut a circle of baking paper as a drop lid (otoshibuta) and lay it directly on the surface. Simmer gently, uncovered above the paper, for 60-75 minutes, until the pork is tender enough to cut with a chopstick and the liquid has reduced to a glossy, thick glaze.
- Add the peeled soft-boiled eggs for the final 15 minutes, turning once, so they take on colour and flavour without overcooking further.
- Rest the pot off the heat for at least 15 minutes before serving; the glaze thickens further and the flavour settles as it cools slightly.
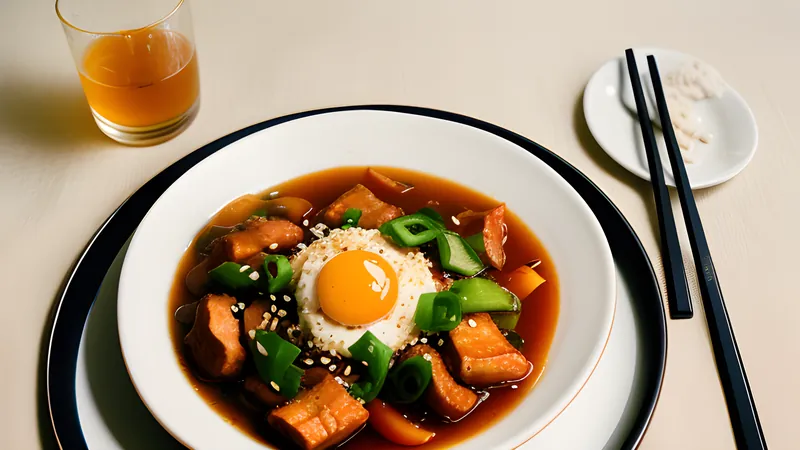
- Serve the pork and halved eggs with a spoonful of the reduced glaze, a scattering of sliced spring onion, and a small dab of mustard on the side.
A Nagasaki port dish with Chinese fingerprints
Kakuni’s closest relative outside Japan is hong shao rou, the Chinese red-braised pork belly built on the same logic of soy, sugar and long, slow cooking until the fat turns translucent. The connection isn’t coincidental — Nagasaki was, for centuries, Japan’s primary port of contact with the outside world during the country’s long period of restricted foreign trade, and Chinese merchants and residents in the city’s Chinatown district brought braising techniques that filtered into the local cuisine and, over generations, into wider Japanese cooking. Nagasaki still has its own regional dish, Nagasaki kakuni, generally credited as an early or founding version, distinguished from more standard versions by manju-style steamed buns sometimes served alongside for making the pork into a sandwich, closer to the Chinese gua bao format. Okinawa developed a parallel dish, rafute, using awamori (a local distilled spirit) in place of sake and often a milder brown sugar, another regional variation on the same idea of pork belly, soy and long, unhurried heat.
Blanching first: the step people skip
The initial blanch, boiling the raw pork belly briefly before it goes anywhere near the braising liquid, is not a step to skip even though it adds time and an extra pot to wash. Raw pork belly carries surface blood and impurities that cloud a braising liquid and can leave a slightly off, mineral flavour in the finished dish if they’re not removed first. Five minutes at a rolling boil, followed by a cold rinse, clears most of this away and gives you a clean base to build the actual braise on. Skipping it doesn’t ruin the dish outright, but it noticeably dulls the final glaze’s clarity and the pork’s flavour.
Two braises, not one
The recipe above runs through two distinct simmering stages, and each is doing a different job. The first, a long simmer in plain water with aromatics only, is entirely about tenderising the meat and rendering fat — no seasoning goes in yet, because salt and soy sauce at this stage would tighten the meat’s surface and slow down how much fat and connective tissue break down over the following ninety minutes. The second stage, once the pork is already most of the way to tender, introduces the soy, sake, mirin and sugar and reduces the liquid down into a genuine glaze rather than a thin broth. Combining both stages into a single simmer — seasoning from the start — produces meat that’s tender but a glaze that never properly concentrates, since there’s more liquid volume to reduce than the aromatics-only first stage leaves behind.
A dish that rewards a heavy pot
A thick-based, heavy pot — cast iron or a heavy stainless-steel Dutch oven — makes a genuine difference to kakuni over the long simmering time involved, since a thin-based pot is more prone to hot spots that can scorch the sugar-heavy glaze against the base during the second stage, particularly once the liquid has reduced down to a smaller volume sitting directly against the metal. If you only have a thinner pot, keep the heat lower than you might otherwise and check the base more frequently in the final 20 minutes, when the liquid is at its most reduced and most vulnerable to catching.
The drop lid, again
As with nikujaga, an otoshibuta — a lid resting directly on the surface of the braising liquid rather than on the rim of the pot — does real, specific work here: it keeps the pork basted in reducing liquid throughout the second stage without you needing to turn the pieces constantly (which risks breaking apart meat that’s already gone very soft), and it helps the liquid reduce evenly across the whole pot rather than fastest at the edges. A circle of baking paper, cut slightly smaller than the pot’s diameter with a small vent cut or torn in the centre, does the job as well as a traditional wooden lid.
Choosing the right piece of belly
Not all pork belly is cut the same way, and kakuni benefits from a specific approach at the butcher’s counter. Ask for a piece with clearly visible, roughly even layers of fat and meat running through it — a piece that’s mostly lean with only a thin fat cap will never render down properly, while one that’s almost entirely fat will collapse into something greasy rather than richly tender. Skin-on belly is traditional and worth seeking out specifically; the skin itself turns almost jelly-like after a long braise, contributing a distinct, slightly bouncy texture alongside the softer meat and fat beneath it that skinless belly simply can’t replicate.
Why soft-boiled eggs, and how to get them right
The eggs added toward the end of the braise are doing more than adding protein to the plate — a soft-boiled egg, its white fully set but its yolk still soft and slightly jammy, takes on the glaze’s colour and flavour on its exterior while staying markedly different in texture from the pork, giving the dish a second textural note rather than just more of the same softness throughout. Boil eggs for 6 to 7 minutes from a rolling boil, then plunge them immediately into iced water to stop the cooking before peeling — over-boiled, fully hard eggs still work but lose the contrast a jammy yolk provides against the pork. Peel gently; eggs that have spent time in an acidic or salty braising liquid can sometimes have their whites cling more stubbornly to the shell than a plain boiled egg would.
What can go wrong
Tough, chewy pork after all that time usually means either the belly wasn’t a fatty enough cut to begin with, or the first simmering stage was rushed. Buy pork belly with a generous, visible fat layer running through it — a lean piece will never reach the melting texture the dish depends on, no matter how long it simmers. If the meat is still tough after 90 minutes in the first stage, give it another 20-30 minutes before moving on to the seasoned braise; there’s no fixed point at which it must be ready, only the chopstick test.
A glaze that stays thin and watery rather than thick and glossy means the second-stage simmer didn’t run long enough, or the heat was too low to actually reduce the liquid. Keep it at a proper simmer, not just warm, and be patient through the final 20-30 minutes when the reduction visibly speeds up and starts clinging to the meat rather than pooling around it.
Overly salty kakuni usually comes from adding all the soy sauce at the concentration meant for the full litre of liquid, rather than the reduced 500ml carried over from the first stage. Taste the liquid once it’s combined and adjust rather than trusting the measurements blindly if your first-stage liquid reduced by an unusually large or small amount.
What the sugar and soy ratio is actually doing
Kakuni’s glaze relies on a relatively high proportion of sugar relative to a dish like nikujaga, and that’s deliberate rather than a matter of taste alone — the sugar is what allows the reducing liquid to thicken into a genuine glaze rather than staying a thin, salty broth, since sugar concentrations rise as water evaporates in a way that changes the liquid’s viscosity noticeably once it passes a certain point. Cutting the sugar back significantly in an attempt to make a “healthier” version tends to produce a braise that never properly glazes, staying thin and soy-forward rather than developing the sticky, clinging coating that’s central to the dish’s appeal. If you want to reduce sweetness without losing the glaze’s body, a small addition of extra reduced cooking liquid from the first stage, simmered down further on its own, adds thickening body without more sugar.
Serving and pairing
Kakuni is traditionally served in small, deep bowls with a modest pool of the glaze rather than plated dry, alongside plain steamed rice that’s built to soak up whatever glaze spills over from the pork. English or Japanese karashi mustard on the side of the plate, dabbed onto the pork rather than mixed through the glaze, cuts the richness in exactly the way it does for oden — a small, sharp contrast against a dish that otherwise has almost no acidity or heat to balance its sweetness and fat. A simple pickle, or a few slices of raw daikon, does similar work if you’d rather skip the mustard.
Substitutions, storage and variations
Pork shoulder can substitute for belly if you want a leaner result, though it will never reach quite the same melting texture, since there’s less fat and connective tissue to render down. A pressure cooker cuts the first tenderising stage dramatically, to around 25-30 minutes at high pressure, though the flavour is generally considered a shade less developed than a long, slow stovetop simmer produces.
Kakuni keeps exceptionally well, arguably improving over two or three days in the fridge as the pork continues to absorb the glaze and the fat sets into a slightly firmer, richer texture that resolidifies attractively on reheating. Reheat gently in the glaze itself over low heat rather than in a microwave, which tends to overcook the exterior of each cube before the centre has properly warmed through. It freezes well too, glaze and all, and is a genuinely good make-ahead dish for exactly this reason — many households consider it better the day after cooking than fresh from the pot.
For a similar idea applied to chicken rather than pork belly, and a fast grill rather than a slow braise, yakitori reduces a comparable soy-mirin base into a glaze using heat and time in a completely different register. If you want another slow-simmered dish built on the same drop-lid technique and soy-dashi seasoning logic, nikujaga uses almost the same method applied to potatoes and thinner-cut meat instead of a whole braise.
Related Content