Brown Butter Scones
Tall, flaky and golden
Contents
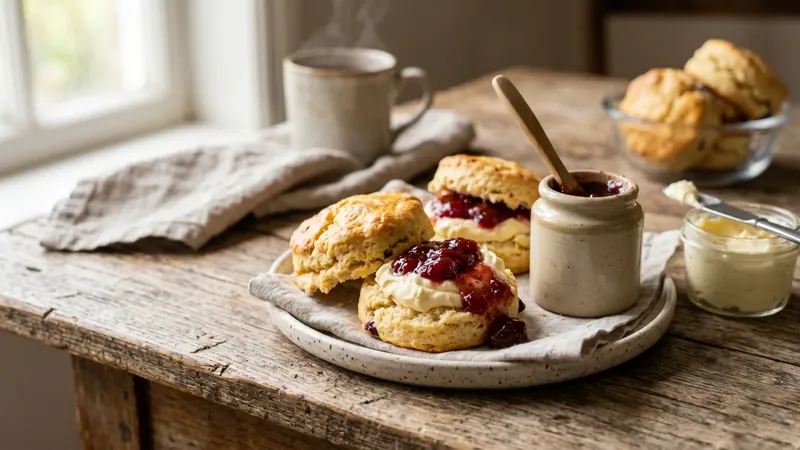
↓ Jump to recipeA good scone is a quick triumph, ready inside forty minutes with almost no equipment, and browning the butter first turns a familiar bake into something quietly more interesting. The toasted, nutty notes carry right through the crumb, deepening the flavour without making the scones heavy or rich. They still rise tall and pull apart in flaky layers, ready for clotted cream and jam. Best eaten warm, the day they are made, while the fat is still soft enough to catch the cream.
Brown Butter Scones
Ingredients
- 100g unsalted butter
- 450g self-raising flour, plus extra to dust
- 1 tsp baking powder
- 0.5 tsp fine salt
- 50g caster sugar
- 175ml whole milk, cold
- 1 large egg
- 1 tsp vanilla extract
- 1 egg yolk beaten with 1 tbsp milk, to glaze
Method
- Brown the butter in a small pan over a medium heat until golden and nutty, then chill until solid.
- Heat the oven to 200C fan and line a baking tray.
- Whisk the flour, baking powder, salt and sugar in a large bowl.
- Grate or rub the cold browned butter into the flour until it resembles breadcrumbs.
- Beat the milk, egg and vanilla together, then stir into the dry mixture to form a soft, shaggy dough.
- Tip onto a floured surface and pat out to 3cm thick, then fold in half and pat out again.
- Cut straight down with a 6cm cutter, without twisting, and place close together on the tray.
- Brush the tops only with the egg-yolk glaze, then bake for 12 to 15 minutes until risen and golden. Cool slightly before serving.
The Story
The scone is one of Britain’s most argued-over baked goods, from how to pronounce its name (does it rhyme with “gone” or “cone”?) to the proper order of cream and jam. That last question maps neatly onto geography: the Devon method spreads clotted cream first and jam on top, while the Cornish way puts jam down first and crowns it with cream. Neither side has ever conceded, and both are usually eaten at the same afternoon tea without incident.
The scone’s roots are usually placed in Scotland, where early versions were large, flat griddle cakes made from oats or barley, cut into triangular wedges called farls and cooked on a hot iron girdle rather than in an oven. The word first appears in print in the early sixteenth century, in a translation by the Scottish poet Gavin Douglas around 1513. It is often linked to the Stone of Scone, the ancient coronation stone kept at Scone Abbey near Perth, though that connection is more poetic than proven and most etymologists point instead to the Dutch schoonbrood, meaning fine white bread. Over time the scone shrank, rose, and moved indoors to the oven, becoming the small, light bake that anchors the afternoon tea popularised in the 1840s by Anna, the seventh Duchess of Bedford, who took to bridging the long gap between lunch and a late dinner with tea and something to eat.
The texture every scone-maker chases is tall and tender, with distinct flaky layers that pull apart cleanly. That comes down to keeping the butter cold and the handling light. Cold fat stays in small, separate pieces through the dough, and when the scones hit a hot oven those pieces melt and their water flashes to steam, pushing the layers apart and lifting them up in the same way that laminated pastry rises. Overworking the dough develops the gluten in the flour and turns a fluffy scone tough and dense, which is why the mixing is done with a knife and the kneading skipped entirely. The dough should look shaggy and slightly rough, not smooth and elastic; a smooth scone dough has already been handled too much.
Why brown the butter
The twist here is browning the butter before it goes in. When butter melts and keeps heating, the water in it cooks off and the milk solids suspended in the fat begin to toast, turning golden and developing deep, nutty, almost caramel notes through the same browning reactions that give toast and roast meat their savour. The French call it beurre noisette, hazelnut butter, for exactly that aroma. It is a small act of cooking that delivers a great deal of flavour, and it is the backbone of half my baking, from brown butter chocolate chip cookies to the batter of a good buttermilk pancake.
The one thing to watch is that browning butter drives off some of its water, and scone dough needs that liquid to come together. That is why the browned butter is poured out, chilled until solid again, then grated cold into the flour: it works the way cold butter should in the dough, keeping the all-important flake, while threading toasted flavour through every bite. If your dough feels a touch dry after the milk goes in, add a splash more cold milk a teaspoon at a time rather than forcing it.
Getting the rise
A few small habits make a real difference. Cut straight down without twisting the cutter: twisting seals and drags the edges, so the scones rise unevenly and lean to one side. Set them close together on the tray, almost touching, so they support one another and climb upward instead of spreading outward. Glaze only the tops, keeping the egg wash off the cut sides, because a coating of set egg will glue the layers shut just where you want them to open. And get the oven properly up to temperature before they go in; scones need an immediate blast of heat to spring before the outside sets.
Serving: cream, jam and the eternal argument
The scone’s natural partners are clotted cream and a good fruit jam, and here Britain divides along county lines. In Devon, the halved scone is spread with clotted cream first and topped with jam; in Cornwall, jam goes on first and the cream sits on top like a cloud. The practical difference is small, but Cornish loyalists will tell you their order lets you pile the cream higher, while Devon cooks argue the cream should take the place of butter, closest to the warm crumb. Clotted cream, the thick, crusted cream made by gently heating full-fat milk until a golden skin forms, is worth seeking out; it is richer and less sweet than whipped double cream and stands up to a bold strawberry or raspberry jam. Warm the scones just enough to soften the cream but not melt it, split them by pulling apart along the natural seam rather than cutting, and serve them the moment they are dressed, before the jam soaks in and turns the crumb soggy.
A word on the raising agents: self-raising flour already contains baking powder, and the extra teaspoon here gives the scones an added push, which matters because the browned butter is denser than the raw cold butter a standard recipe uses. If your scones come out flat, the usual culprits are a cool oven, dough patted too thin, or a cutter twisted on the way down. Aim for a full 3cm of thickness after the fold, and resist rolling the dough out with a pin, which compresses it and knocks out the air; patting by hand keeps it light.
Substitutions and variations
For a fruit scone, stir 75g of sultanas or dried cranberries into the dry mix before the liquid. For a savoury version, drop the sugar to 1 tsp, add 75g of grated mature Cheddar and a teaspoon of English mustard powder, and serve them alongside a bowl of butternut squash soup. No self-raising flour? Use 450g plain flour and add 4 tsp of baking powder in total. Whole milk gives the richest crumb, but semi-skimmed works, and a couple of tablespoons of the milk swapped for plain yoghurt gives a slightly tangier, even more tender result.
If you want the brown-butter flavour turned up further, brown a little more butter than the recipe needs, chill it, and use the extra to brush the warm scones as they come out of the oven instead of a plain butter glaze; it settles into the tops and reinforces that toasted, nutty aroma. For a lighter, more everyday scone, you can skip the browning entirely and rub in the same weight of cold plain butter straight from the fridge, which gives a slightly higher rise since you keep all the water in the fat, at the cost of that deeper flavour. A pinch of ground cinnamon or the finely grated zest of a lemon or orange stirred into the dry mix pairs particularly well with the browned butter, if you fancy nudging the scones towards something a shade more special than the plain afternoon-tea version.
Storage and make-ahead
Scones are at their best within a few hours of baking, warm enough to soften the cream. They stale fast as the day goes on, which is no real hardship: a batch this size rarely lasts long enough to find out. To get ahead, cut the raw scones, arrange them on a tray and freeze until solid, then bag them; bake straight from frozen with an extra 3 to 4 minutes. A day-old scone is transformed by 30 seconds’ warming in the oven, which softens the crumb and revives the browned butter aroma.
Related Content