Akara: The Black-Eyed Bean Fritter
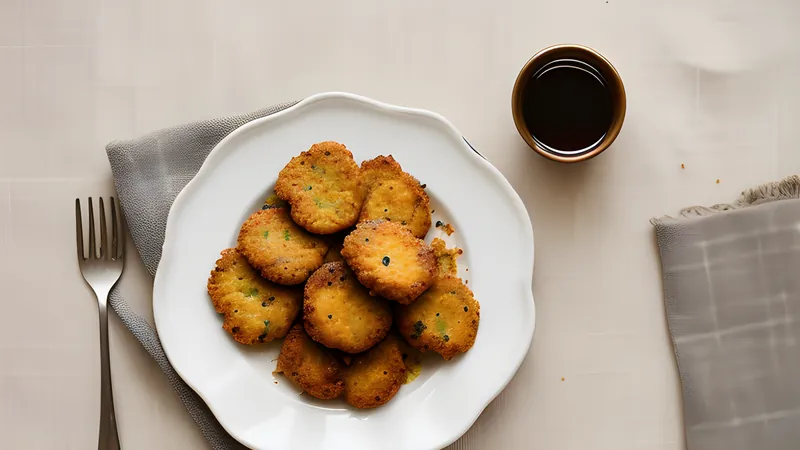
A crisp-shelled, cloud-centred bean fritter, fried straight from a peeled bean batter
Contents
↓ Jump to recipeAkara: The Black-Eyed Bean Fritter
Ingredients
- 500g dried black-eyed beans (peeled, or peel yourself)
- 1 large onion, roughly chopped, divided
- 2 red bell peppers, deseeded
- 1-2 scotch bonnet chillies, deseeded, to taste
- 150-200ml cold water, for blending, added gradually
- 1 tsp salt, plus more to taste
- 1 litre vegetable or groundnut oil, for deep-frying
Method
- Soak the beans in cold water for at least 4 hours, or overnight. Rub the beans between your palms under running water to loosen the skins, pouring off the floating hulls repeatedly until only pale, naked beans remain.
- Blend the peeled beans with two-thirds of the onion and the peppers in short pulses, adding the water in small splashes only as needed to keep the blade moving. Stop well before the water level of a smooth soup — the batter should be thick enough to hold a peak on a spoon.
- Transfer to a bowl and whisk vigorously by hand for 3-4 minutes, or with a stand mixer whisk for 90 seconds, until the batter lightens noticeably in colour and increases in volume. This trapped air is what makes akara light rather than dense.
- Finely dice the remaining onion and fold it, along with the chillies and salt, into the whisked batter just before frying.
- Heat the oil in a deep, heavy pot to 175-180C. Test with a small spoonful of batter — it should sizzle immediately and rise to the surface within seconds without burning.
- Scoop tablespoon-sized portions of batter directly into the oil using two spoons, working in batches of 5-6 to avoid crowding and dropping the oil temperature.
- Fry for 4-5 minutes, turning once, until deep golden brown on both sides and cooked through at the centre. Drain on a wire rack or kitchen paper.
- Serve immediately, while the shell is still audibly crisp.
The batter that decides everything
Akara and moin moin start from the same base — peeled, blended black-eyed beans, whisked hard to trap air — and split apart at the final step. Moin moin gets wrapped and steamed into something custard-soft. Akara gets scooped straight into hot oil, and the same aeration that makes a steamed pudding light is what gives a fried fritter its structure: without enough air whipped into the batter, akara collapses into dense, oily lumps instead of holding a crisp shell around a fluffy, faintly sweet interior. This is the fritter sold from steel drums of bubbling oil on Lagos street corners at dawn, wrapped in old newspaper or a twist of brown paper, eaten standing up on the way to work or school. It’s also a Sunday-morning kitchen ritual in Nigerian households worldwide, made in bulk and eaten with pap (fermented corn porridge), bread, or nothing at all beyond a shake of salt.
A fritter with roots on three continents
Akara’s history runs directly through the transatlantic slave trade. Yoruba and other West African cooks carried the technique of blending peeled beans into an aerated batter and frying it across the Atlantic, and the fritter reappears, transformed but recognisable, as acarajé in Bahia, Brazil, where it’s sold by street vendors — traditionally women known as baianas — dressed in white, frying in dendê (palm) oil and splitting the fritters open to fill with vatapá, dried shrimp and hot sauce. The same base recipe surfaces again in the Caribbean as accra or acra, a fritter served across Trinidad, Jamaica and other islands, sometimes made with saltfish folded into the batter instead of onion and pepper alone. Three cuisines, three names, one bean batter — it’s one of the clearest, most direct culinary throughlines from West Africa to the Americas, and it survived because the technique itself, peeling and aerating a bean paste before frying, travelled well even when the exact seasonings shifted to match what was locally available.
Peeling: the part nobody enjoys but everybody needs
The papery hull on a black-eyed bean has to come off before blending or the finished fritter turns gritty and heavy rather than light. Traditional peeling is done by hand: soak the beans until they soften, then rub fistfuls between your palms under a running tap, letting the loosened skins float to the surface where you can pour them off. It’s ten to fifteen minutes of repetitive, faintly meditative work, and it’s the single most skippable step if you buy pre-peeled beans — sold as “moin moin beans,” “peeled black-eyed beans,” or “olele beans” in West African grocers — which arrive split and hull-free, ready to soak and blend directly. I peel by hand most weekends because the beans I can get locally aren’t sold pre-peeled, but there’s no culinary penalty for buying the shortcut.
Getting the fry right
Oil temperature is the difference between an akara that’s crisp outside and cooked through inside, and one that’s either raw-centred and greasy or scorched outside while still wet in the middle. Too cool — under about 170C — and the batter absorbs oil before a shell forms, giving you a heavy, greasy fritter that never crisps properly. Too hot — over 190C — and the outside browns and hardens in under a minute while the dense centre stays underdone. A cooking thermometer removes the guesswork, but the traditional test works nearly as well: drop a small spoonful of batter into the oil and watch it. It should sizzle immediately, rise to the surface within a few seconds, and hold its shape rather than spreading thin across the oil’s surface.
Frying in small batches matters more than most people expect. Dropping in too many spoonfuls at once cools the oil rapidly, and the fritters that go in during that temperature dip will be the greasy ones. Five or six fritters at a time, in a wide, heavy pot, keeps the temperature recovering fast between drops.
Shaping without a mould
Akara doesn’t use a mould — the shape comes from how the batter is scooped. The classic method uses two spoons: one to portion the batter, the other to push it off into the oil, which gives an irregular, organic teardrop shape rather than a perfect sphere. Wetting both spoons in a cup of water between scoops stops the thick batter sticking and dragging, and keeps the portions roughly even so they finish cooking at the same time. Some cooks use a small ice-cream scoop for more consistent sizing, particularly when frying in bulk for a crowd, though the resulting fritters lose some of the rustic, craggy surface that gives homemade akara its characteristic extra-crisp texture at the edges.
Tips for consistency
Salt the batter at the very end, just before frying, not during blending — salting too early draws liquid out of the aerated batter and can deflate some of the air you worked to whisk in. If your batter seems too loose to hold a peak, resist the urge to add more beans; instead, blend in short pulses next time and add water more sparingly, since over-watering during blending is the most common reason for a batter that won’t hold its shape. Fresh chillies stirred in whole, finely diced pieces rather than blended into the base give little pockets of direct heat throughout the fritter, which most Nigerian cooks prefer to an evenly spiced, milder result.
Substitutions
Brown beans (sometimes called honey beans) can replace black-eyed beans for a slightly sweeter, earthier akara, though the texture is a touch denser. For a version with more protein and a savoury backbone, some cooks fold in a spoonful of ground dried crayfish or finely chopped smoked fish along with the onion — a popular addition at Lagos akara stalls, where you can often ask for it “with fish” or “with crayfish.” Vegetable oil, groundnut (peanut) oil and palm oil all work for frying; groundnut oil is the traditional choice for its high smoke point and neutral flavour, while palm oil gives a more assertive, slightly smoky fritter and a deeper amber colour.
Storage and reheating
Akara is genuinely best eaten within minutes of frying, while the shell is still audibly crisp — this isn’t a dish that improves with resting. Leftovers keep in the fridge for up to two days, but reheat them in a hot oven or air fryer rather than a microwave, which turns the crisp shell soft and slightly rubbery. For make-ahead convenience, you can freeze the raw whisked batter (before adding onion and chilli) for up to a month; thaw in the fridge overnight, fold in the aromatics fresh, and fry as normal. Freezing already-fried akara works in a pinch but never fully recovers its original crispness, even reheated in an oven.
Reading the oil like a street vendor
Akara sellers who fry hundreds of fritters a morning don’t use thermometers, and watching how they judge the oil is worth borrowing. They drop a tiny test bead of batter in first and read three things at once: how fast it rises (should be within two or three seconds), how loudly it sizzles (a sharp, continuous crackle, not a faint hiss), and how the surface of the oil moves around the bead (small, energetic bubbles rather than slow, lazy ones). Any one of those signs being off — a slow rise, a faint sizzle, sluggish bubbling — means the oil needs another minute or two of heating before a full batch goes in. It’s a fast, low-tech read that a thermometer, checked once and trusted, can actually miss if the flame fluctuates partway through frying.
Why the interior stays fluffy
The contrast between akara’s crisp shell and its soft, almost soufflé-like interior comes down to how quickly the outside of the fritter sets once it hits hot oil. The surface batter, exposed directly to 175-180C oil, dehydrates and browns within the first thirty seconds, forming a shell that then acts as a pressure vessel: steam generated by the moisture inside the fritter has nowhere to escape except through that shell, and it’s this trapped steam, working against the aerated batter’s existing air pockets, that keeps the centre light rather than compacting into a dense paste as it cooks through. This is also why akara batter benefits from being fried at a stable, undropping temperature — a shell that sets slowly, because the oil is too cool, doesn’t trap steam efficiently and the fritter ends up denser throughout, not just soggier at the edges.
Variations
Some regions and households fold in shredded cabbage or grated carrot for colour and a little vegetable sweetness against the beans. A popular street-food variation, akara balls stuffed with a small piece of smoked fish pressed into the centre before frying, turns each fritter into something closer to a savoury dumpling. For breakfast, akara is classically paired with pap or custard, but it holds up just as well alongside ewa agoyin for a fully bean-forward plate, or sandwiched into a slice of bread with a smear of pepper sauce for something closer to a Lagos commuter breakfast.
Equipment that actually helps
A heavy-based pot, cast iron or thick-gauge steel, holds heat far more evenly through repeated batches than a thin aluminium pan, which can swing ten or fifteen degrees between drops as the cold batter chills the surrounding oil. A wide pot also matters: it lets five or six fritters fry without crowding, so each one has open oil around it to brown evenly rather than steaming against its neighbours. A spider skimmer or a slotted spoon makes lifting finished fritters out far gentler than tongs, which tend to pierce the crisp shell and let oil seep into the fluffy interior. None of this is specialist kit — it’s the same equipment most kitchens already have for any deep-frying project — but the difference between a pot that holds its temperature and one that doesn’t shows up directly in the finished fritter’s texture.
Related Content