Afghan Biscuits: Cocoa, Cornflakes and a Walnut
New Zealand's tearoom classic, a crunchy chocolate biscuit with a glossy icing and a single walnut
Contents
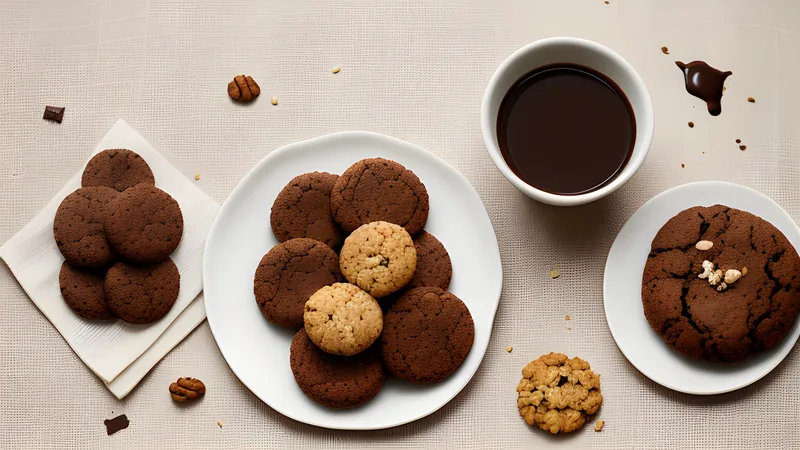
↓ Jump to recipeEvery country seems to have one biscuit that turns up at every school fair, every church hall afternoon tea, every grandmother’s biscuit tin, without anyone quite being able to explain when it started or why it stuck. In New Zealand, that biscuit is the Afghan — a chunky, crunchy, cocoa-dark biscuit made distinctive by a handful of crushed cornflakes folded through the dough, topped with a thick chocolate icing and, always, a single walnut half pressed into the centre.
Afghan Biscuits: Cocoa, Cornflakes and a Walnut
Ingredients
- 225g unsalted butter, softened
- 150g caster sugar
- 225g plain flour
- 30g cocoa powder
- 1/2 tsp bicarbonate of soda
- 75g cornflakes, lightly crushed
- 150g icing sugar
- 20g cocoa powder, for the icing
- 30g unsalted butter, melted, for the icing
- 2-3 tbsp hot water, for the icing
- 18 walnut halves
Method
- Preheat the oven to 180C (160C fan) and line two baking trays with baking paper.
- Cream the butter and sugar together until pale and fluffy, about 3-4 minutes.
- Sift in the flour, cocoa powder and bicarbonate of soda. Mix until just combined.
- Fold in the crushed cornflakes gently, keeping some texture rather than crushing them to crumbs.
- Roll the mixture into walnut-sized balls, about 25g each, and place on the trays 5cm apart, flattening each slightly with your palm.
- Bake for 15-18 minutes until firm at the edges and just set in the centre. Do not overbake — they should still look slightly soft when they come out.
- Cool on the tray for 5 minutes, then transfer to a wire rack to cool completely.
- Make the icing: sift the icing sugar and cocoa powder into a bowl. Stir in the melted butter, then add hot water a teaspoon at a time until you have a thick, glossy, spreadable icing.
- Spread a spoonful of icing over each cooled biscuit and press a walnut half into the centre while the icing is still wet.
- Leave the icing to set for at least 20 minutes before serving or stacking.
A name nobody can quite explain
Ask ten New Zealand home bakers where the Afghan biscuit gets its name and you’ll get ten different guesses, none of them confirmed by any documented source. Some claim the crackled, craggy surface of the baked biscuit resembles the mountainous terrain of Afghanistan. Others suggest the name has nothing to do with the country at all and is simply an old commercial branding choice from a biscuit-mix or recipe-card company that stuck in the national vocabulary the way brand names sometimes do. What’s certain is that the recipe itself has no genuine connection to Afghan cuisine — it’s a thoroughly domestic New Zealand invention, most likely developed sometime in the mid-twentieth century, built on ingredients that were cheap, shelf-stable and already sitting in most pantries: butter, sugar, flour, cocoa, and a box of breakfast cornflakes.
That last ingredient is the detail that makes Afghans instantly recognisable and slightly unusual among biscuit recipes worldwide. Folding crushed cornflakes into a chocolate biscuit dough, rather than using them as a coating or garnish, gives the finished biscuit a distinctive craggy, almost coral-like surface texture and a light crunch running all the way through rather than concentrated on the crust. It’s a wartime-and-postwar thrift instinct at work — cornflakes were affordable and added bulk and texture to a dough without needing extra flour or nuts, both of which cost more.
Getting the cornflake texture right
The temptation, rolling out this recipe for the first time, is to crush the cornflakes too finely, worried that large flakes will look untidy in the finished biscuit. Resist it. The characteristic craggy surface of a proper Afghan biscuit comes from cornflake pieces that are still visibly flake-shaped, not ground to dust — crush them in your hands or briefly with a rolling pin over a sealed bag, aiming for pieces roughly a centimetre across, some smaller, some slightly larger. Cornflakes ground to a fine powder disappear into the dough and produce a smoother, plainer biscuit that loses the entire point of including them.
Fold the crushed cornflakes in gently, right at the end of mixing, rather than beating them through with the same vigour you used for creaming the butter and sugar — overmixing at this stage breaks the flakes down further and works against the texture you’re trying to preserve.
Why they’re not overbaked
Afghan biscuits look, from the outside, like they should be baked hard and crisp all the way through, the way a gingernut or a digestive is. They’re not. The correct texture is a firm, slightly craggy exterior with a noticeably softer, almost fudgy centre — closer to a slightly underbaked chocolate cookie than a crisp shortbread. Pull them from the oven when the edges are set and firm but the centre still looks a touch soft and matte rather than fully dry; they’ll continue firming up as they cool on the tray, and a biscuit that looks perfectly done straight out of the oven will be noticeably overbaked and dry by the time it’s fully cooled.
This matters more here than in most biscuit recipes because cocoa powder dries a dough out faster than an equivalent quantity of flour would, and a dough already prone to drying combined with even a couple of minutes’ overbaking produces a distinctly chalky result rather than the rich, slightly dense centre a good Afghan should have.
The icing and the walnut
The chocolate icing on an Afghan biscuit is meant to be thick and glossy rather than thin and runny — closer to a spreadable ganache than a drizzled glaze — because it needs enough body to hold the walnut half in place as it sets without the nut sliding off. Add the hot water to the icing sugar and cocoa mixture gradually, a teaspoon at a time; it takes very little liquid to move from a stiff paste to a too-thin glaze, and the reverse adjustment (more icing sugar to thicken a too-thin batch) works but changes the ratio of butter to sugar in a way that can make the icing taste slightly chalky.
The walnut half isn’t a garnish you can skip without changing the biscuit’s identity — it’s as fixed a part of the Afghan biscuit as the cornflakes are, present in essentially every version baked in New Zealand for decades. Press it into the wet icing immediately after spreading, while there’s still enough tack to hold it without pressing so hard that icing squeezes out from underneath.
What can go wrong
Flat, spread-out biscuits with none of the characteristic craggy texture usually mean the butter was too warm going into the creaming stage, or the dough sat somewhere warm before baking. Butter creamed properly should be soft enough to beat easily but not melted or greasy-looking; if your kitchen runs warm, chill the shaped dough balls on the tray for ten minutes before they go into the oven, which helps them hold their shape rather than spreading into flat discs as the butter melts too fast in the oven’s first few minutes.
Dry, crumbly biscuits that fall apart when you pick them up are almost always overbaked. Cocoa powder has less natural moisture than an equivalent weight of flour, and Afghan dough is already on the drier side of a biscuit dough before it goes into the oven — a couple of minutes past the right point turns a fudgy centre into a dry, sandy one with no way back. Set a timer for the lower end of the range given and check early; the biscuits firm up substantially in the first five minutes on the tray after coming out, so a centre that looks slightly underdone in the oven is usually exactly right.
Icing that slides off or won’t set typically means it was spread too thin or too warm. A properly mixed icing should hold a stiff peak briefly when you lift the spoon out of the bowl; if yours runs flat immediately, sift in a little more icing sugar rather than persisting with a too-wet batch, since a walnut half pressed into runny icing will simply slide to one side as it sets.
A note on ingredients
Use ordinary cornflakes, not a sweetened or frosted breakfast cereal variant, which will throw off the balance of sugar in the finished biscuit and can also scorch faster in the oven due to their sugar coating. Dutch-processed cocoa powder, the kind labelled “alkalised,” gives a smoother, darker, less acidic chocolate flavour than natural cocoa powder and is the better choice here if you have a choice at the shop, though natural cocoa works perfectly well and is what most New Zealand households would have used historically.
Walnuts should be fresh rather than old and slightly rancid — walnuts have a high oil content and go off faster than most other nuts, developing a bitter, slightly paint-like flavour that’s easy to miss until it’s sitting on top of a finished batch of biscuits. Buy a small quantity close to when you’re baking rather than keeping a large bag in the cupboard for months.
Variations
Some bakers add a teaspoon of instant coffee dissolved in the hot water used for the icing, which deepens the chocolate flavour without making the icing taste distinctly of coffee — a common trick in chocolate baking generally, since coffee and cocoa share flavour compounds that reinforce each other. A small pinch of ground cinnamon or a few drops of vanilla in the biscuit dough itself is another common household variation, subtle enough not to change the biscuit’s identity but adding a little warmth underneath the cocoa.
Gluten-free versions substitute a measure-for-measure gluten-free flour blend for the plain flour, and work reasonably well since the cornflakes themselves are already gluten-free and provide much of the biscuit’s structure and texture regardless of the flour used. Dairy-free versions, using a plant-based butter substitute in both the dough and the icing, are increasingly common on New Zealand baking blogs and produce a very close result, since butter’s role here is more about fat content and flavour than any specific dairy chemistry.
Where Afghans sit in the tearoom pantheon
New Zealand’s baking tradition runs on a fairly small, fixed set of recipes that turn up at nearly every school gala, church fundraiser and family gathering, and the Afghan sits comfortably alongside the other regulars without ever needing modernising. It’s rarely served as a special-occasion bake — no one plates an Afghan biscuit for a dinner party — but it’s almost always present in the biscuit tin at the back of the pantry, made in batches large enough to last a week of school lunches and afternoon teas. Part of its staying power is exactly this lack of pretension: it uses ingredients every household already has, takes under forty minutes start to finish, and produces a biscuit sturdy enough to survive being packed into a lunchbox without crumbling.
Storage
Afghan biscuits keep unusually well for an iced biscuit, largely because the icing sets into a genuinely firm shell rather than staying tacky — once fully set, about 20-30 minutes at room temperature, they can be stacked with baking paper between layers without sticking. Store them in an airtight container at room temperature for up to five days; they don’t need refrigeration and refrigerating them tends to dull the chocolate flavour and firm the texture more than necessary.
They freeze well unfrosted for up to two months, wrapped in a double layer of cling film — ice them fresh after thawing for the best glossy finish, since icing that’s been frozen and thawed can occasionally weep slightly as it comes back to room temperature. If Afghan biscuits are your first taste of New Zealand’s tearoom baking, lamingtons and hokey pokey ice cream are the two other fixtures worth knowing — between the three of them, they cover most of what a New Zealand school fair table has looked like for the better part of a century.
Related Content